Pytest API Automation Testing QuickStart Project
An introductory QuickStart project document on API automation testing with Pytest.
Introduction
Introducing Pytest
Pytest is a popular Python testing framework for writing, organizing, and running various types of automated tests. It provides a rich set of features that make it easy to write and manage test cases, as well as generate detailed test reports. Here are some of the key features and benefits of Pytest:
-
Simple and easy to use: Pytest is designed to make writing test cases simple and easy to understand. You can write test assertions using Python's standard
assertstatement without having to learn a new assertion syntax. -
Automatic Discovery of Test Cases: Pytest can automatically discover and run test cases in your project without explicitly configuring the test suite. Test case files can be named
test_*.pyor*_test.py, or use a specific test function naming convention. -
Rich plugin ecosystem: Pytest can be extended with plugins. There are many third-party plug-ins available to meet different testing needs, such as Allure reporting, parameterization, coverage analysis, and so on.
-
Parameterized Testing: Pytest supports parameterized testing, which allows you to run the same test case multiple times, but with different parameters. This reduces code duplication and improves test coverage.
-
Exception and fault localization: Pytest provides detailed error and exception information that helps you locate and resolve problems more easily. It also provides detailed traceback information.
-
Parallel Test Execution: Pytest supports parallel execution of test cases, which increases the speed of test execution, especially in large projects.
-
Multiple Report Formats: Pytest supports multiple test report formats, including terminal output, JUnit XML, HTML reports and Allure reports. These reports can help you visualize test results.
-
Command Line Options: Pytest provides a rich set of command line options to customize the behavior of test runs, including filtering, retrying, coverage analysis, and more.
-
Integration: Pytest can be easily integrated with other testing frameworks and tools (e.g. Selenium, Django, Flask, etc.) as well as continuous integration systems (e.g. Jenkins, Travis CI, etc.).
-
Active Community: Pytest has an active community with extensive documentation and tutorials for learning and reference. You can also get support and solve problems in the community.
In short, Pytest is a powerful and flexible testing framework for projects of all sizes and types. Its ease of use, automation capabilities, and rich set of plugins make it one of the go-to tools in Python testing.
Official website: https://docs.pytest.org/en/latest/
Introduction to python virtual environments
A Python virtual environment is a mechanism for creating and managing multiple isolated development environments within a single Python installation. Virtual environments help resolve dependency conflicts between different projects by ensuring that each project can use its own independent Python packages and libraries without interfering with each other. Here are the steps on how to create and use a Python virtual environment:
- Install the Virtual Environment Tool.
Before you begin, make sure you have installed Python's virtual environment tools. In Python 3.3 and later, the
venvmodule is built-in and can be used to create virtual environments. If you're using an older version of Python, you can install thevirtualenvtool.
For Python 3.3+, the venv tool is built-in and does not require additional installation.
For Python 2.x, you can install the virtualenv tool with the following command:
bash
   pip install virtualenv
- Creating a virtual environment. Open a terminal, move to the directory where you wish to create the virtual environment, and run the following command to create the virtual environment:
Use venv (for Python 3.3+):
bash
   python -m venv myenv
Use virtualenv (for Python 2.x):
bash
   virtualenv myenv
In the above command, myenv is the name of the virtual environment and you can customize the name.
-
Activate virtual environment. To start using the virtual environment, you need to activate it. The activation command is slightly different for different operating systems:
-
on macOS and Linux:
bash source myenv/bin/activate -
On Windows (using Command Prompt):
bash myenv\Scripts\activate -
On Windows (using PowerShell):
bash
 .\myenv\Scripts\Activate.ps1
Once the virtual environment is activated, you will see the name of the virtual environment in front of the terminal prompt, indicating that you are in the virtual environment.
- Installing dependencies in a virtual environment.
In a virtual environment, you can use
pipto install any Python packages and libraries required by your project, and these dependencies will be associated with that virtual environment. Example:
bash
   pip install requests
-
Using a virtual environment. When working in a virtual environment, you can run Python scripts and use packages installed in the virtual environment. This ensures that your project runs in a separate environment and does not conflict with the global Python installation.
-
Exiting the virtual environment. To exit the virtual environment, simply run the following command in a terminal:
bash
   deactivate
This returns you to the global Python environment.
By using a virtual environment, you can maintain clean dependencies between projects and ensure project stability and isolation. This is a good practice in Python development.
Project dependencies
The following environments need to be installed in advance
- [x] python, demo 版本为 v3.11.6
Just install python 3.x or higher.
Project directory structure
The following is an example of the directory structure of a Pytest interface automation test project:
Subsequent demo projects will introduce allure reports, so there will be an additional allure-report directory.
Pytest-allure-demo/
    ├── tests/                  # test case files
    │   ├── test_login.py       # Example test case file
    │   ├── test_order.py       # Example test case file
    │   └── ...
    ├── data/                   # test data files (e.g. JSON, CSV, etc.)
    │   ├── dev_test_data.json      #  Test data file for development environment.
    │   ├── prod_test_data.json      #  Test data file for prod environment.
    │   ├── ...
    ├── config/
    │   ├── dev_config.json  # Development environment configuration file
    │   ├── prod_config.json  # Production environment configuration file
    │   ├── ...
    ├── conftest.py             # Pytest's global configuration file
    ├── pytest.ini              # Pytest configuration file
    ├── requirements.txt        # Project dependencies file
    └── allure-report/          # Allure reports
Build a Pytest API Automation Test Project from 0 to 1
1. Create a project directory
mkdir Pytest-API-Testing-Demo
2.Project initialization
// Go to the project folder
cd Pytest-API-Testing-Demo
// Create the project python project virtual environment
python -m venv .env
// Enable the project python project virtual environment
source .env/bin/activate
3.Install project dependencies
// Install the requests package
pip install requests
// Install the pytest package
pip install pytest
// Save the project dependencies to the requirements.txt file.
pip freeze > requirements.txt
4. Create new test files and test cases
// Create a new tests folder
mkdir tests
// Create a new test case file
cd tests
touch test_demo.py
5. Writing Test Cases
The test API can be referred to the demoAPI.md file in the project.
import requests


class TestPytestDemo:

    def test_get_demo(self):
        base_url = "https://jsonplaceholder.typicode.com"
        # SEND REQUEST
        response = requests.get(f"{base_url}/posts/1")
        # ASSERT
        assert response.status_code == 200
        assert response.json()['userId'] == 1
        assert response.json()['id'] == 1

    def test_post_demo(self):
        base_url = "https://jsonplaceholder.typicode.com"
        requests_data = {
            "title": "foo",
            "body": "bar",
            "userId": 1
        }
        # SEND REQUEST
        response = requests.post(f"{base_url}/posts", requests_data)
        # ASSERT
        assert response.status_code == 201
        print(response.json())
        assert response.json()['userId'] == '1'
        assert response.json()['id'] == 101
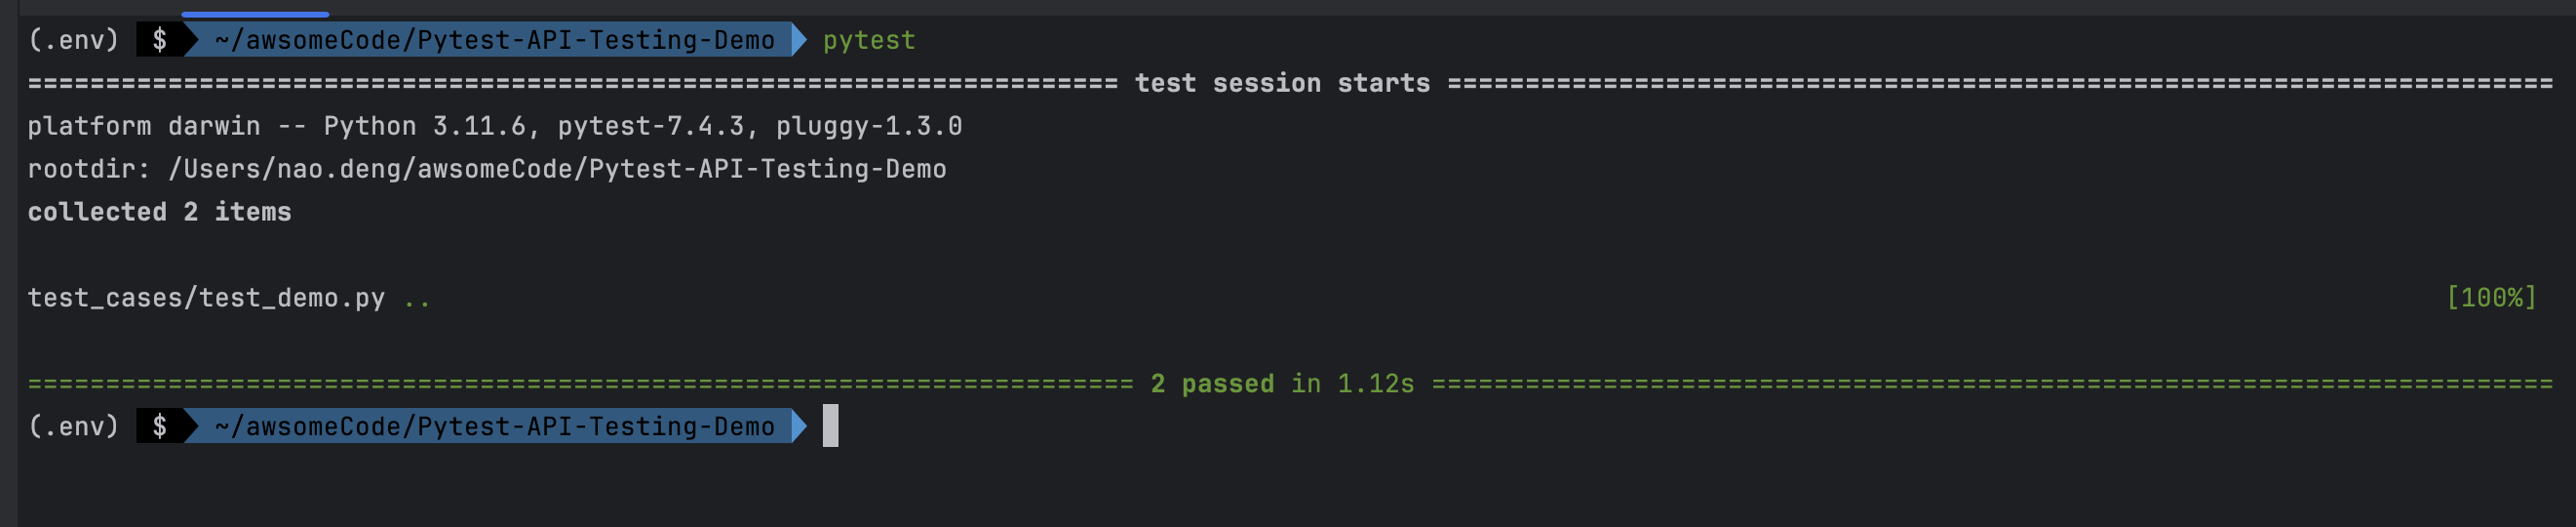
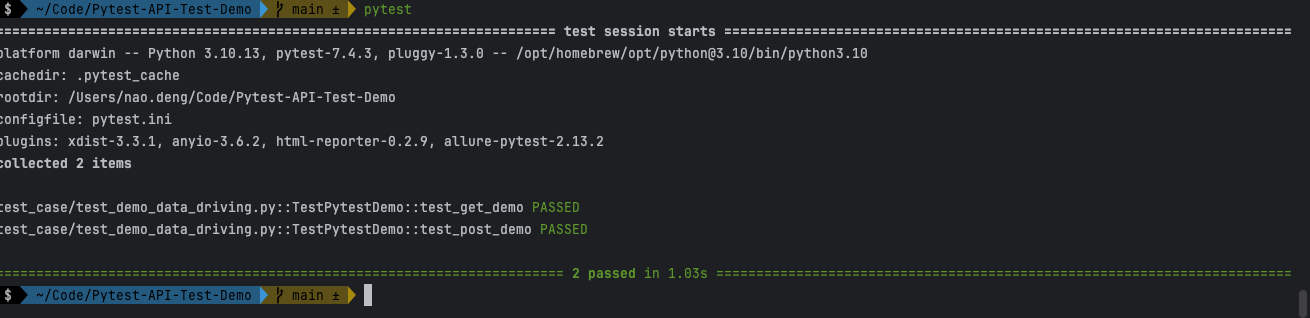
6.Run test cases
pytest
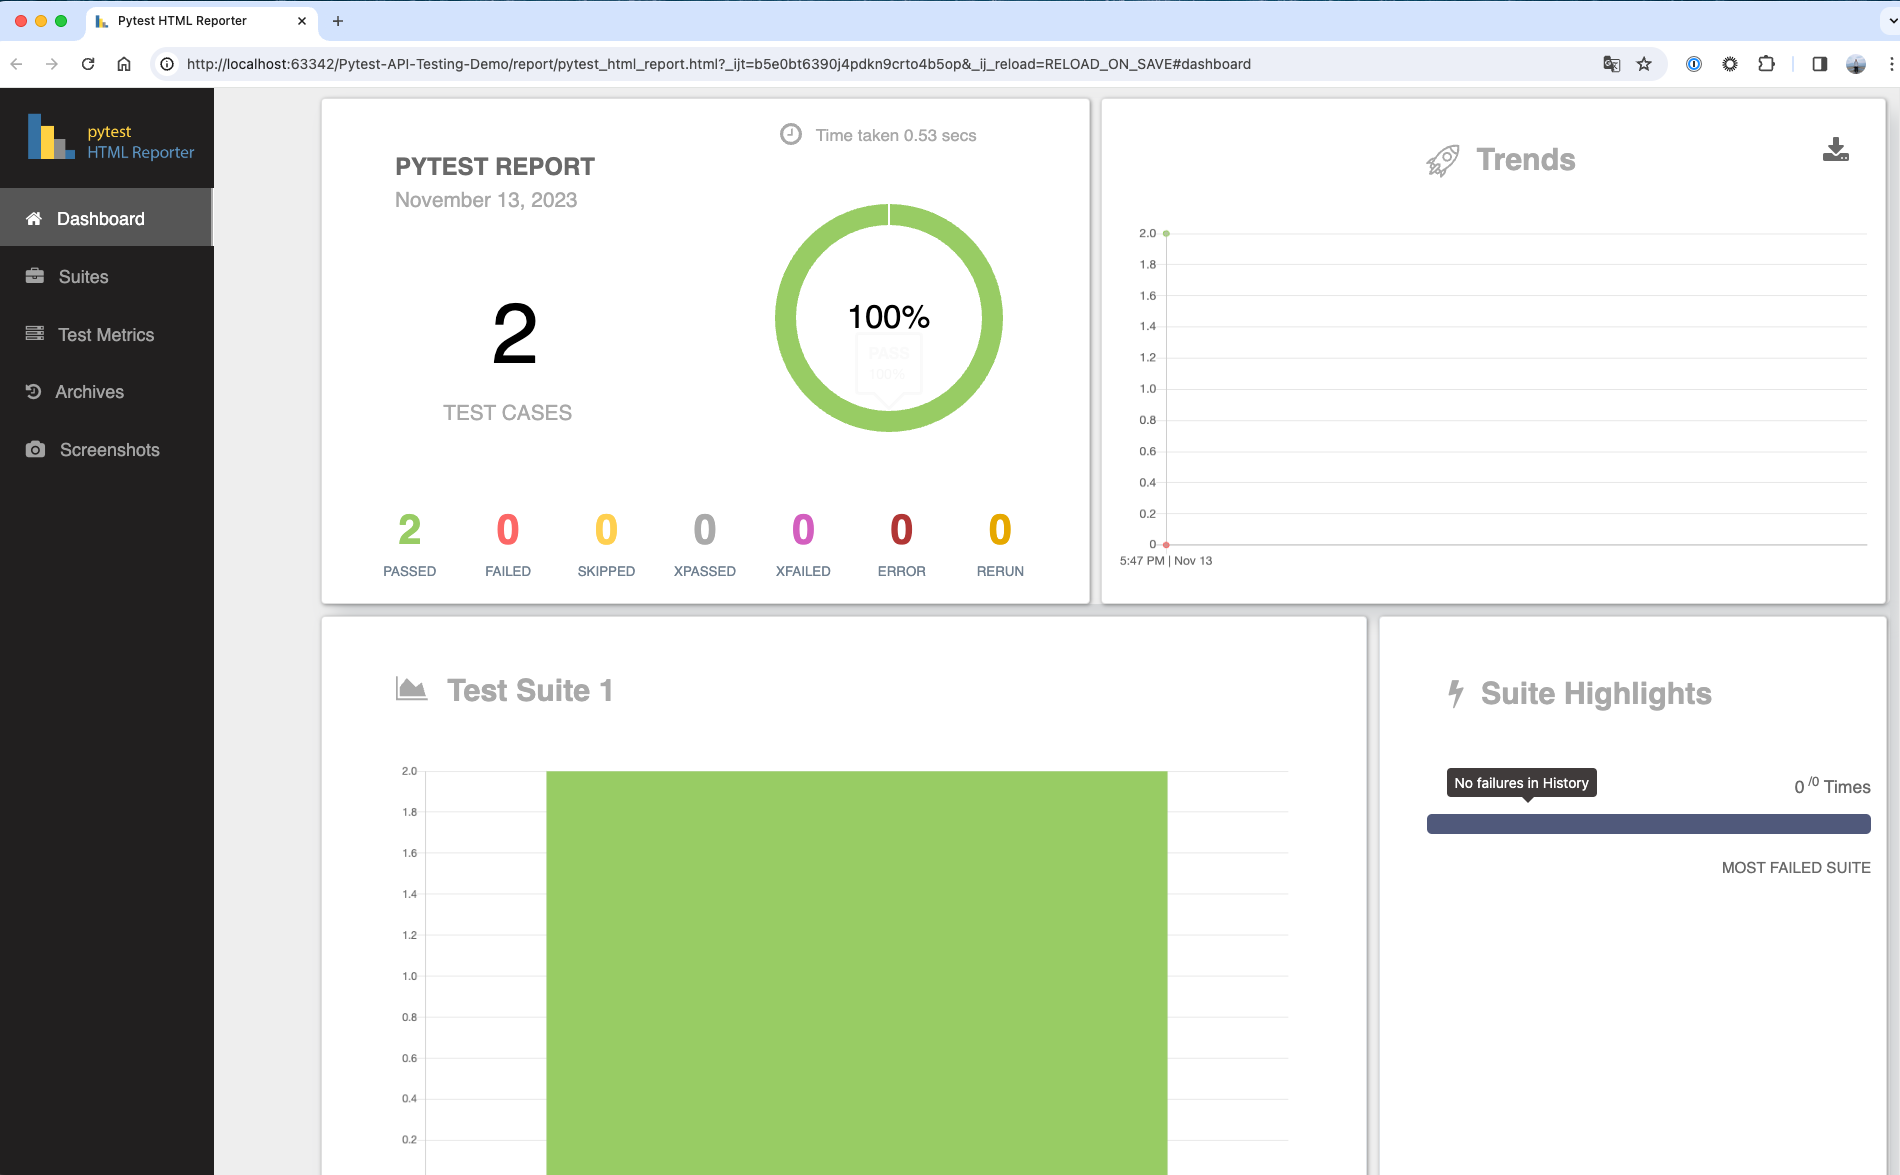
7.View test report
8.Integration pytest-html-reporter test report
Install pytest-html-reporter dependency
pip install pytest-html-reporter
Configuring Test Report Parameters
- Create a new pytest.ini file in the project root directory.
- Add the following
[pytest]
addopts = -vs -rf --html-report=./report --title='PYTEST REPORT' --self-contained-html
Run test cases
pytest
Viewing the test report
The report is located in the report directory in the project root directory, use your browser to open the pytest_html_report.html file to view it.
Advanced Usage
CI/CD integration
Integration github action
Use github action as an example, and other CI tools similarly
See the demo at https://github.com/Automation-Test-Starter/Pytest-API-Test-Demo
-
Create the .github/workflows directory: In your GitHub repository, create a directory called .github/workflows. This will be where the GitHub Actions workflow files will be stored.
-
Create a workflow file: Create a YAML-formatted workflow file, such as pytest.yml, in the .github/workflows directory.
-
Edit the pytest.yml file: Copy the following into the file
# This workflow will install Python dependencies, run tests and lint with a single version of Python
# For more information see: https://docs.github.com/en/actions/automating-builds-and-tests/building-and-testing-python

name: Pytest API Testing

on:
  push:
    branches: [ "main" ]
  pull_request:
    branches: [ "main" ]

permissions:
  contents: read

jobs:
  Pytes-API-Testing:

    runs-on: ubuntu-latest

    steps:
    - uses: actions/checkout@v3
    - name: Set up Python 3.10
      uses: actions/setup-python@v3
      with:
        python-version: "3.10"
    - name: Install dependencies
      run: |
        python -m pip install --upgrade pip
        pip install -r requirements.txt

    - name: Test with pytest
      run: |
        pytest

    - name: Archive Pytest test report
      uses: actions/upload-artifact@v3
      with:
        name: SuperTest-test-report
        path: report

    - name: Upload Pytest report to GitHub
      uses: actions/upload-artifact@v3
      with:
        name: Pytest-test-report
        path: report
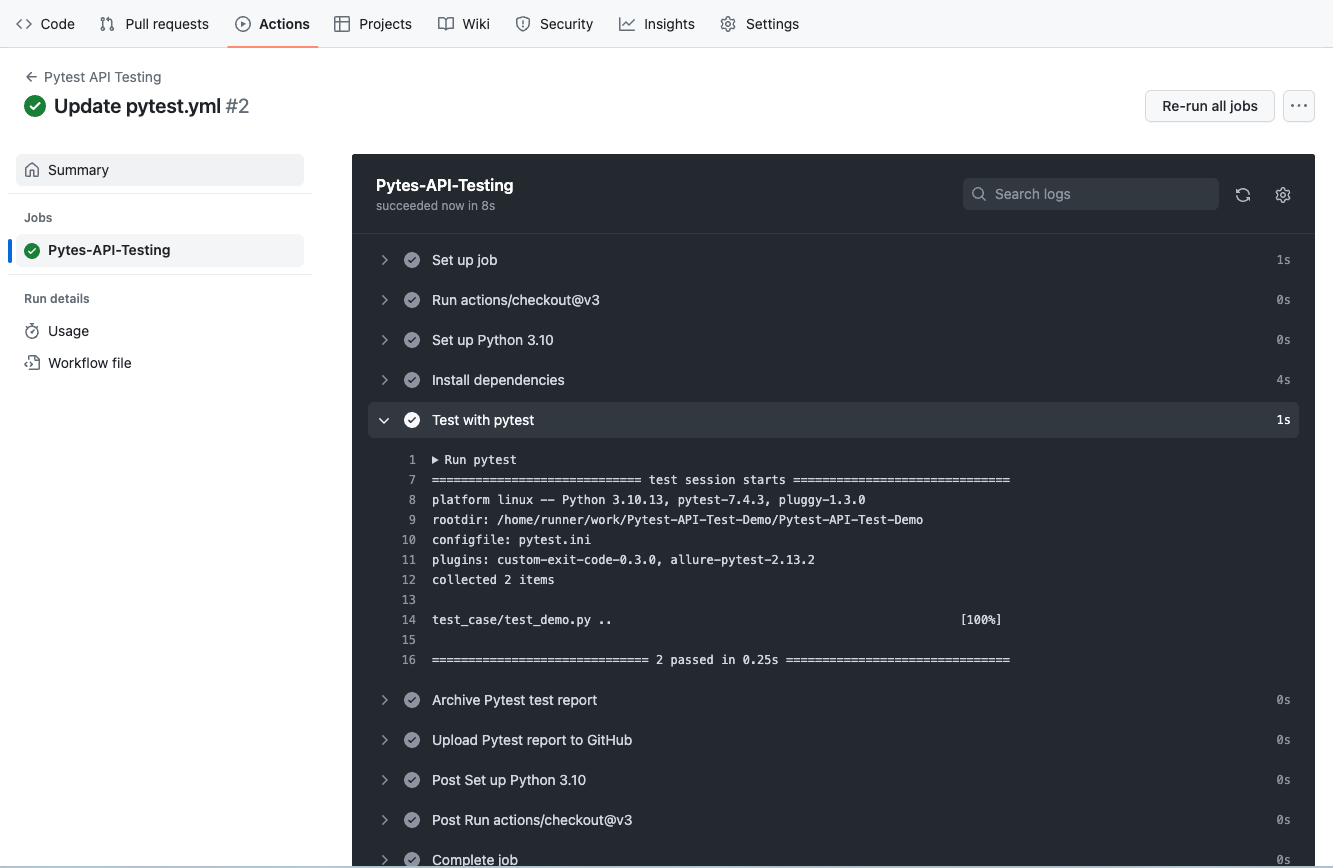
- Commit the code: Add the pytest.yml file to your repository and commit.
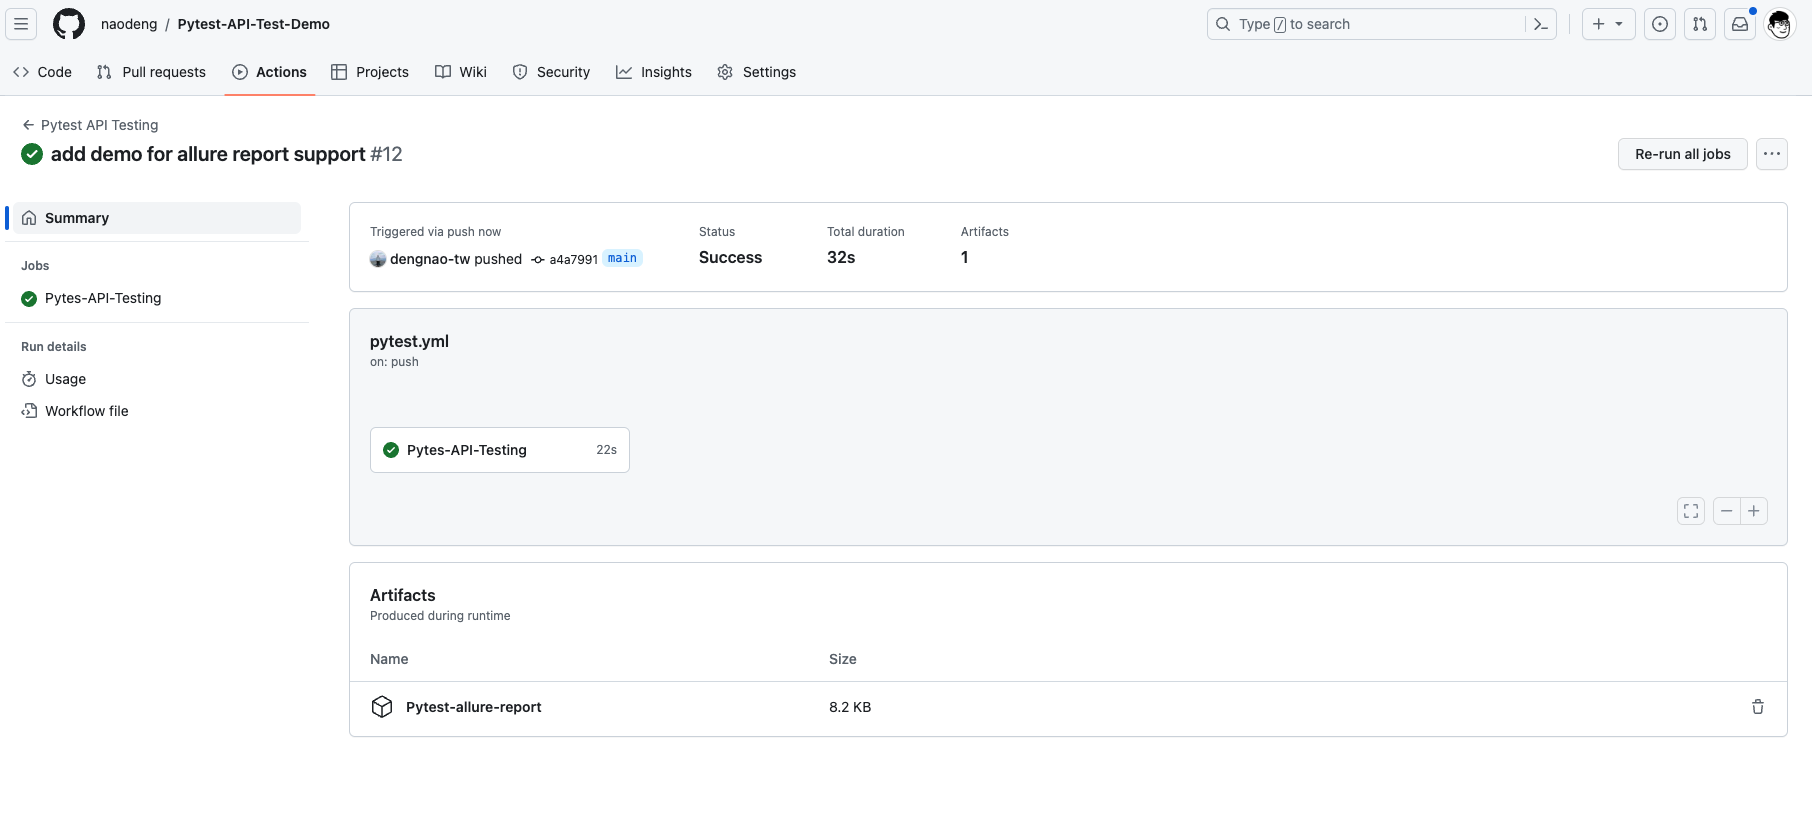
- View test reports: In GitHub, navigate to your repository. Click the Actions tab at the top and then click the Pytest API Testing workflow on the left. You should see the workflow running, wait for the execution to complete and you can view the results.
Common Assertions
Using Pytest During the writing of interface automation test cases, we need to use various assertions to verify the expected results of the tests.
Pytest provides more assertions and a flexible library of assertions to fulfill various testing needs.
The following are some of the commonly used Pytest interface automation test assertions:
- Equality assertion: checks whether two values are equal.
python
   assert actual_value == expected_value
- Unequality Assertion: checks if two values are not equal.
python
   assert actual_value != expected_value
- Containment assertion: checks whether a value is contained in another value, usually used to check whether a string contains a substring.
python
   assert substring in full_string
- Membership Assertion: checks whether a value is in a collection, list, or other iterable object.
python
   assert item in iterable
- Truth Assertion: checks whether an expression or variable is true.
python
   assert expression
OR
python
   assert variable
- False Value Assertion: checks whether an expression or variable is false.
python
   assert not expression
OR
python
   assert not variable
- Greater Than, Less Than, Greater Than Equal To, Less Than Equal To Assertion: checks whether a value is greater than, less than, greater than equal to, or less than equal to another value.
python
   assert value > other_value
   assert value < other_value
   assert value >= other_value
   assert value <= other_value
- Type Assertion: checks that the type of a value is as expected.
python
   assert isinstance(value, expected_type)
For example, to check if a value is a string:
python
   assert isinstance(my_string, str)
- Exception Assertion: checks to see if a specific type of exception has been raised in a block of code.
python
   with pytest.raises(ExpectedException):
       # Block of code that is expected to raise an ExpectedException.
- Approximate Equality Assertion: checks whether two floating-point numbers are equal within some margin of error.
python
   assert math.isclose(actual_value, expected_value, rel_tol=1e-9)
- List Equality Assertion: checks if two lists are equal.
python
   assert actual_list == expected_list
- Dictionary Equality Assertion: checks if two dictionaries are equal.
python
   assert actual_dict == expected_dict
- Regular Expression Match Assertion: checks if a string matches the given regular expression.
```python import re
assert re.match(pattern, string) ```
- Null Assertion: checks whether a value is
None。
python
   assert value is None
- Non-null value assertion: checks if a value is not
None。
python
   assert value is not None
- Boolean Assertion: checks whether a value of
TrueorFalse。
python
   assert boolean_expression
- Empty Container Assertion: checks if a list, collection or dictionary is empty.
python
   assert not container  # Check if the container is empty
- Contains Subset Assertion: checks whether a set contains another set as a subset.
python
   assert subset <= full_set
-
String Beginning or End Assertion: checks whether a string begins or ends with the specified prefix or suffix.
python assert string.startswith(prefix) assert string.endswith(suffix) -
Quantity Assertion: checks the number of elements in a list, collection, or other iterable object.
python assert len(iterable) == expected_length -
Range Assertion: checks if a value is within the specified range.
python assert lower_bound <= value <= upper_bound -
Document Existence Assertion: checking whether a document exists or not。
```python import os
assert os.path.exists(file_path) ```
These are some common Pytest assertions, but depending on your specific testing needs, you may want to use other assertions or combine multiple assertions to more fully validate your test results. Detailed documentation on assertions can be found on the official Pytest website at:Pytest - Built-in fixtures, marks, and nodes
Data-driven
In the process of API automation testing. The use of data-driven is a regular testing methodology where the input data and expected output data of the test cases are stored in data files, and the testing framework executes multiple tests based on these data files to validate various aspects of the API.
The test data can be easily modified without modifying the test case code.
Data-driven testing helps you cover multiple scenarios efficiently and ensures that the API works properly with a variety of input data.
Refer to the demo:https://github.com/Automation-Test-Starter/Pytest-API-Test-Demo
Create the test configuration file
Configuration file will be stored in json format for example, other formats such as YAML, CSV, etc. are similar, can be referred to.
// create a new config folder
mkdir config
// enter the config folder
cd config
// create a new configuration file
touch config.json
Writing Test Configuration Files
The configuration file stores the configuration information of the test environment, such as the URL of the test environment, database connection information, and so on.
The contents of the test configuration file in the demo are as follows:
- Configure host information
- Configure the getAPI interface information.
- Configure the postAPI interface information.
{
  "host": "https://jsonplaceholder.typicode.com",
  "getAPI": "/posts/1",
  "postAPI":"/posts"
}
Create the test data file
The request data file and the response data file store the request data and the expected response data of the test case, respectively.
// create a new data folder
mkdir data
// enter the data folder
cd data
// create a new request data file
touch request_data.json
// create a new response data file
touch response_data.json
Writing test data files
- Writing the request data file
The request data file is configured with the request data for the getAPI API and the request data for the postAPI API.
{
  "getAPI": "",
  "postAPI":{
    "title": "foo",
    "body": "bar",
    "userId": 1
  }
}
- Writing the response data file
The request data file is configured with the response data for the getAPI API and the response data for the postAPI API.
{
    "getAPI": {
      "userId": 1,
      "id": 1,
      "title": "sunt aut facere repellat provident occaecati excepturi optio reprehenderit",
      "body": "quia et suscipit\nsuscipit recusandae consequuntur expedita et cum\nreprehenderit molestiae ut ut quas totam\nnostrum rerum est autem sunt rem eveniet architecto"
    },
    "postAPI":{
      "title": "foo",
      "body": "bar",
      "userId": 1,
      "id": 101
    }
}
Updating test cases to support data driving
To differentiate, here is a new test case file named test_demo_data_driving.py
import requests
import json

# get the test configuration information from the configuration file
with open("config/config.json", "r") as json_file:
    config = json.load(json_file)

# get the request data from the test data file
with open('data/request_data.json', 'r') as json_file:
    request_data = json.load(json_file)

# get the response data from the test data file
with open('data/response_data.json', 'r') as json_file:
    response_data = json.load(json_file)


class TestPytestDemo:

    def test_get_demo(self):
        host = config.get("host")
        get_api = config.get("getAPI")
        get_api_response_data = response_data.get("getAPI")
        # send request
        response = requests.get(host+get_api)
        # assert
        assert response.status_code == 200
        assert response.json() == get_api_response_data

    def test_post_demo(self):
        host = config.get("host")
        post_api = config.get("postAPI")
        post_api_request_data = request_data.get("postAPI")
        post_api_response_data = response_data.get("postAPI")
        # send request
        response = requests.post(host + post_api, post_api_request_data)
        # assert
        assert response.status_code == 201
        assert response.json() == post_api_response_data
Run the test case to confirm the data driver is working
If you run the data driver support test case with demo project: test_demo_data_driving.py, it is recommended to block other test cases first, otherwise it may report errors.
pytest tests/test_demo_data_driving.py
Multi-environment support
In the actual API automation testing process, we need to run test cases in different environments to ensure that the API works properly in each environment.
By using Pytest's fixture feature, we can easily support multiple environments.
Refer to the demo:https://github.com/Automation-Test-Starter/Pytest-API-Test-Demo
New test configuration files for different environments
Configuration file will be stored in json format for example, other formats such as YAML, CSV, etc. are similar, can refer to the
// Create a new test configuration folder
mkdir config
// Go to the test configuration folder
cd config
// Create a new test configuration file for the development environment
touch dev_config.json
// Create a new test configuration file for the production environment
touch prod_config.json
Writing different environment test profiles
- Writing Development Environment Test Profiles
Configure the development environment test profiles according to the actual situation.
{
  "host": "https://jsonplaceholder.typicode.com",
  "getAPI": "/posts/1",
  "postAPI":"/posts"
}
- Configuring Production Environment Test Profiles
Configure production environment test profiles according to the actual situation
{
  "host": "https://jsonplaceholder.typicode.com",
  "getAPI": "/posts/1",
  "postAPI":"/posts"
}
New Different Environment Test Data File
The different environments request data file and the response data file store the different environments request data and the different environments expected response data for the test cases, respectively.
// Create a new test data folder
mkdir data
// Go to the test data folder
cd data
// Create a new dev request data file
touch dev_request_data.json
// Create a new dev response data file
touch dev_response_data.json
// Create a new request data file for the production environment
touch prod_request_data.json
// Create a new production response data file
touch prod_response_data.json
Writing test data files for different environments
- Write the dev environment request data file
The dev environment request data file is configured with the request data for the getAPI API and the request data for the postAPI API.
{
  "getAPI": "",
  "postAPI":{
    "title": "foo",
    "body": "bar",
    "userId": 1
  }
}
- Writing the dev Environment Response Data File
The dev environment response data file is configured with the response data for the getAPI API and the response data for the postAPI API.
{
    "getAPI": {
      "userId": 1,
      "id": 1,
      "title": "sunt aut facere repellat provident occaecati excepturi optio reprehenderit",
      "body": "quia et suscipit\nsuscipit recusandae consequuntur expedita et cum\nreprehenderit molestiae ut ut quas totam\nnostrum rerum est autem sunt rem eveniet architecto"
    },
    "postAPI":{
      "title": "foo",
      "body": "bar",
      "userId": 1,
      "id": 101
    }
}
- Write the prod environment request data file
The prod environment request data file is configured with the request data for the getAPI API and the request data for the postAPI API.
{
  "getAPI": "",
  "postAPI":{
    "title": "foo",
    "body": "bar",
    "userId": 1
  }
}
- Writing the prod Environment Response Data File
The prod environment response data file is configured with the response data for the getAPI API and the response data for the postAPI API.
{
    "getAPI": {
      "userId": 1,
      "id": 1,
      "title": "sunt aut facere repellat provident occaecati excepturi optio reprehenderit",
      "body": "quia et suscipit\nsuscipit recusandae consequuntur expedita et cum\nreprehenderit molestiae ut ut quas totam\nnostrum rerum est autem sunt rem eveniet architecto"
    },
    "postAPI":{
      "title": "foo",
      "body": "bar",
      "userId": 1,
      "id": 101
    }
}
Configure fixture to support multiple environments
The > fixture will be stored in the conftest.py file as an example, other formats such as YAML, CSV, etc. are similar.
- Create a new conftest.py file in the project root directory.
mkdrir conftest.py
- Writing the conftest.py file
import pytest
import json
import json
import os


@pytest.fixture(scope="session")
def env_config(request):
    # get config file from different env
    env = os.getenv('ENV', 'dev')
    with open(f'config/{env}_config.json', 'r') as config_file:
        config = json.load(config_file)
    return config


@pytest.fixture(scope="session")
def env_request_data(request):
    # get request data file from different env
    env = os.getenv('ENV', 'dev')
    with open(f'data/{env}_request_data.json', 'r') as request_data_file:
        request_data = json.load(request_data_file)
    return request_data


@pytest.fixture (scope="session")
def env_response_data(request):
    # get response data file from different env
    env = os.getenv('ENV', 'dev')
    with open(f'data/{env}_response_data.json', 'r') as response_data_file:
        response_data = json.load(response_data_file)
    return response_data
Update test case to support multi environment
To make a distinction, here is a new test case file named test_demo_multi_environment.py
import requests
import json


class TestPytestMultiEnvDemo:

    def test_get_demo_multi_env(self, env_config, env_request_data, env_response_data):
        host = env_config["host"]
        get_api = env_config["getAPI"]
        get_api_response_data = env_response_data["getAPI"]
        # send request
        response = requests.get(host+get_api)
        # assert
        assert response.status_code == 200
        assert response.json() == get_api_response_data

    def test_post_demo_multi_env(self, env_config, env_request_data, env_response_data):
        host = env_config["host"]
        post_api = env_config["postAPI"]
        post_api_request_data = env_request_data["postAPI"]
        post_api_response_data = env_response_data["postAPI"]
        # send request
        response = requests.post(host + post_api, post_api_request_data)
        # assert
        assert response.status_code == 201
        assert response.json() == post_api_response_data
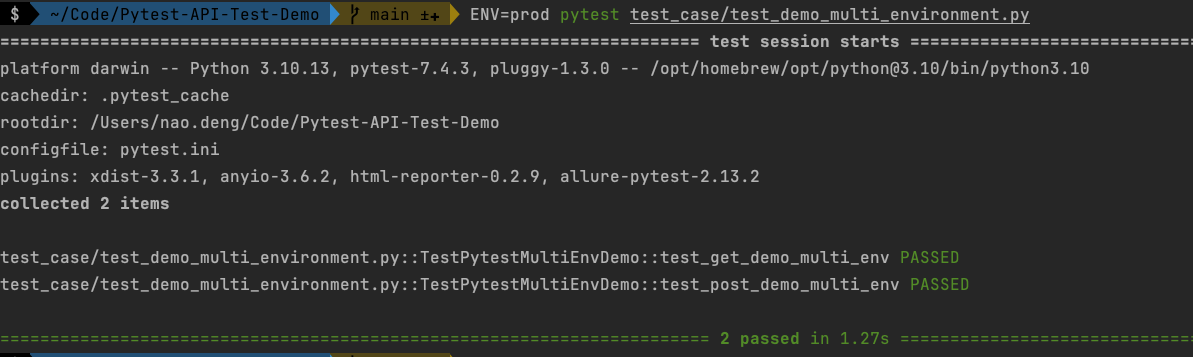
Run this test case to confirm that multi-environment support is in effect
- Run the dev environment test case
ENV=dev pytest test_case/test_demo_multi_environment.py

- Run the prod environment test case
ENV=prod pytest test_case/test_demo_multi_environment.py
Integration with allure reporting
allure is a lightweight, flexible, and easily extensible test reporting tool that provides a rich set of report types and features to help you better visualize your test results.
allure reports can be integrated with Pytest to generate detailed test reports.
Refer to the demo:https://github.com/Automation-Test-Starter/Pytest-API-Test-Demo
Install allure-pytest library
pip install allure-pytest
To avoid conflicts between the previously installed pytest-html-reporter and the allure-pytest package, it is recommended to uninstall the pytest-html-reporter package first.
pip uninstall pytest-html-reporter
Configuration allure-pytest library
Update the pytest.ini file to specify where allure reports are stored
[pytest]
# allure
addopts = --alluredir ./allure-results
Adjusting test cases to support allure reporting
To differentiate, create a new test case file here, named test_demo_allure.py
import allure
import requests


@allure.feature("Test example API")
class TestPytestAllureDemo:

    @allure.story("Test example get endpoint")
    @allure.title("Verify the get API")
    @allure.description("verify the get API response status code and data")
    @allure.severity("blocker")
    def test_get_example_endpoint_allure(self, env_config, env_request_data, env_response_data):
        host = env_config["host"]
        get_api = env_config["getAPI"]
        get_api_request_data = env_request_data["getAPI"]
        get_api_response_data = env_response_data["getAPI"]
        # send get request
        response = requests.get(host + get_api)
        # assert
        print("response status code is" + str(response.status_code))
        assert response.status_code == 200
        print("response data is" + str(response.json()))
        assert response.json() == get_api_response_data

    @allure.story("Test example POST API")
    @allure.title("Verify the POST API")
    @allure.description("verify the POST API response status code and data")
    @allure.severity("Critical")
    def test_post_example_endpoint_allure(self, env_config, env_request_data, env_response_data):
        host = env_config["host"]
        post_api = env_config["postAPI"]
        post_api_request_data = env_request_data["postAPI"]
        post_api_response_data = env_response_data["postAPI"]
        # send request
        response = requests.post(host + post_api, json=post_api_request_data)
        # assert
        print("response status code is" + str(response.status_code))
        assert response.status_code == 201
        print("response data is" + str(response.json()))
        assert response.json() == post_api_response_data
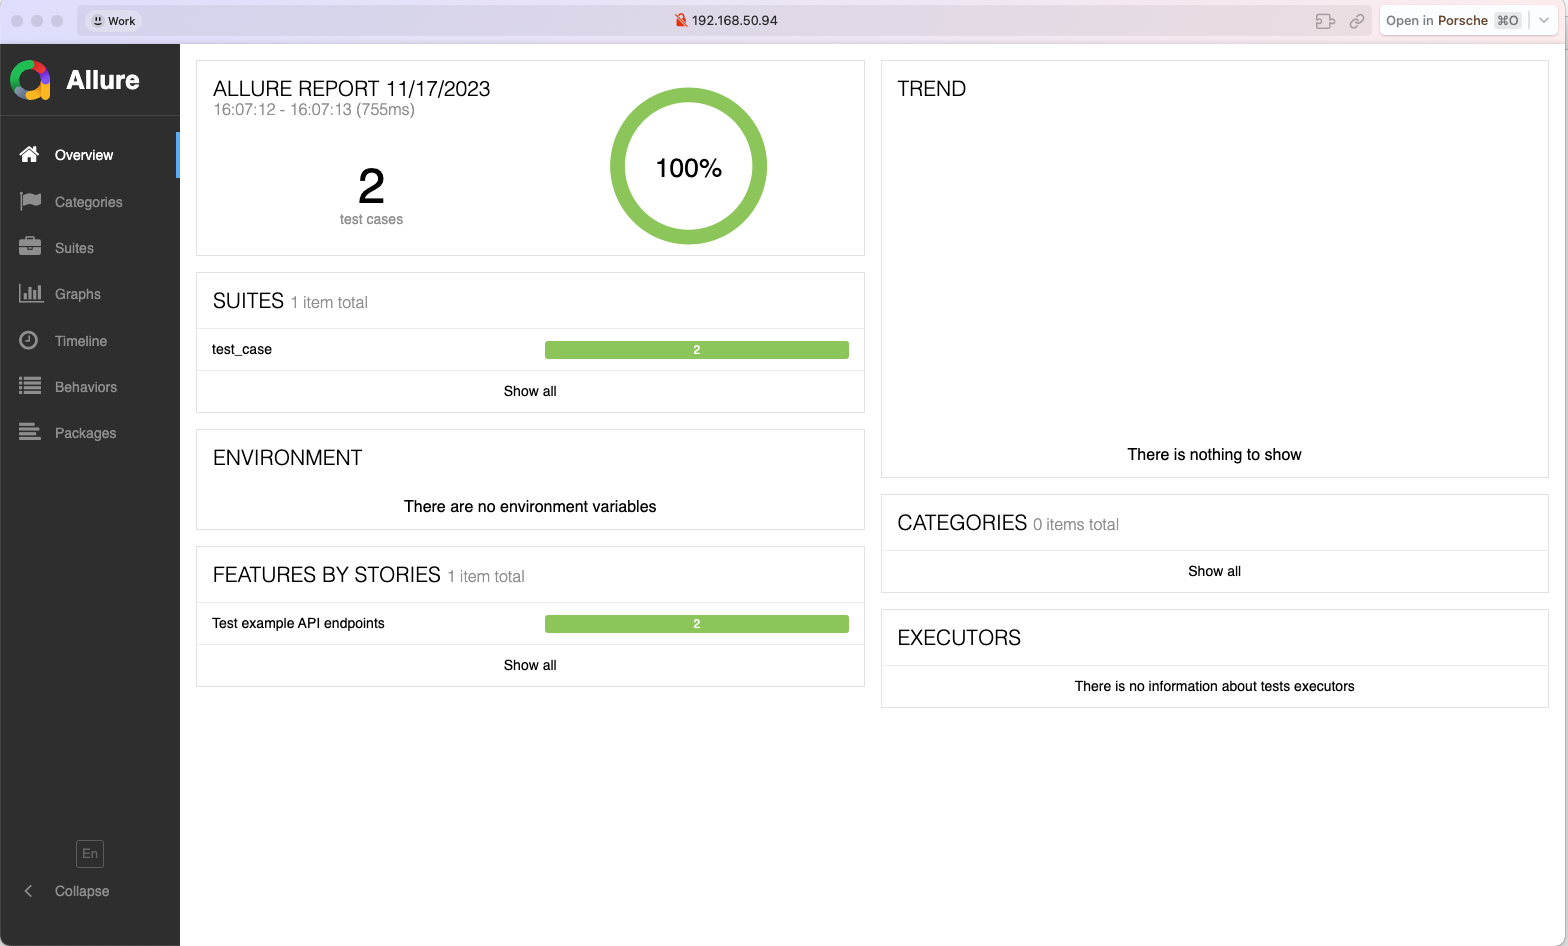
Run test cases to generate allure reports
ENV=dev pytest test_case/test_demo_allure.py
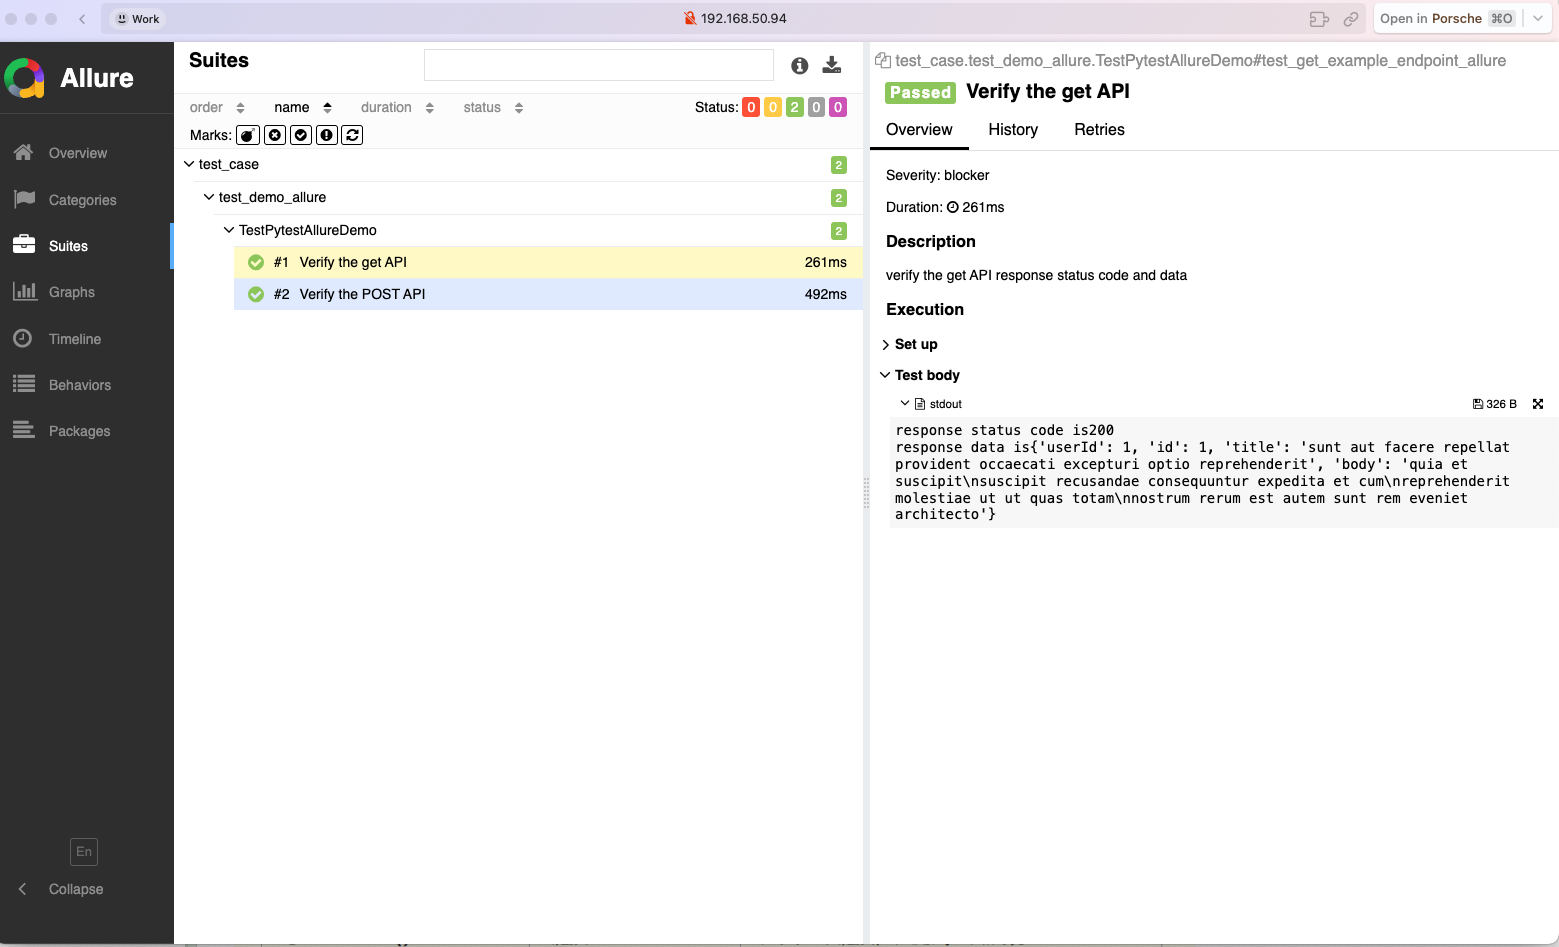
View allure report
Run the following command to view the allure report in the browser
allure serve allure-results
Adapting CI/CD processes to support allure reporting
Github action is an example, other CI tools are similar.
Update the contents of the .github/workflows/pytest.yml file to upload allure reports to GitHub.
name: Pytest API Testing

on:
  push:
    branches: [ "main" ]
  pull_request:
    branches: [ "main" ]

permissions:
  contents: read

jobs:
  Pytes-API-Testing:

    runs-on: ubuntu-latest

    steps:
    - uses: actions/checkout@v3
    - name: Set up Python 3.10
      uses: actions/setup-python@v3
      with:
        python-version: "3.10"
    - name: Install dependencies
      run: |
        python -m pip install --upgrade pip
        pip install -r requirements.txt

    - name: Test with pytest
      run: |
        ENV=dev pytest

    - name: Archive Pytest allure test report
      uses: actions/upload-artifact@v3
      with:
        name: Pytest-allure-report
        path: allure-results

    - name: Upload Pytest allure report to GitHub
      uses: actions/upload-artifact@v3
      with:
        name: Pytest-allure-report
        path: allure-results
View github action allure report
In GitHub, navigate to your repository. Click the Actions tab at the top, and then click the Pytest API Testing workflow on the left. You should see the workflow running, wait for the execution to complete, and then you can view the results.
concurrent testing and distributed testing
In the daily process of API automation testing, concurrent execution of test cases is required to improve testing efficiency.
Sometimes it is also necessary to introduce distributed testing in order to run test cases on multiple machines at the same time, which can also better improve testing efficiency.
pytest-xdist is a plugin for Pytest that provides some corresponding functionality, mainly for supporting concurrent and distributed testing.
pytest-xdist Feature Introduction
- Concurrently run tests:
- Use the
-noption:pytest -n NUMallows running tests concurrently, whereNUMis the number of concurrent workers. This can speed up test execution, especially on computers with multiple CPU cores.
bash
   pytest -n 3  # Start 3 concurrent workers to execute the test
- Distributed testing:
- Use
pytest --dist=loadscope: allows tests to be executed on multiple nodes and test runs can be completed faster with distributed testing.
bash
   pytest --dist=loadscope
- Use
pytest --dist=each: run a set of tests per node, for distributed testing.
bash
   pytest --dist=each
- Parameterized tests and Concurrency:
- Use of
pytest.mark.run: In conjunction with thepytest.mark.runtag, tests with different tags can optionally be run on different processes or nodes.
python
   @pytest.mark.run(processes=2)
   def test_example():
       pass
- Distributed environment setup:
- Use
pytest_configure_node: you can configure the tests before running them on the node.
python
   def pytest_configure_node(node):
       node.slaveinput['my_option'] = 'some value'
- Use
pytest_configure_node: you can configure the tests before running them on the node.
python
   def pytest_configure_node(node):
       node.slaveinput['my_option'] = 'some value'
- Distributed test environment destruction:
- Use
pytest_configure_node: you can clean up after running tests on a node.
```python def pytest_configure_node(node): # Configure the node yield
   # Perform cleanup after running tests on nodes
   print("Cleaning up after test run on node %s" % node.gateway.id)
```
These are some of the features provided by pytest-xdist that can help you perform concurrent and distributed tests more efficiently to speed up test execution and increase efficiency. Be sure to consult the pytest-xdist documentation for more detailed information and usage examples before using it.
Installing pytest-xdist dependency
pip install pytest-xdist
Example of running a test case concurrently
Execute test cases concurrently with 3 workers
Run the following commands to see how long the test cases take to execute
- Concurrent Execution
pytest -n 3

- Default Parallel Execution
pytest
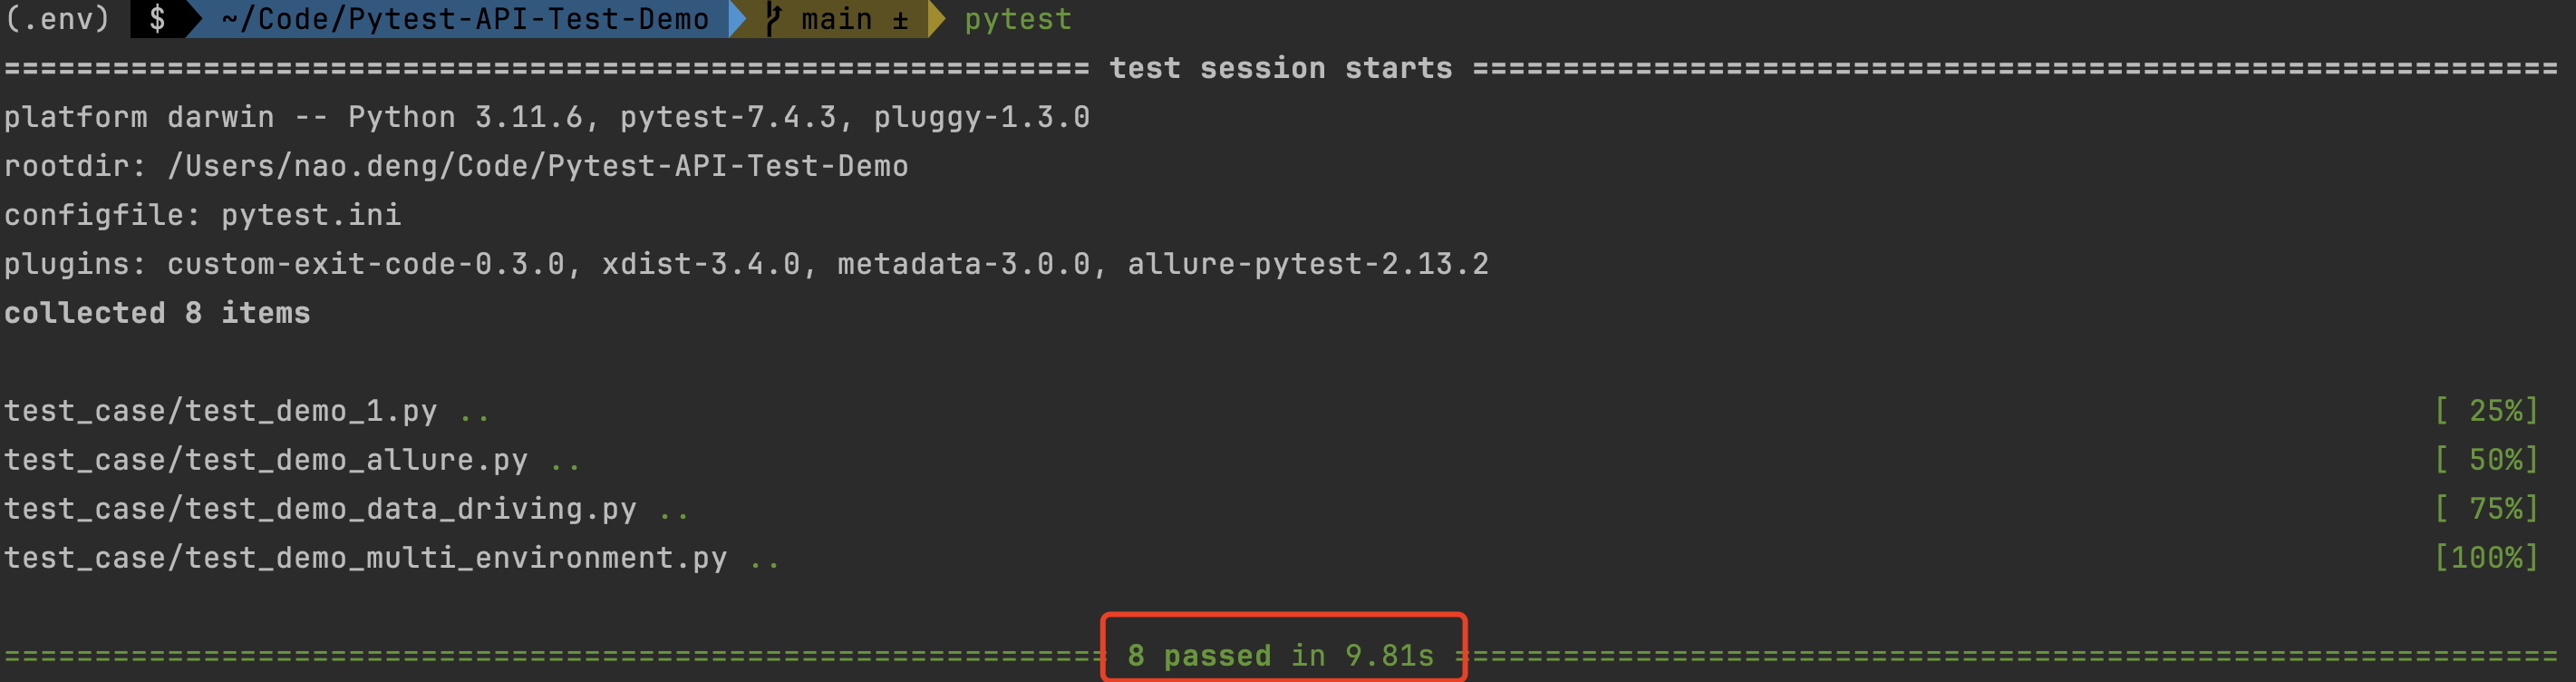
Parallel execution took 9.81s while Concurrent execution took 1.63s, you can see that concurrent execution of test cases can greatly improve the Parallel of testing.
concurrently executes the test cases with 3 workers, and each worker prints the progress of the test cases
pytest -n 3 -v
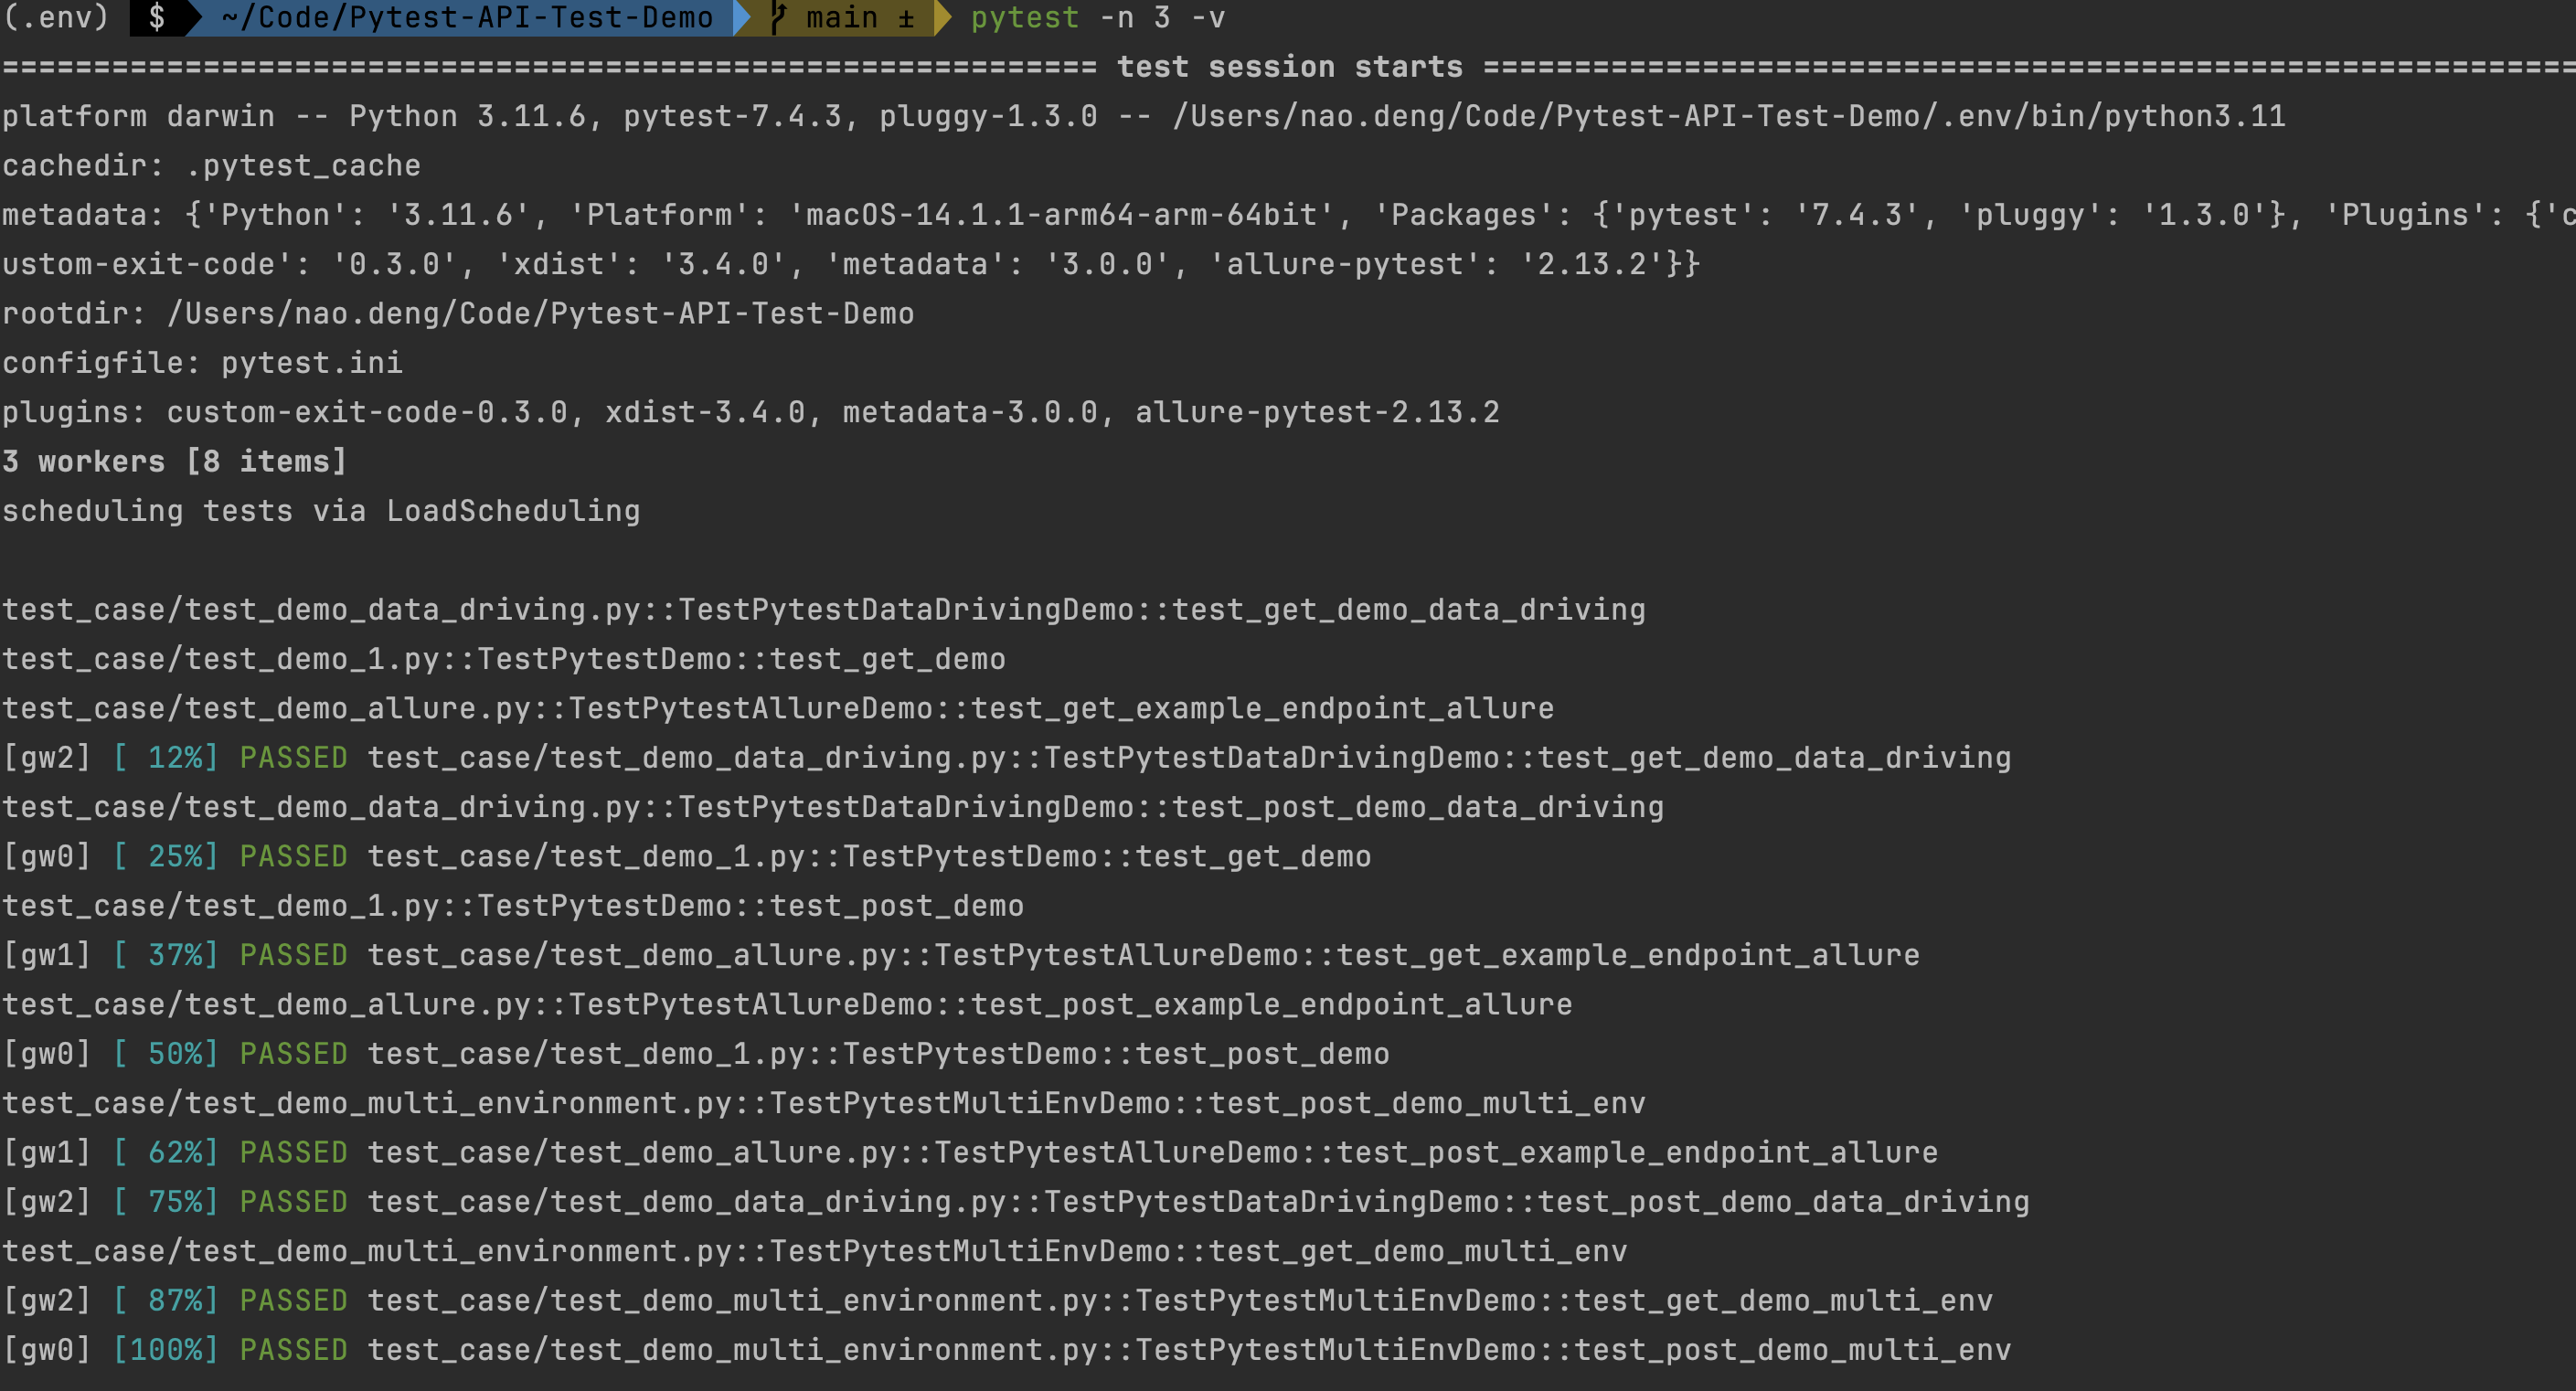
The progress of the test is printed in the test results, which provides a better understanding of the execution of the test cases.
Distributed testing example
Distributed test where each node runs a set of tests
pytest --dist=each
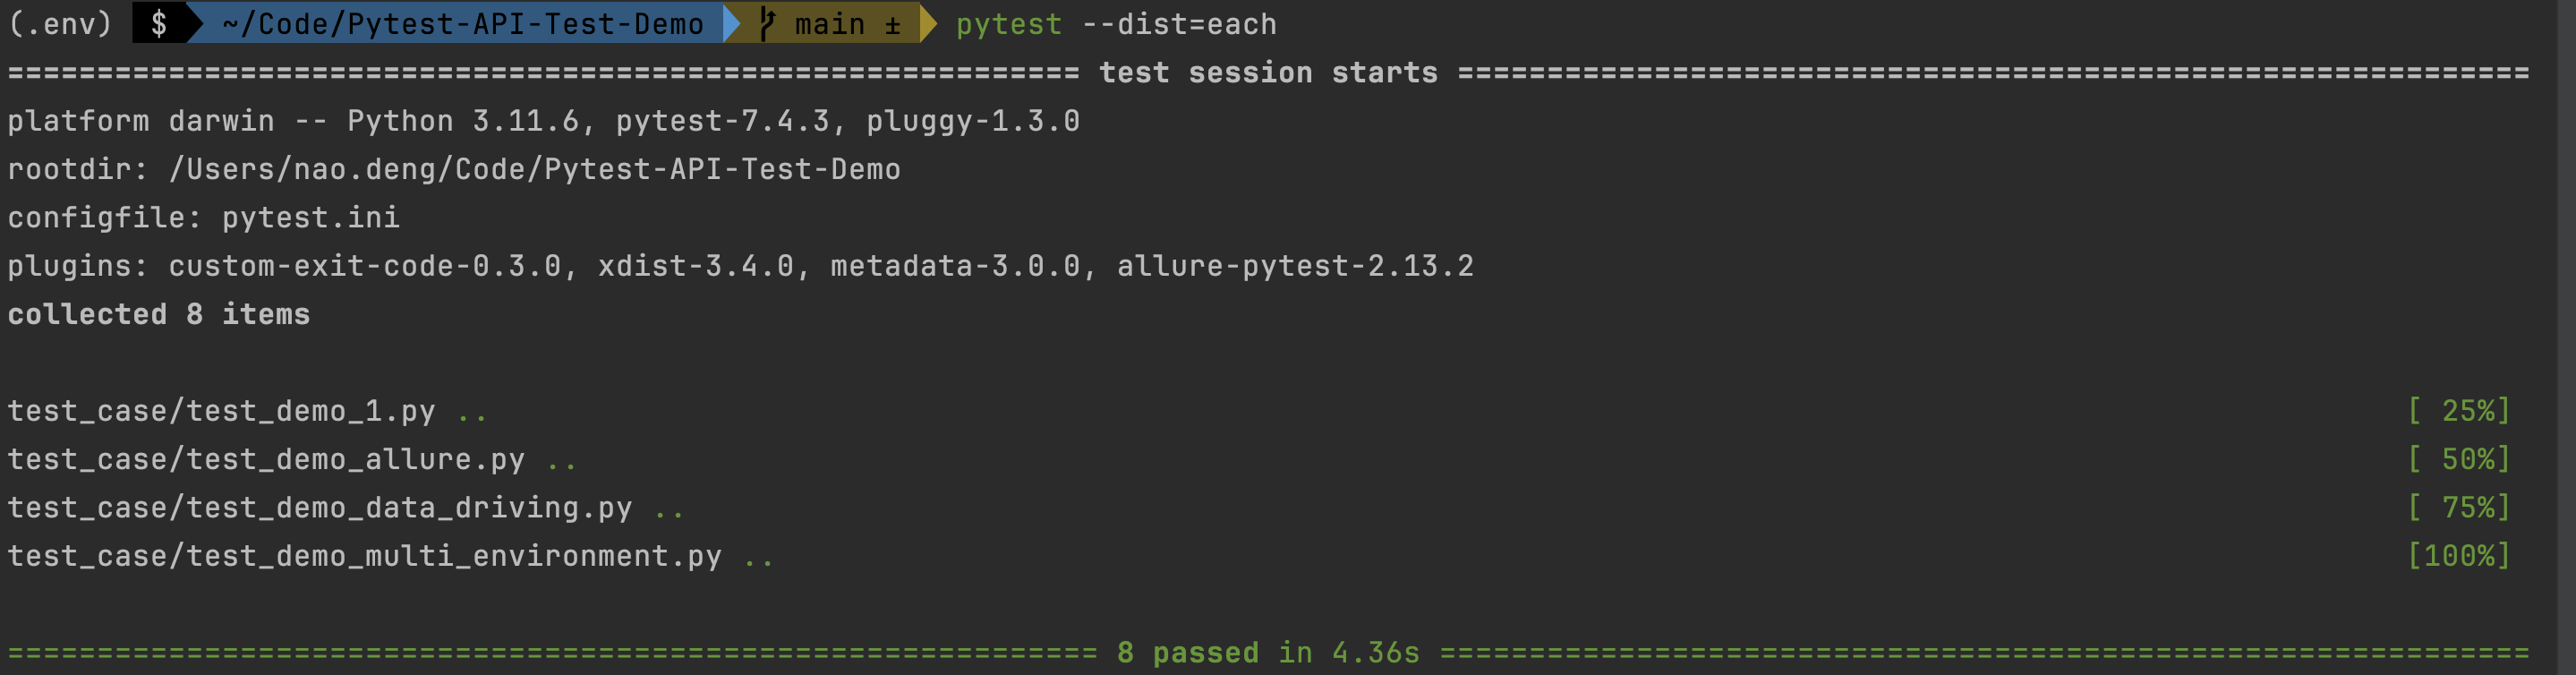
Distributed testing allows for faster test runs.
Distributed testing, where each node runs a set of tests and each worker prints the progress of the test cases
pytest --dist=each -v
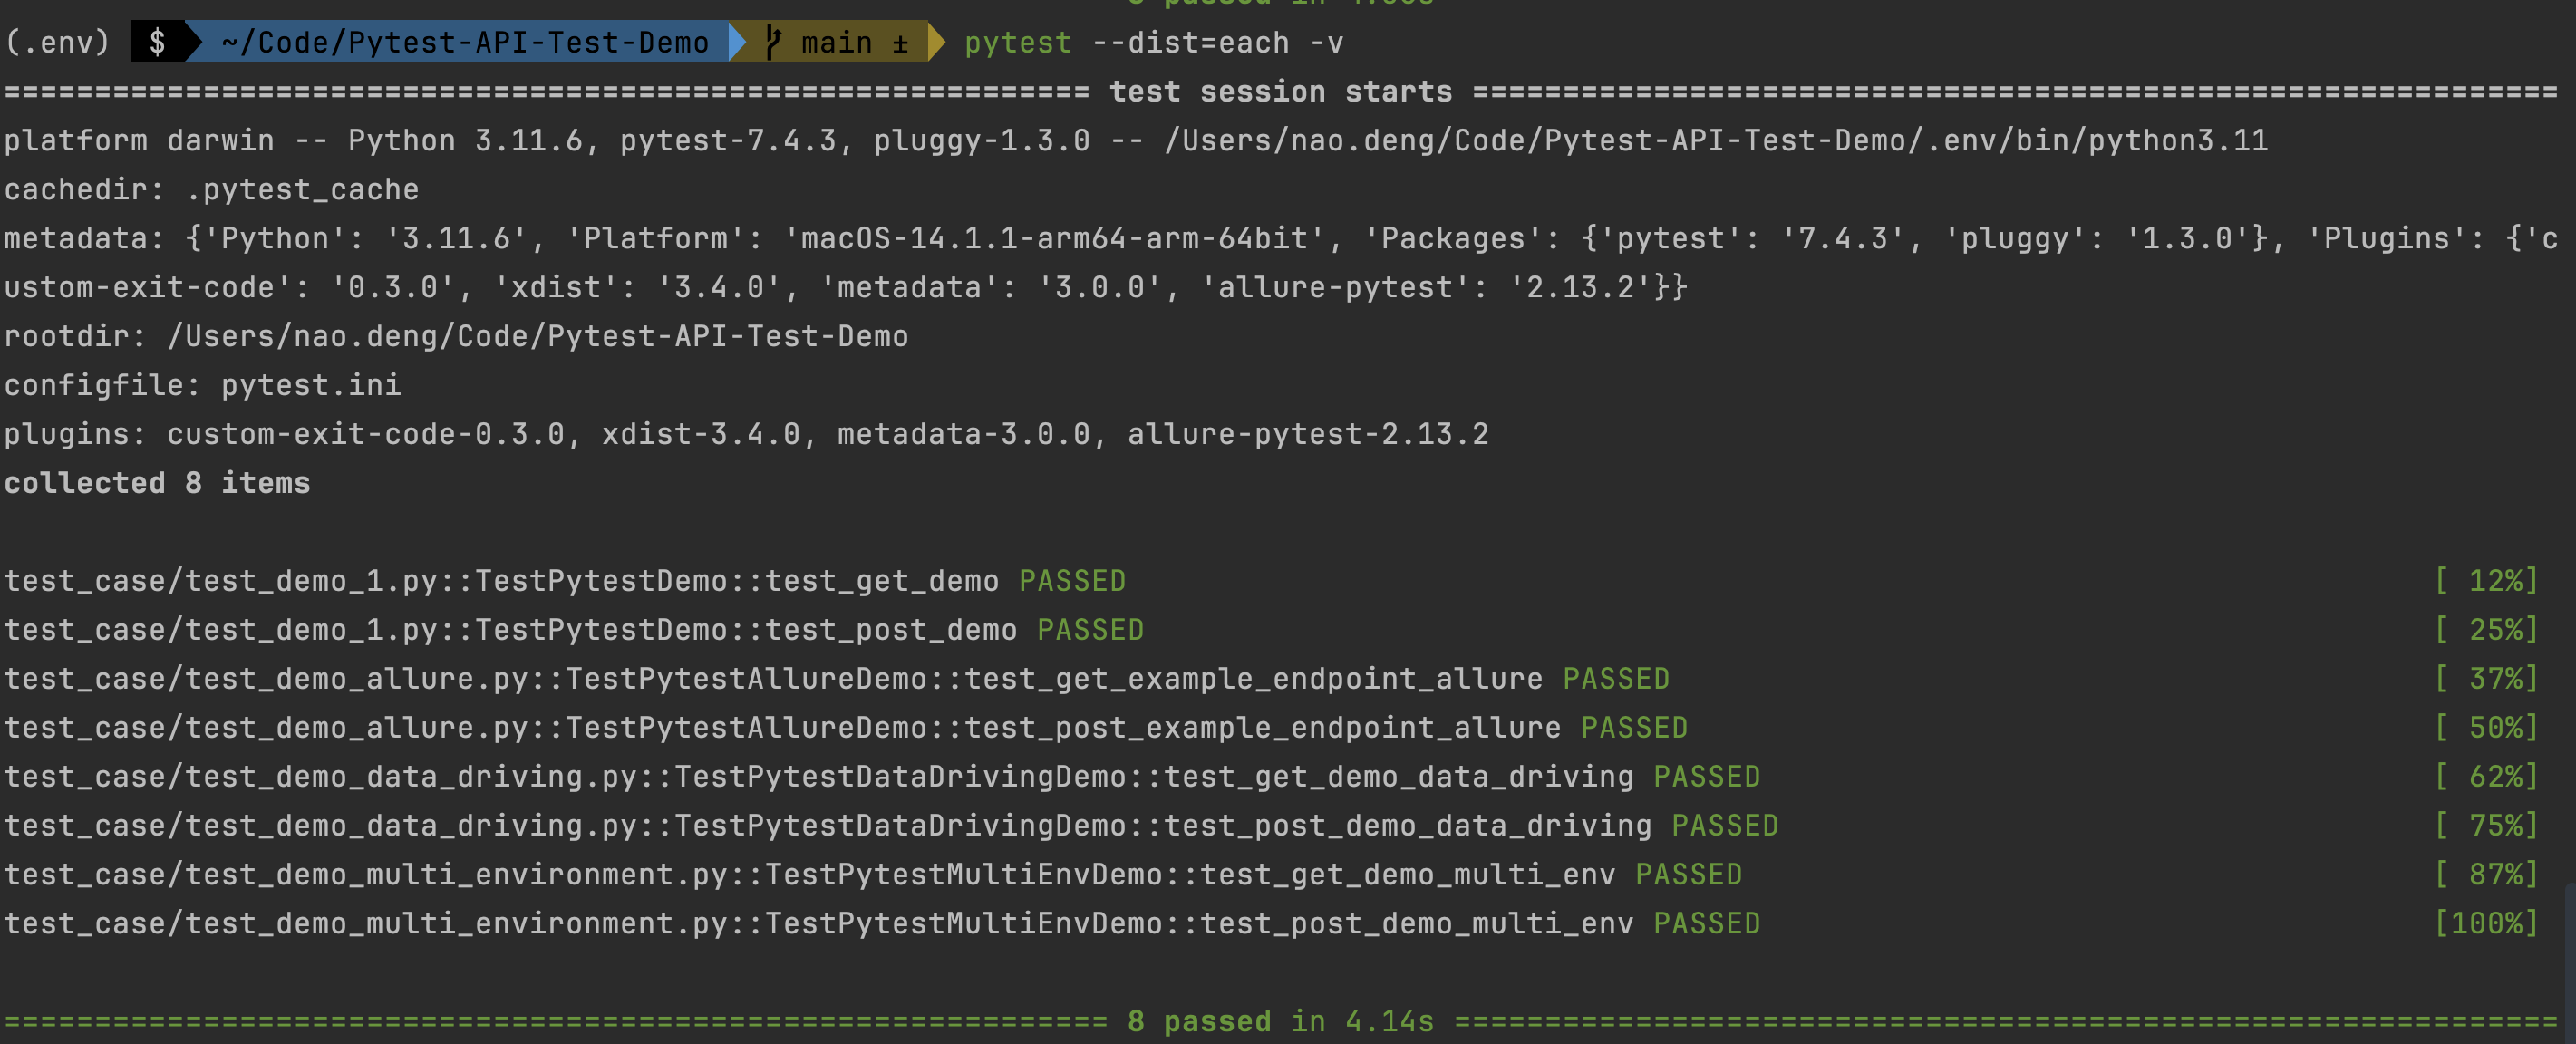
The progress of the test will be printed in the test results, so you can better understand the execution of the test cases.
Distributed testing, each node runs a set of tests, and each worker prints the progress of the test cases, as well as the output of the test logs
pytest --dist=each -v --capture=no
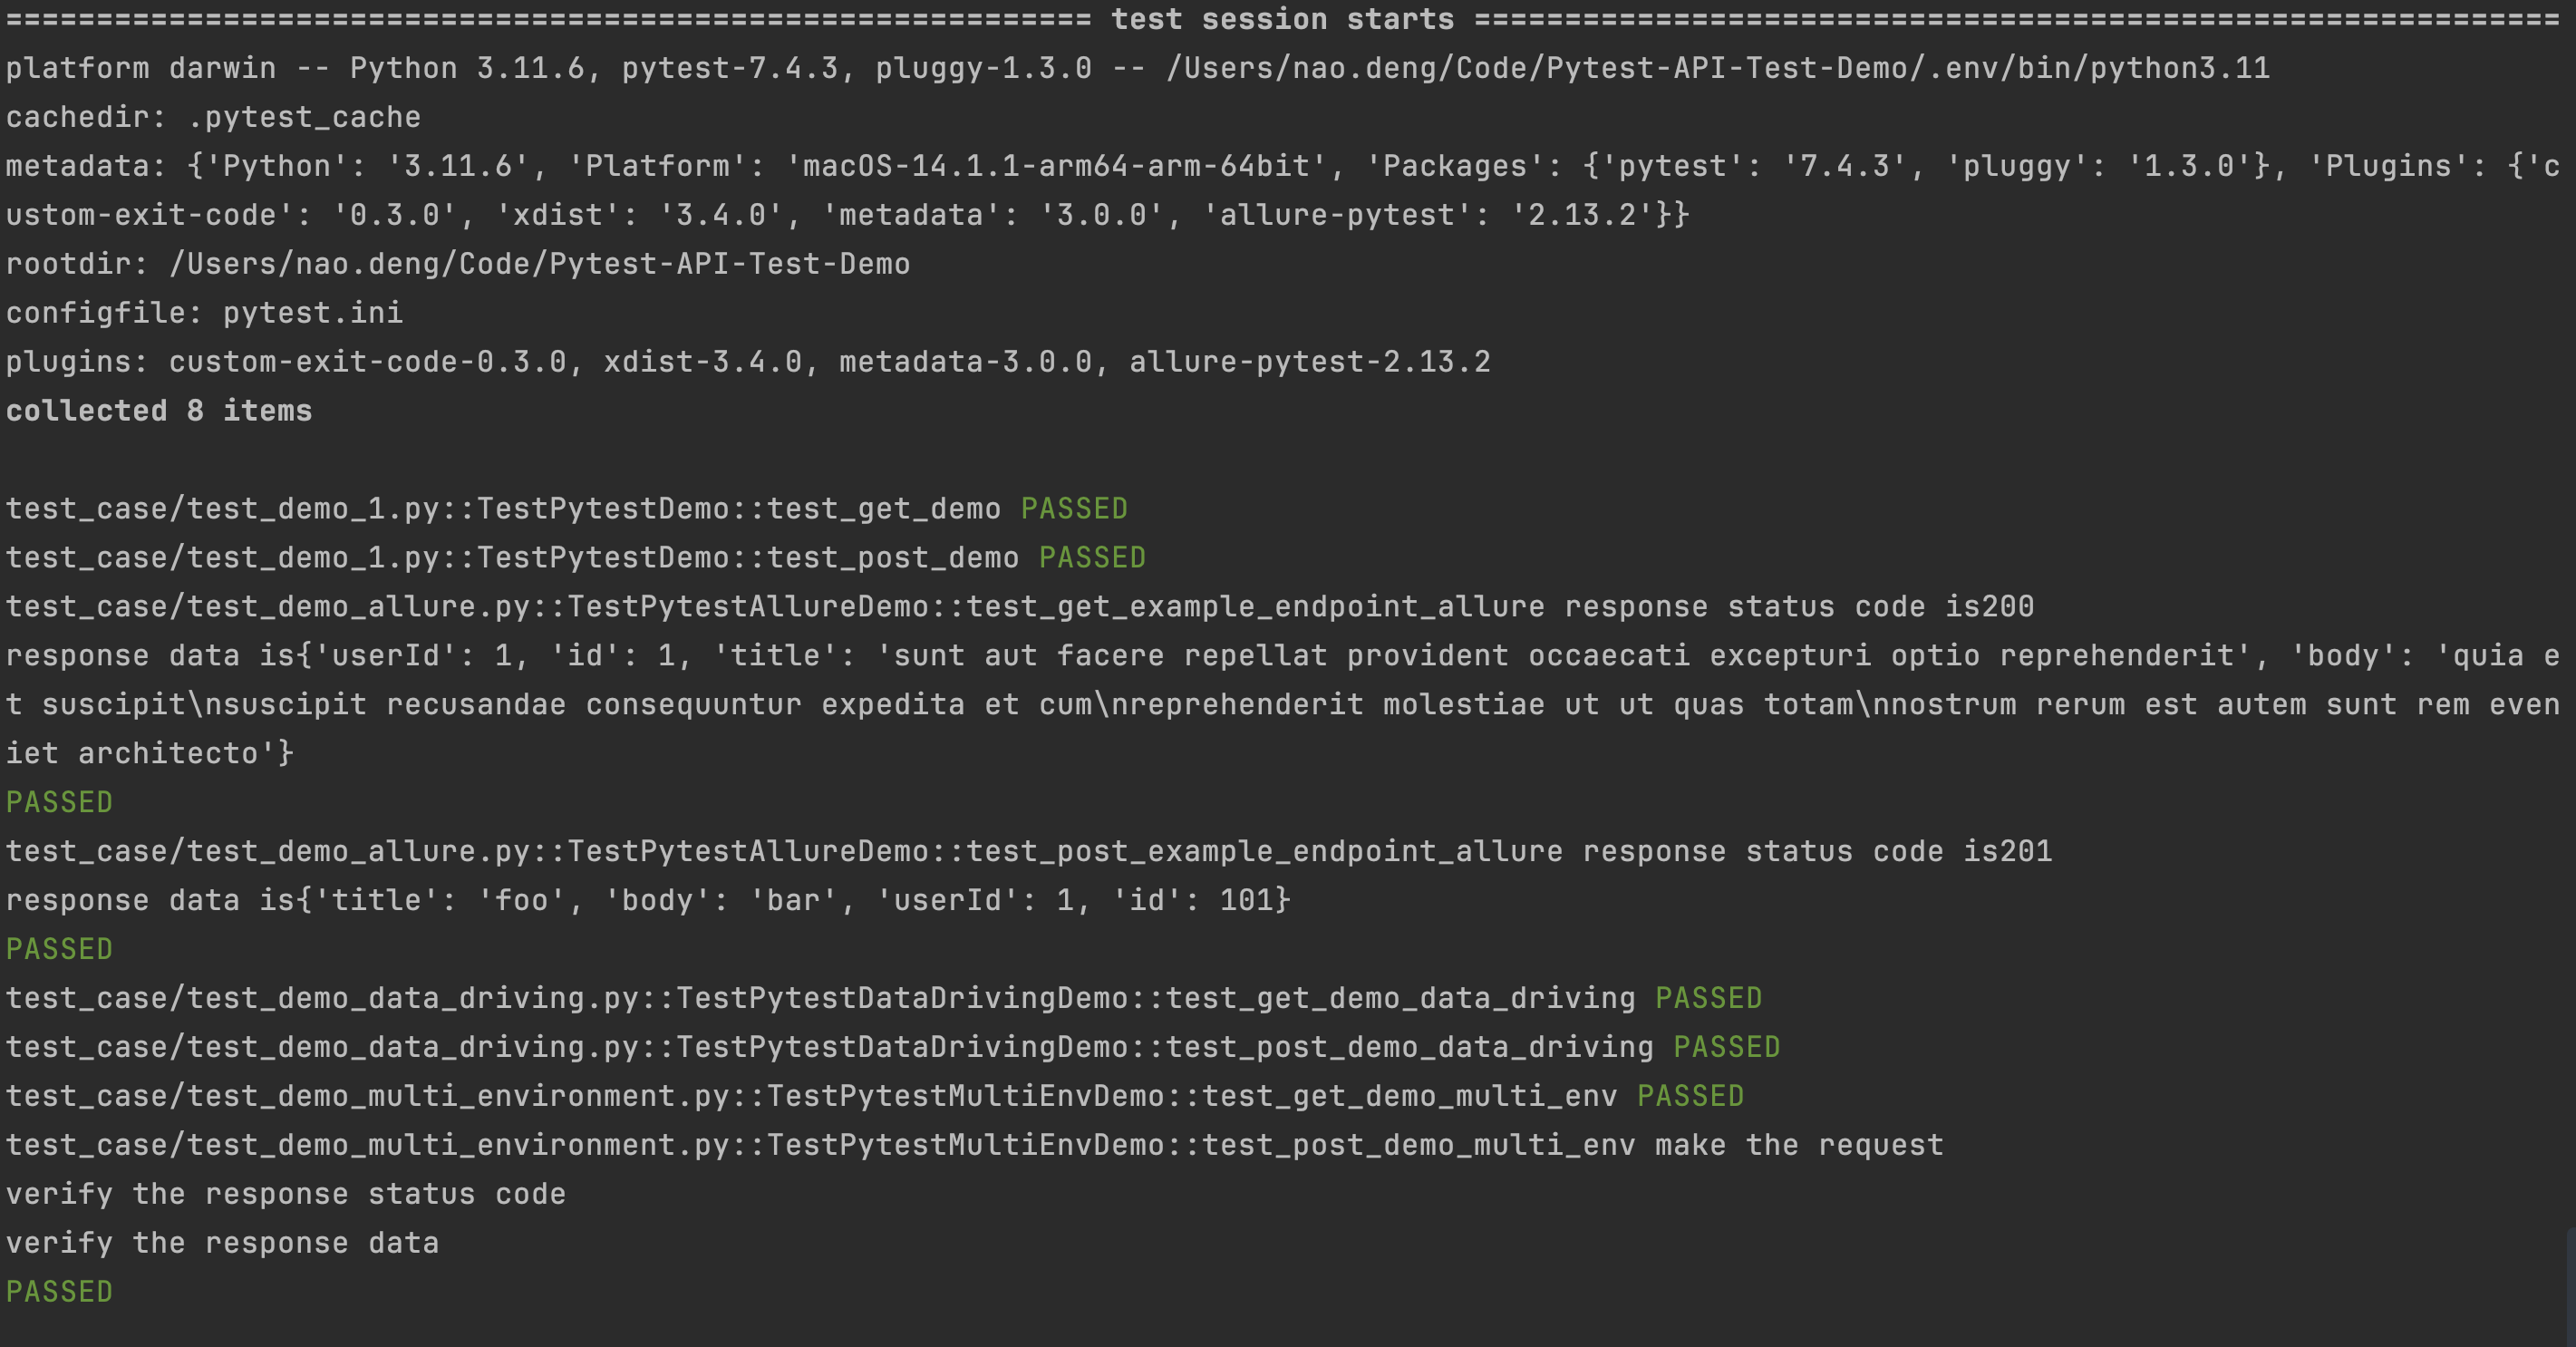
The output of the test log is printed in the test results, which gives a better understanding of the execution of the test cases.
Filtering test case execution
In the daily API testing process, we need to selectively execute test cases according to the actual situation in order to improve the testing efficiency.
Generally, when we use allure test reports, we can use the Allure tag feature to filter the use cases corresponding to the tag to execute the test, but the Pytest framework does not directly support running tests based on Allure tags. However, the Pytest framework does not directly support running tests based on Allure tags, so you can use Pytest markers to accomplish this.
Pytest provides a marks tagging feature that can be used to tag different types of test cases and then filter them for execution.
The general process is that you can mark tests with custom markers (e.g. Regression/Smoke) and then use pytest's -m option to run only those tests.
Defining Pytest Markers
Edit the pytest.ini file and add the following: customize the type of markers
- Regression: Marks the use case for regression testing.
- Smoke: mark it as a use case for smoke testing
markers =
    Regression: marks tests as Regression
    Smoke: marks tests as Smoke
Marking Test Cases
The operation steps are:
- Introduce pytest
- Mark the test case with
@pytest.mark.
To differentiate, create a new test case file named test_demo_filter.py.
import pytest
import requests
import json


class TestPytestMultiEnvDemo:

    @pytest.mark.Regression  # mark the test case as regression
    def test_get_demo_filter(self, env_config, env_request_data, env_response_data):
        host = env_config["host"]
        get_api = env_config["getAPI"]
        get_api_response_data = env_response_data["getAPI"]
        # send request
        response = requests.get(host+get_api)
        # assert
        assert response.status_code == 200
        assert response.json() == get_api_response_data

    @pytest.mark.Smoke  # mark the test case as smoke
    def test_post_demo_filter(self, env_config, env_request_data, env_response_data):
        host = env_config["host"]
        post_api = env_config["postAPI"]
        post_api_request_data = env_request_data["postAPI"]
        print("make the request")
        post_api_response_data = env_response_data["postAPI"]
        # Your test code here
        response = requests.post(host + post_api, json=post_api_request_data)
        print("verify the response status code")
        assert response.status_code == 201
        print("verify the response data")
        assert response.json() == post_api_response_data
Filtering Test Case Execution
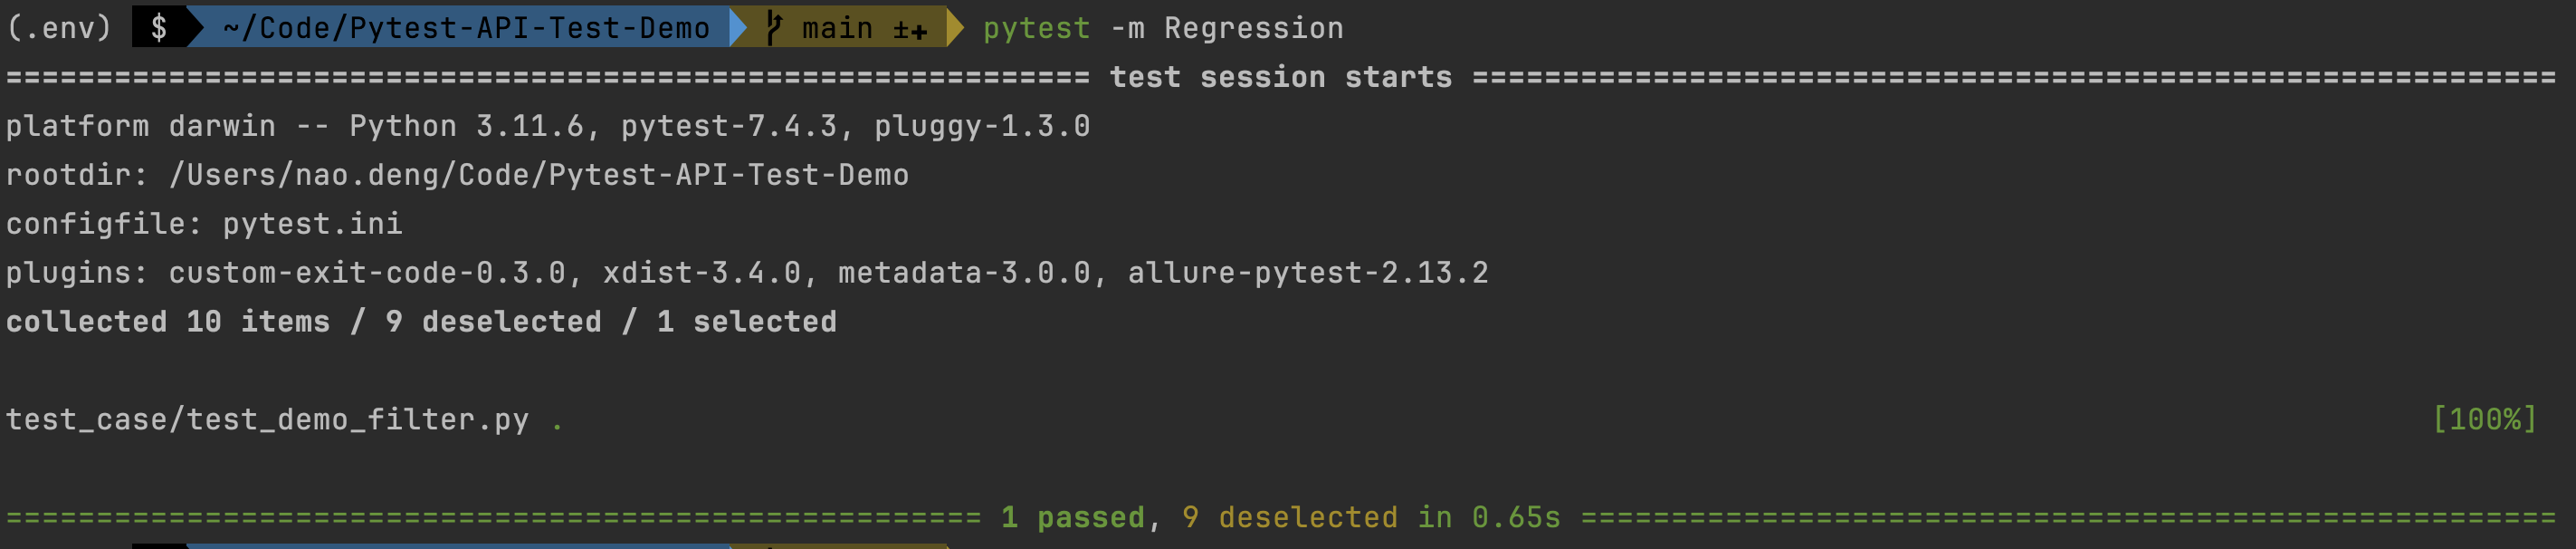
- Running Regression-tagged test cases
pytest -m Regression
This command tells pytest to run only the tests labeled Regression.
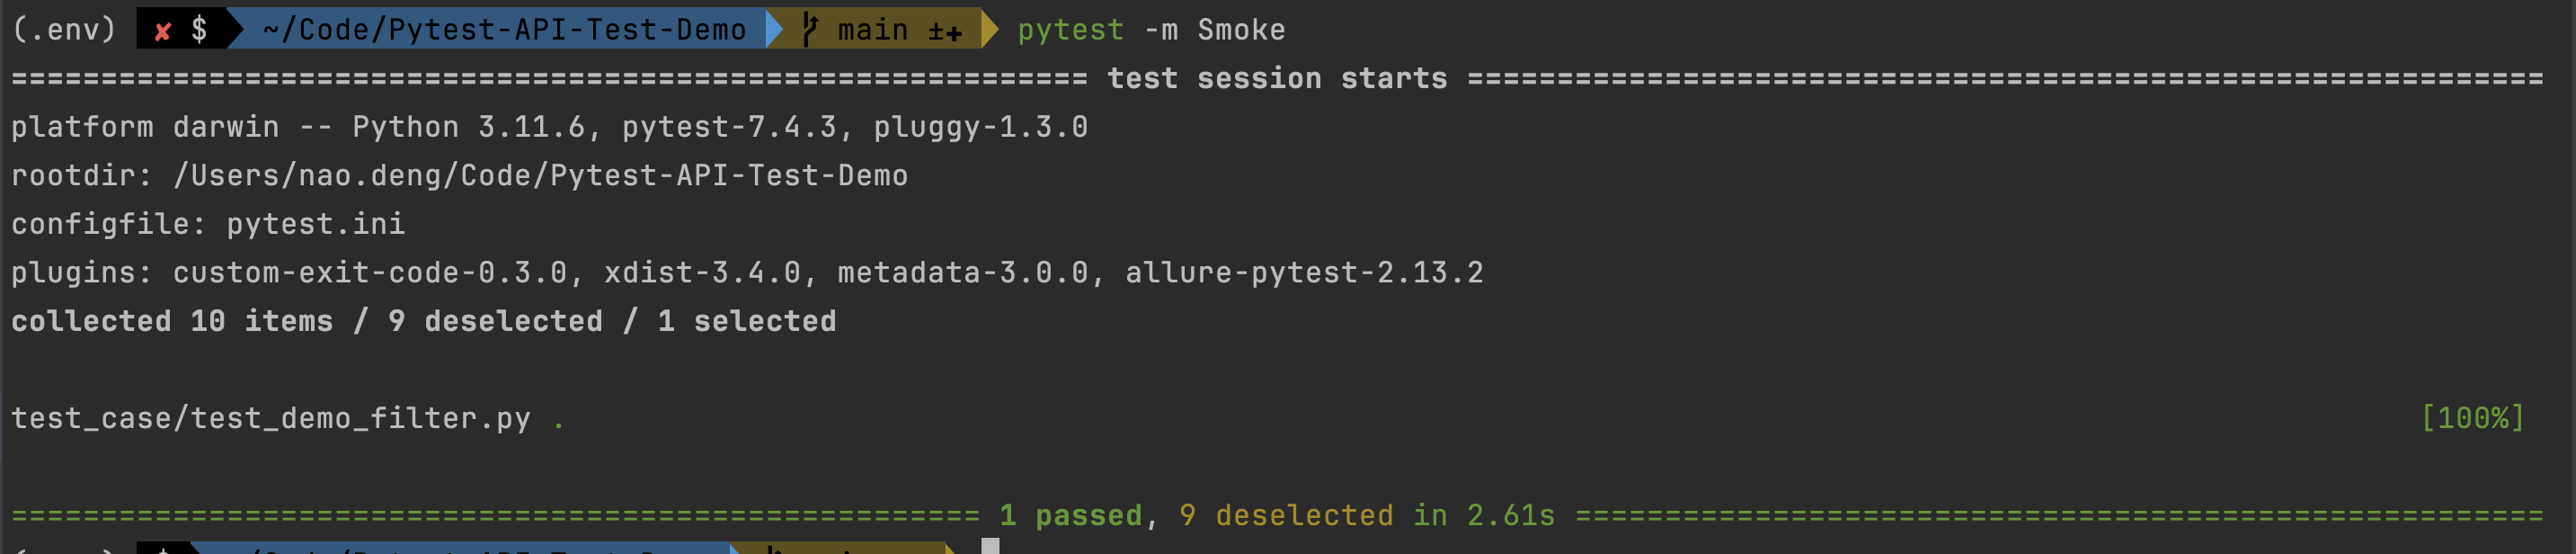
- Running Smoke-tagged test cases
pytest -m Smoke
This command tells pytest to run only the tests labeled Smoke.