Pytest 接口自动化测试快速启动项目
关于使用 Pytest 进行 API 自动化测试的快速启动项目介绍文档。
介绍
Pytest 介绍
Pytest 是一个流行的 Python 测试框架,用于编写、组织和运行各种类型的自动化测试。它提供了丰富的功能,使您能够轻松编写和管理测试用例,以及生成详细的测试报告。以下是 Pytest 的一些主要特点和优势:
-
简单和易用:Pytest 的设计使得编写测试用例变得简单且易于理解。您可以使用 Python 的标准
assert语句来编写测试断言,而不需要学习新的断言语法。 -
自动发现测试用例:Pytest 可以自动发现和运行项目中的测试用例,而不需要显式配置测试套件。测试用例文件可以命名为
test_*.py或*_test.py,或使用特定的测试函数命名规范。 -
丰富的插件生态系统:Pytest 可以通过插件扩展其功能。有许多第三方插件可用,以满足不同测试需求,如 Allure 报告、参数化、覆盖率分析等。
-
参数化测试:Pytest 支持参数化测试,允许您运行相同的测试用例多次,但使用不同的参数。这可以减少代码重复,提高测试覆盖率。
-
异常和故障定位:Pytest 提供详细的错误和异常信息,有助于您更容易地定位和解决问题。它还提供详细的回溯(traceback)信息。
-
并行测试执行:Pytest 支持并行执行测试用例,提高了测试执行的速度,特别是在大型项目中。
-
多种报告格式:Pytest 支持多种测试报告格式,包括终端输出、JUnit XML、HTML 报告和 Allure 报告等。这些报告可以帮助您可视化测试结果。
-
命令行选项:Pytest 提供了丰富的命令行选项,以定制测试运行的行为,包括过滤、重试、覆盖率分析等。
-
集成性:Pytest 可以与其他测试框架和工具(如 Selenium、Django、Flask 等)以及持续集成系统(如 Jenkins、Travis CI 等)轻松集成。
-
活跃的社区:Pytest 拥有一个活跃的社区,有广泛的文档和教程可供学习和参考。您还可以在社区中获得支持和解决问题。
总之,Pytest 是一个强大且灵活的测试框架,适用于各种规模和类型的项目。它的易用性、自动化能力以及丰富的插件使它成为 Python 测试领域的首选工具之一。
官方网站:https://docs.pytest.org/en/latest/
python 虚拟环境介绍
Python 虚拟环境(Virtual Environment)是一种机制,用于在单个 Python 安装中创建和管理多个隔离的开发环境。虚拟环境有助于解决不同项目之间的依赖冲突问题,确保每个项目都能够使用其独立的 Python 包和库,而不会相互干扰。以下是如何创建和使用 Python 虚拟环境的步骤:
- 安装虚拟环境工具:
在开始之前,确保您已安装 Python 的虚拟环境工具。在 Python 3.3 及更高版本中,
venv模块已经内置,可以使用它来创建虚拟环境。如果您使用较旧版本的 Python,您可以安装virtualenv工具。
对于 Python 3.3+,venv 工具已内置,无需额外安装。
对于 Python 2.x,可以使用以下命令安装 virtualenv 工具:
bash
   pip install virtualenv
- 创建虚拟环境: 打开终端,移动到您希望创建虚拟环境的目录,并运行以下命令以创建虚拟环境:
使用 venv(适用于 Python 3.3+):
bash
   python -m venv myenv
使用 virtualenv(适用于 Python 2.x):
bash
   virtualenv myenv
在上述命令中,myenv 是虚拟环境的名称,您可以自定义名称。
-
激活虚拟环境: 要开始使用虚拟环境,需要激活它。在不同的操作系统中,激活命令略有不同:
-
在 macOS 和 Linux 上:
bash source myenv/bin/activate -
在 Windows 上(使用 Command Prompt):
bash myenv\Scripts\activate -
在 Windows 上(使用 PowerShell):
bash
 .\myenv\Scripts\Activate.ps1
一旦虚拟环境激活,您会在终端提示符前看到虚拟环境的名称,表示您已进入虚拟环境。
- 在虚拟环境中安装依赖:
在虚拟环境中,您可以使用
pip安装项目所需的任何 Python 包和库,这些依赖将与该虚拟环境关联。例如:
bash
   pip install requests
-
使用虚拟环境: 在虚拟环境中工作时,您可以运行 Python 脚本和使用安装在虚拟环境中的包。这确保了您的项目在独立的环境中运行,不会与全局 Python 安装产生冲突。
-
退出虚拟环境: 要退出虚拟环境,只需在终端中运行以下命令:
bash
   deactivate
这将使您返回到全局 Python 环境。
通过使用虚拟环境,您可以在不同项目之间维护干净的依赖关系,并确保项目的稳定性和隔离性。这是 Python 开发中的一个良好实践。
项目依赖
需提前安装好以下环境
- [x] python, demo 版本为 v3.11.6
大家安装 python3.x 以上的版本即可
项目目录结构
以下为一个 Pytest 接口自动化测试项目的目录结构示例:
后续 demo 项目会引入 allure 报告,所以会多出一个 allure-report 目录
Pytest-allure-demo/
    ├── tests/                  # 存放测试用例文件
    │   ├── test_login.py       # 示例测试用例文件
    │   ├── test_order.py       # 示例测试用例文件
    │   └── ...
    ├── data/                   # 存放测试数据文件(如 JSON、CSV 等)
    │   ├── dev_test_data.json      # 开发环境测试数据文件
    │   ├── prod_test_data.json      # 生产环境测试数据文件
    │   ├── ...
    ├── config/
    │   ├── dev_config.json  # 开发环境配置文件
    │   ├── prod_config.json  # 生产环境配置文件
    │   ├── ...
    ├── conftest.py             # Pytest 的全局配置文件
    ├── pytest.ini              # Pytest 配置文件
    ├── requirements.txt        # 项目依赖项文件
    └── allure-report/          # 存放 Allure 报告
从 0 到 1 搭建 Pytest 接口自动化测试项目
1.创建项目目录
mkdir Pytest-API-Testing-Demo
2.项目初始化
// 进入项目文件夹下
cd Pytest-API-Testing-Demo
// 创建项目 python 项目虚拟环境
python -m venv .env
// 启用项目 python 项目虚拟环境
source .env/bin/activate
3.安装项目依赖
// 安装 requests 包
pip install requests
// 安装pytest 包
pip install pytest
// 将项目依赖项保存到 requirements.txt 文件中
pip freeze > requirements.txt
4.新建测试文件及测试用例
// 新建测试文件夹
mkdir tests
// 新建测试用例文件
cd tests
touch test_demo.py
5.编写测试用例
测试接口可参考项目中 demoAPI.md 文件
import requests


class TestPytestDemo:

    def test_get_demo(self):
        base_url = "https://jsonplaceholder.typicode.com"
        # 发起请求
        response = requests.get(f"{base_url}/posts/1")
        # 断言
        assert response.status_code == 200
        assert response.json()['userId'] == 1
        assert response.json()['id'] == 1

    def test_post_demo(self):
        base_url = "https://jsonplaceholder.typicode.com"
        requests_data = {
            "title": "foo",
            "body": "bar",
            "userId": 1
        }
        # 发起请求
        response = requests.post(f"{base_url}/posts", requests_data)
        # 断言
        assert response.status_code == 201
        print(response.json())
        assert response.json()['userId'] == '1'
        assert response.json()['id'] == 101
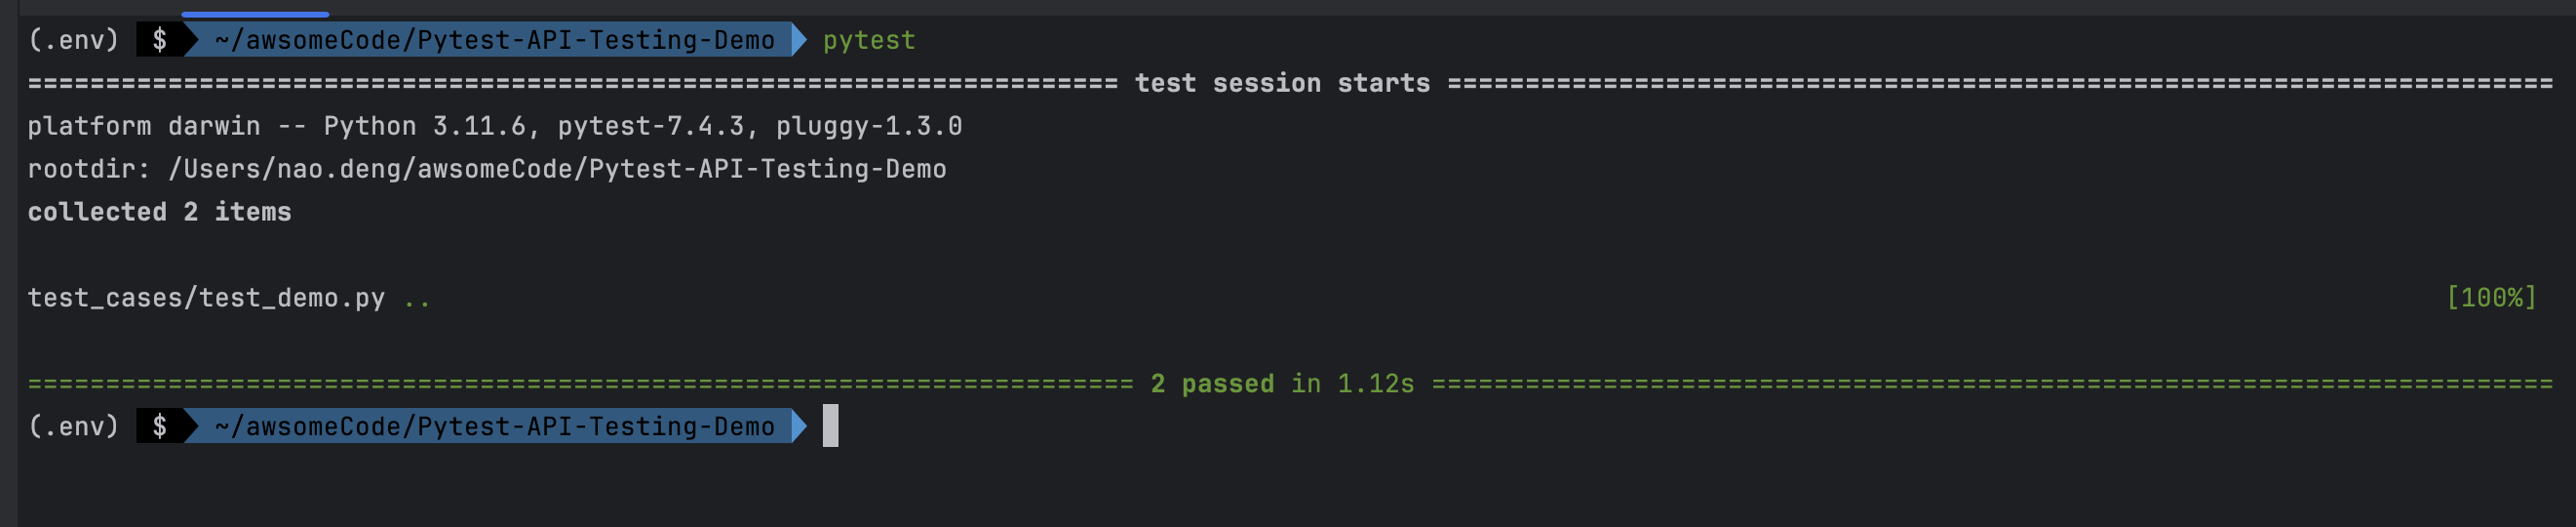
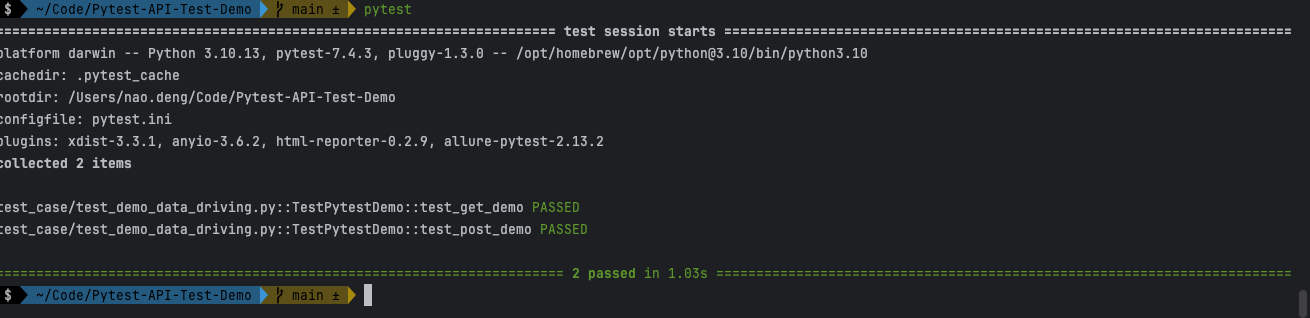
6.运行测试用例
pytest
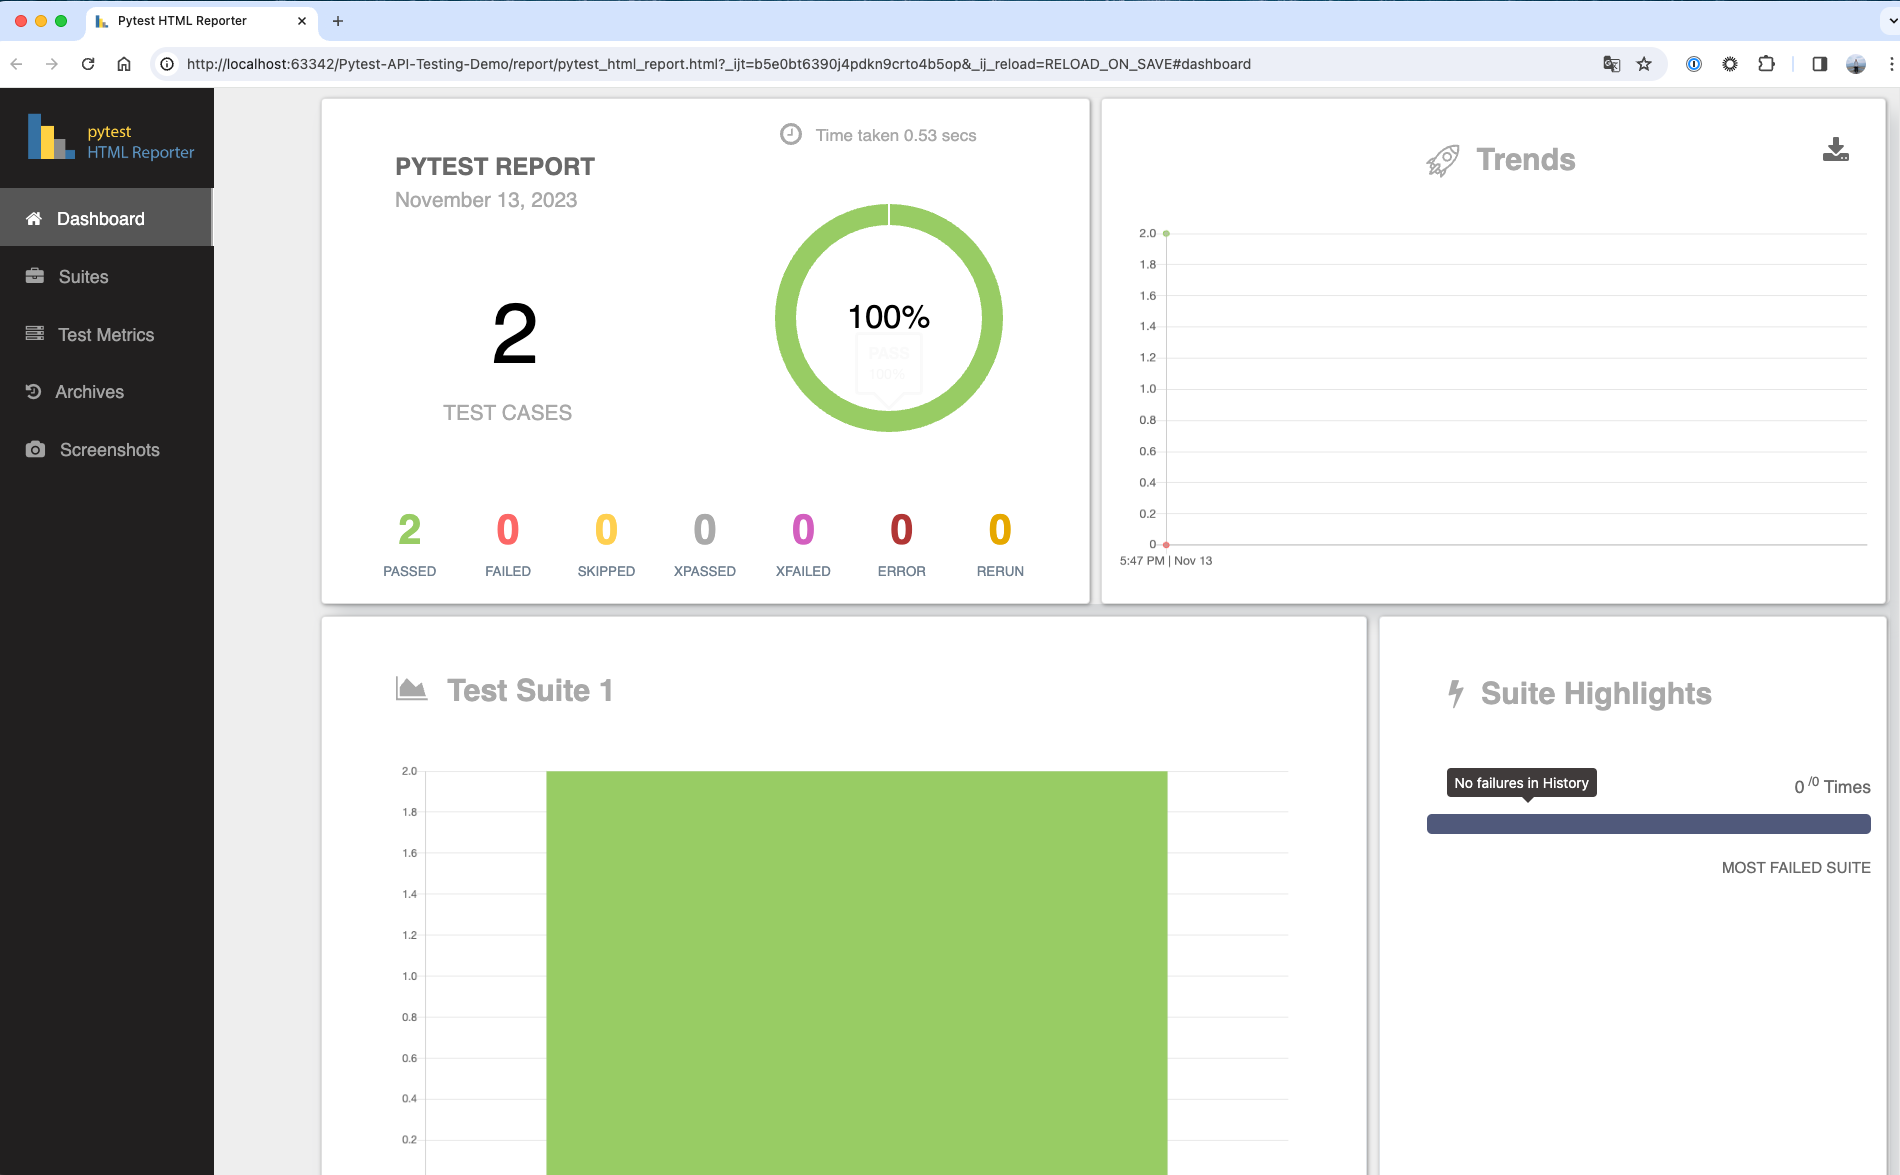
7.查看测试报告
8.接入 pytest-html-reporter 测试报告
安装 pytest-html-reporter 依赖
pip install pytest-html-reporter
配置测试报告参数
- 项目根目录下新建 pytest.ini 文件
- 添加以下内容
[pytest]
addopts = -vs -rf --html-report=./report --title='PYTEST REPORT' --self-contained-html
运行测试用例
pytest
查看测试报告
报告在项目根目录下的 report 目录下,使用浏览器打开 pytest_html_report.html 文件即可查看
进阶用法
持续集成
接入 github action
以 github action 为例,其他 CI 工具类似
可参考 demo:https://github.com/Automation-Test-Starter/Pytest-API-Test-Demo
创建.github/workflows 目录:在你的 GitHub 仓库中,创建一个名为 .github/workflows 的目录。这将是存放 GitHub Actions 工作流程文件的地方。
创建工作流程文件:在.github/workflows 目录中创建一个 YAML 格式的工作流程文件,例如 pytest.yml。
编辑 pytest.yml 文件:将以下内容复制到文件中
# This workflow will install Python dependencies, run tests and lint with a single version of Python
# For more information see: https://docs.github.com/en/actions/automating-builds-and-tests/building-and-testing-python

name: Pytest API Testing

on:
  push:
    branches: [ "main" ]
  pull_request:
    branches: [ "main" ]

permissions:
  contents: read

jobs:
  Pytes-API-Testing:

    runs-on: ubuntu-latest

    steps:
    - uses: actions/checkout@v3
    - name: Set up Python 3.10
      uses: actions/setup-python@v3
      with:
        python-version: "3.10"
    - name: Install dependencies
      run: |
        python -m pip install --upgrade pip
        pip install -r requirements.txt

    - name: Test with pytest
      run: |
        pytest

    - name: Archive Pytest test report
      uses: actions/upload-artifact@v3
      with:
        name: SuperTest-test-report
        path: report

    - name: Upload Pytest report to GitHub
      uses: actions/upload-artifact@v3
      with:
        name: Pytest-test-report
        path: report
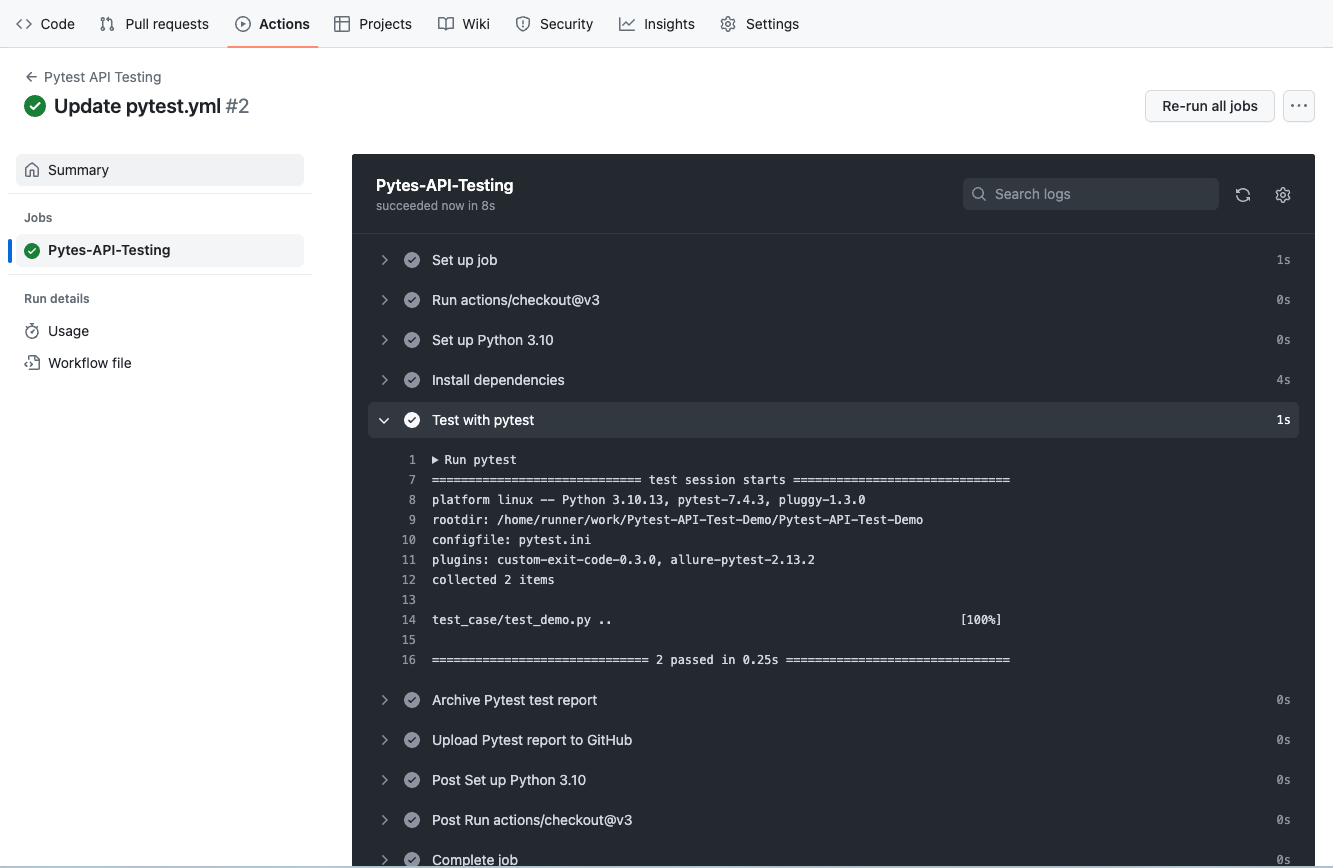
- 提交代码:将 pytest.yml 文件添加到仓库中并提交。
- 查看测试报告:在 GitHub 中,导航到你的仓库。单击上方的 Actions 选项卡,然后单击左侧的 Pytest API Testing 工作流。你应该会看到工作流正在运行,等待执行完成,就可以查看结果。
常用断言
使用 Pytest 在接口自动化测试用例编写过程中,我们需要使用各种断言来验证测试的预期结果。
Pytest 提供了更多的断言和灵活的断言库,以满足各种测试需求。
以下是一些常用的 Pytest 接口自动化测试断言:
- 相等性断言:检查两个值是否相等。
python
   assert actual_value == expected_value
- 不相等性断言:检查两个值是否不相等。
python
   assert actual_value != expected_value
- 包含断言:检查一个值是否包含在另一个值中,通常用于检查字符串是否包含子字符串。
python
   assert substring in full_string
- 成员资格断言:检查一个值是否在集合、列表或其他可迭代对象中。
python
   assert item in iterable
- 真值断言:检查一个表达式或变量是否为真。
python
   assert expression
或
python
   assert variable
- 假值断言:检查一个表达式或变量是否为假。
python
   assert not expression
或
python
   assert not variable
- 大于、小于、大于等于、小于等于断言:检查一个值是否大于、小于、大于等于或小于等于另一个值。
python
   assert value > other_value
   assert value < other_value
   assert value >= other_value
   assert value <= other_value
- 类型断言:检查一个值的类型是否符合预期。
python
   assert isinstance(value, expected_type)
例如,检查一个值是否是字符串:
python
   assert isinstance(my_string, str)
- 异常断言:检查在代码块中是否引发了特定类型的异常。
python
   with pytest.raises(ExpectedException):
       # 代码块,期望引发 ExpectedException 异常
- 近似相等断言:检查两个浮点数是否在某个误差范围内相等。
python
   assert math.isclose(actual_value, expected_value, rel_tol=1e-9)
- 列表相等断言:检查两个列表是否相等。
python
   assert actual_list == expected_list
- 字典相等断言:检查两个字典是否相等。
python
   assert actual_dict == expected_dict
- 正则表达式匹配断言:检查一个字符串是否匹配给定的正则表达式。
```python import re
assert re.match(pattern, string) ```
- 空值断言:检查一个值是否为
None。
python
   assert value is None
- 非空值断言:检查一个值是否不为
None。
python
   assert value is not None
- 布尔值断言:检查一个值是否为
True或False。
python
   assert boolean_expression
- 空容器断言:检查一个列表、集合或字典是否为空。
python
   assert not container  # 检查容器是否为空
- 包含子集断言:检查一个集合是否包含另一个集合作为子集。
python
   assert subset <= full_set
-
字符串开头或结尾断言:检查一个字符串是否以指定的前缀或后缀开头或结尾。
python assert string.startswith(prefix) assert string.endswith(suffix) -
数量断言:检查一个列表、集合或其他可迭代对象的元素数量。
python assert len(iterable) == expected_length -
范围断言:检查一个值是否在指定的范围内。
python assert lower_bound <= value <= upper_bound -
文件存在断言:检查文件是否存在。
```python import os
assert os.path.exists(file_path) ```
以上是一些 Pytest 常用的断言,但根据具体的测试需求,您可能会使用其他断言或结合多个断言来更全面地验证测试结果。 详细的断言文档可以在 Pytest 官方网站找到:Pytest - Built-in fixtures, marks, and nodes
数据驱动
在 API 自动化测试的过程中。使用数据驱动是一种常规测试方法,其中测试用例的输入数据和预期输出数据都被存储在数据文件中,测试框架根据这些数据文件执行多次测试,以验证 API 的各个方面。
测试数据可以很容易地修改,而不需要修改测试用例代码。
数据驱动测试可以帮助你有效地覆盖多种情况,确保 API 在各种输入数据下都能正常运行。
可参考 demo:https://github.com/Automation-Test-Starter/Pytest-API-Test-Demo
新建测试配置文件
配置文件会以 json 格式存储为例,其他格式如 YAML、CSV 等类似,均可参考
// 新建测试配置文件夹
mkdir config
// 新建测试配置文件
cd config
touch config.json
编写测试配置文件
配置文件存储测试环境的配置信息,如测试环境的 URL、数据库连接信息等。
demo 中的测试配置文件内容如下:
- 配置 host 信息
- 配置 getAPI 接口信息
- 配置 postAPI 接口信息
{
  "host": "https://jsonplaceholder.typicode.com",
  "getAPI": "/posts/1",
  "postAPI":"/posts"
}
新建测试数据文件
请求数据文件和响应数据文件分别存储测试用例的请求数据和预期响应数据。
// 新建测试数据文件夹
mkdir data
// 进入测试数据文件夹
cd data
// 新建请求数据文件
touch request_data.json
// 新建响应数据文件
touch response_data.json
编写测试数据文件
- 编写请求数据文件
请求数据文件中配置了 getAPI 接口的请求数据和 postAPI 接口的请求数据
{
  "getAPI": "",
  "postAPI":{
    "title": "foo",
    "body": "bar",
    "userId": 1
  }
}
- 编写响应数据文件
请求数据文件中配置了 getAPI 接口的响应数据和 postAPI 接口的响应数据
{
    "getAPI": {
      "userId": 1,
      "id": 1,
      "title": "sunt aut facere repellat provident occaecati excepturi optio reprehenderit",
      "body": "quia et suscipit\nsuscipit recusandae consequuntur expedita et cum\nreprehenderit molestiae ut ut quas totam\nnostrum rerum est autem sunt rem eveniet architecto"
    },
    "postAPI":{
      "title": "foo",
      "body": "bar",
      "userId": "1",
      "id": 101
    }
}
更新测试用例来支持数据驱动
为做区分,这里新建测试用例文件,文件名为 test_demo_data_driving.py
import requests
import json

# 从配置文件夹获取测试配置
with open("config/config.json", "r") as json_file:
    config = json.load(json_file)

# 从测试数据文件夹获取接口请求数据
with open('data/request_data.json', 'r') as json_file:
    request_data = json.load(json_file)

# 从测试数据文件夹获取接口响应数据
with open('data/response_data.json', 'r') as json_file:
    response_data = json.load(json_file)


class TestPytestDemo:

    def test_get_demo(self):
        host = config.get("host")
        get_api = config.get("getAPI")
        get_api_response_data = response_data.get("getAPI")
        # 发起请求
        response = requests.get(host+get_api)
        # 断言
        assert response.status_code == 200
        assert response.json() == get_api_response_data

    def test_post_demo(self):
        host = config.get("host")
        post_api = config.get("postAPI")
        post_api_request_data = request_data.get("postAPI")
        post_api_response_data = response_data.get("postAPI")
        # 发起请求
        response = requests.post(host + post_api, post_api_request_data)
        # 断言
        assert response.status_code == 201
        assert response.json() == post_api_response_data
运行该测试用例确认数据驱动是否生效
若用 demo 项目运行数据驱动支持测试用例:test_demo_data_driving.py,建议先屏蔽掉其他测试用例,否则可能会报错
pytest tests/test_demo_data_driving.py
多环境支持
在实际的 API 自动化测试过程中,我们需要在不同的环境中运行测试用例,以确保 API 在各个环境中都能正常运行。
通过使用 Pytest 的 fixture 功能,我们可以轻松地实现多环境支持。
可参考 demo:https://github.com/Automation-Test-Starter/Pytest-API-Test-Demo
新建不同环境测试配置文件
配置文件会以 json 格式存储为例,其他格式如 YAML、CSV 等类似,均可参考
// 新建测试配置文件夹
mkdir config
// 进入测试配置文件夹
cd config
// 新建开发环境测试配置文件
touch dev_config.json
// 新建生产环境测试配置文件
touch prod_config.json
编写不同环境测试配置文件
- 编写开发环境测试配置文件
根据实际情况配置开发环境测试配置文件
{
  "host": "https://jsonplaceholder.typicode.com",
  "getAPI": "/posts/1",
  "postAPI":"/posts"
}
- 编写生产环境测试配置文件
根据实际情况配置生产环境测试配置文件
{
  "host": "https://jsonplaceholder.typicode.com",
  "getAPI": "/posts/1",
  "postAPI":"/posts"
}
新建不同环境测试数据文件
不同环境请求数据文件和响应数据文件分别存储测试用例的不同环境请求数据和不同环境预期响应数据。
// 新建测试数据文件夹
mkdir data
// 进入测试数据文件夹
cd data
// 新建开发环境请求数据文件
touch dev_request_data.json
// 新建开发环境响应数据文件
touch dev_response_data.json
// 新建生产环境请求数据文件
touch prod_request_data.json
// 新建生产环境响应数据文件
touch prod_response_data.json
编写不同环境测试数据文件
- 编写开发环境请求数据文件
开发环境请求数据文件中配置了 getAPI 接口的请求数据和 postAPI 接口的请求数据
{
  "getAPI": "",
  "postAPI":{
    "title": "foo",
    "body": "bar",
    "userId": 1
  }
}
- 编写开发环境响应数据文件
开发环境响应数据文件中配置了 getAPI 接口的响应数据和 postAPI 接口的响应数据
{
    "getAPI": {
      "userId": 1,
      "id": 1,
      "title": "sunt aut facere repellat provident occaecati excepturi optio reprehenderit",
      "body": "quia et suscipit\nsuscipit recusandae consequuntur expedita et cum\nreprehenderit molestiae ut ut quas totam\nnostrum rerum est autem sunt rem eveniet architecto"
    },
    "postAPI":{
      "title": "foo",
      "body": "bar",
      "userId": 1,
      "id": 101
    }
}
- 编写生产环境请求数据文件
生产环境请求数据文件中配置了 getAPI 接口的请求数据和 postAPI 接口的请求数据
{
  "getAPI": "",
  "postAPI":{
    "title": "foo",
    "body": "bar",
    "userId": 1
  }
}
- 编写生产环境响应数据文件
生产环境响应数据文件中配置了 getAPI 接口的响应数据和 postAPI 接口的响应数据
{
    "getAPI": {
      "userId": 1,
      "id": 1,
      "title": "sunt aut facere repellat provident occaecati excepturi optio reprehenderit",
      "body": "quia et suscipit\nsuscipit recusandae consequuntur expedita et cum\nreprehenderit molestiae ut ut quas totam\nnostrum rerum est autem sunt rem eveniet architecto"
    },
    "postAPI":{
      "title": "foo",
      "body": "bar",
      "userId": 1,
      "id": 101
    }
}
配置支持多环境的 fixture
fixture 会以 conftest.py 文件存储为例,其他格式如 YAML、CSV 等类似,均可参考
- 项目根目录新建 conftest.py 文件
mkdrir conftest.py
- 编写 conftest.py 文件
import pytest
import json
import json
import os


@pytest.fixture(scope="session")
def env_config(request):
    # get config file from different env
    env = os.getenv('ENV', 'dev')
    with open(f'config/{env}_config.json', 'r') as config_file:
        config = json.load(config_file)
    return config


@pytest.fixture(scope="session")
def env_request_data(request):
    # get request data file from different env
    env = os.getenv('ENV', 'dev')
    with open(f'data/{env}_request_data.json', 'r') as request_data_file:
        request_data = json.load(request_data_file)
    return request_data


@pytest.fixture (scope="session")
def env_response_data(request):
    # get response data file from different env
    env = os.getenv('ENV', 'dev')
    with open(f'data/{env}_response_data.json', 'r') as response_data_file:
        response_data = json.load(response_data_file)
    return response_data
更新测试用例来支持多环境
为做区分,这里新建测试用例文件,文件名为 test_demo_multi_environment.py
import requests
import json


class TestPytestMultiEnvDemo:

    def test_get_demo_multi_env(self, env_config, env_request_data, env_response_data):
        host = env_config["host"]
        get_api = env_config["getAPI"]
        get_api_response_data = env_response_data["getAPI"]
        # send request
        response = requests.get(host+get_api)
        # assert
        assert response.status_code == 200
        assert response.json() == get_api_response_data

    def test_post_demo_multi_env(self, env_config, env_request_data, env_response_data):
        host = env_config["host"]
        post_api = env_config["postAPI"]
        post_api_request_data = env_request_data["postAPI"]
        post_api_response_data = env_response_data["postAPI"]
        # send request
        response = requests.post(host + post_api, post_api_request_data)
        # assert
        assert response.status_code == 201
        assert response.json() == post_api_response_data
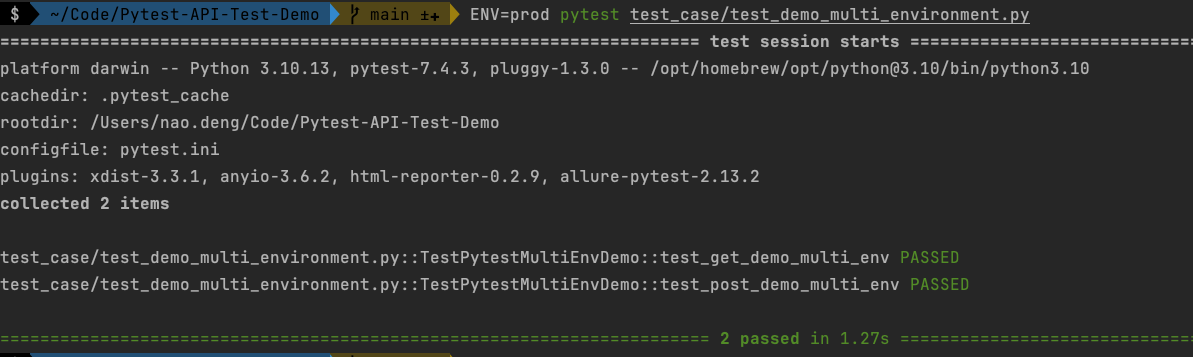
运行该测试用例确认多环境支持是否生效
- 运行开发环境测试用例
ENV=dev pytest test_case/test_demo_multi_environment.py

- 运行生产环境测试用例
ENV=prod pytest test_case/test_demo_multi_environment.py
集成 allure 报告
allure 是一个轻量级的、灵活的、易于扩展的测试报告工具,它提供了丰富的报告类型和功能,可以帮助您更好地可视化测试结果。
allure 报告可以与 Pytest 集成,以生成详细的测试报告。
可参考 demo:https://github.com/Automation-Test-Starter/Pytest-API-Test-Demo
安装 allure-pytest 依赖
pip install allure-pytest
避免之前安装的 pytest-html-reporter 与 allure-pytest 冲突,建议先卸载 pytest-html-reporter
pip uninstall pytest-html-reporter
配置 allure-pytest
更新 pytest.ini 文件来指定 allure 报告的存储位置
[pytest]
# allure
addopts = --alluredir ./allure-results
调整测试用例来支持 allure 报告
为做区分,这里新建测试用例文件,文件名为 test_demo_allure.py
import allure
import requests
@allure.feature("Test example API")
class TestPytestAllureDemo:
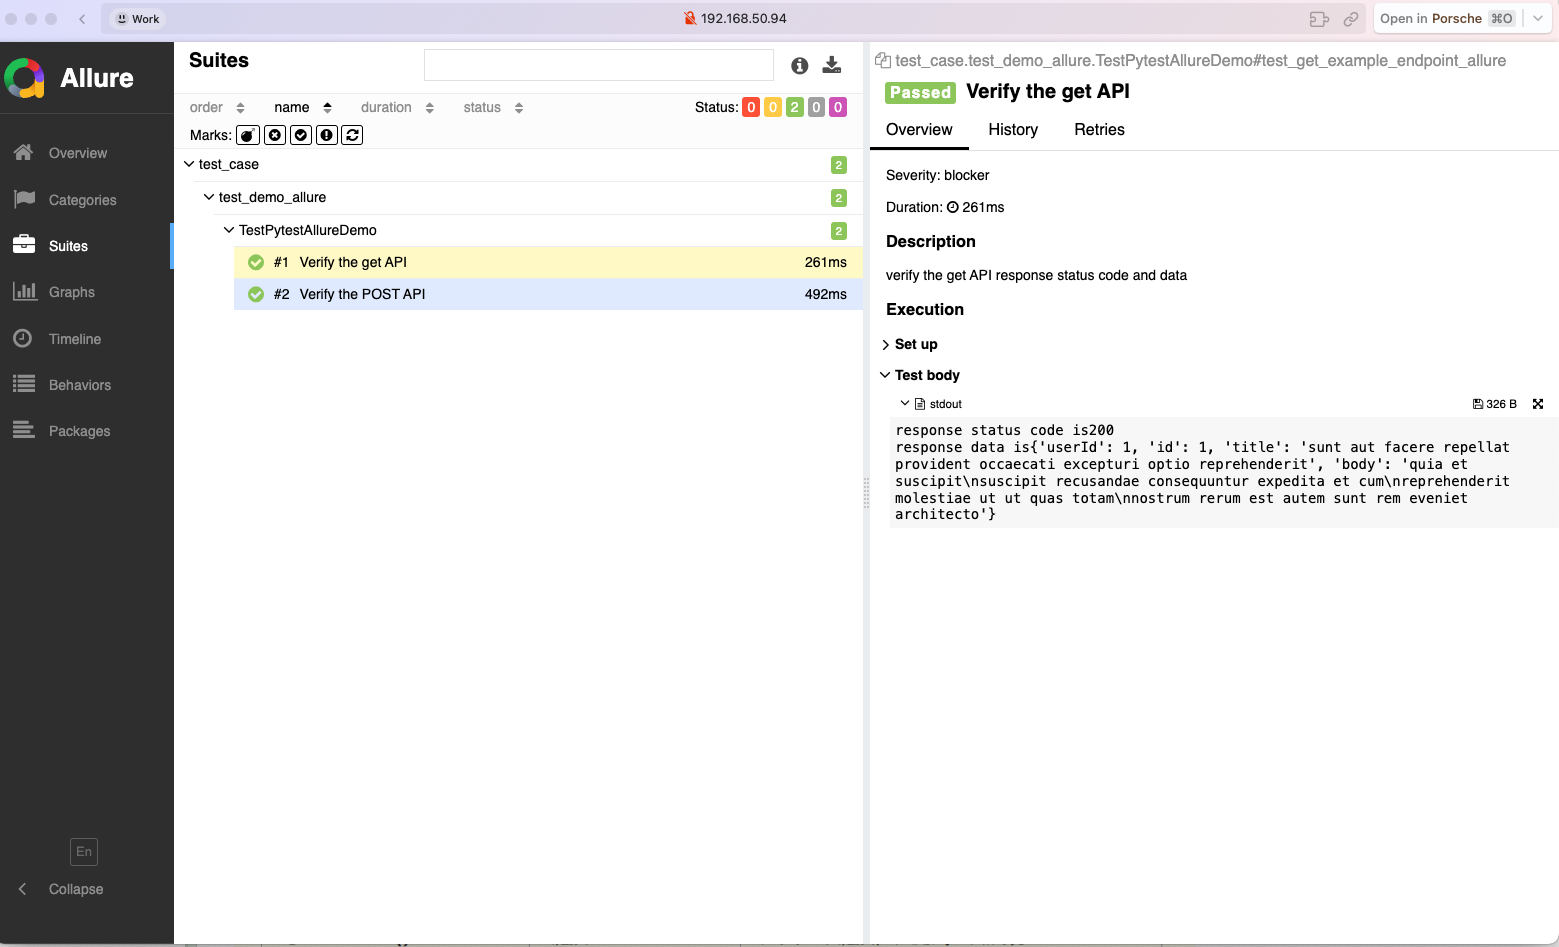
@allure.story("Test example get endpoint")
@allure.title("Verify the get API")
@allure.description("verify the get API response status code and data")
@allure.severity("blocker")
def test_get_example_endpoint_allure(self, env_config, env_request_data, env_response_data):
host = env_config["host"]
get_api = env_config["getAPI"]
get_api_request_data = env_request_data["getAPI"]
get_api_response_data = env_response_data["getAPI"]
# send get request
response = requests.get(host + get_api)
# assert
print("response status code is" + str(response.status_code))
assert response.status_code == 200
print("response data is" + str(response.json()))
assert response.json() == get_api_response_data
@allure.story("Test example POST API")
@allure.title("Verify the POST API")
@allure.description("verify the POST API response status code and data")
@allure.severity("Critical")
def test_post_example_endpoint_allure(self, env_config, env_request_data, env_response_data):
host = env_config["host"]
post_api = env_config["postAPI"]
post_api_request_data = env_request_data["postAPI"]
post_api_response_data = env_response_data["postAPI"]
# send request
response = requests.post(host + post_api, json=post_api_request_data)
# assert
print("response status code is" + str(response.status_code))
assert response.status_code == 201
print("response data is" + str(response.json()))
assert response.json() == post_api_response_data
运行测试用例生成 allure 报告
ENV=dev pytest test_case/test_demo_allure.py
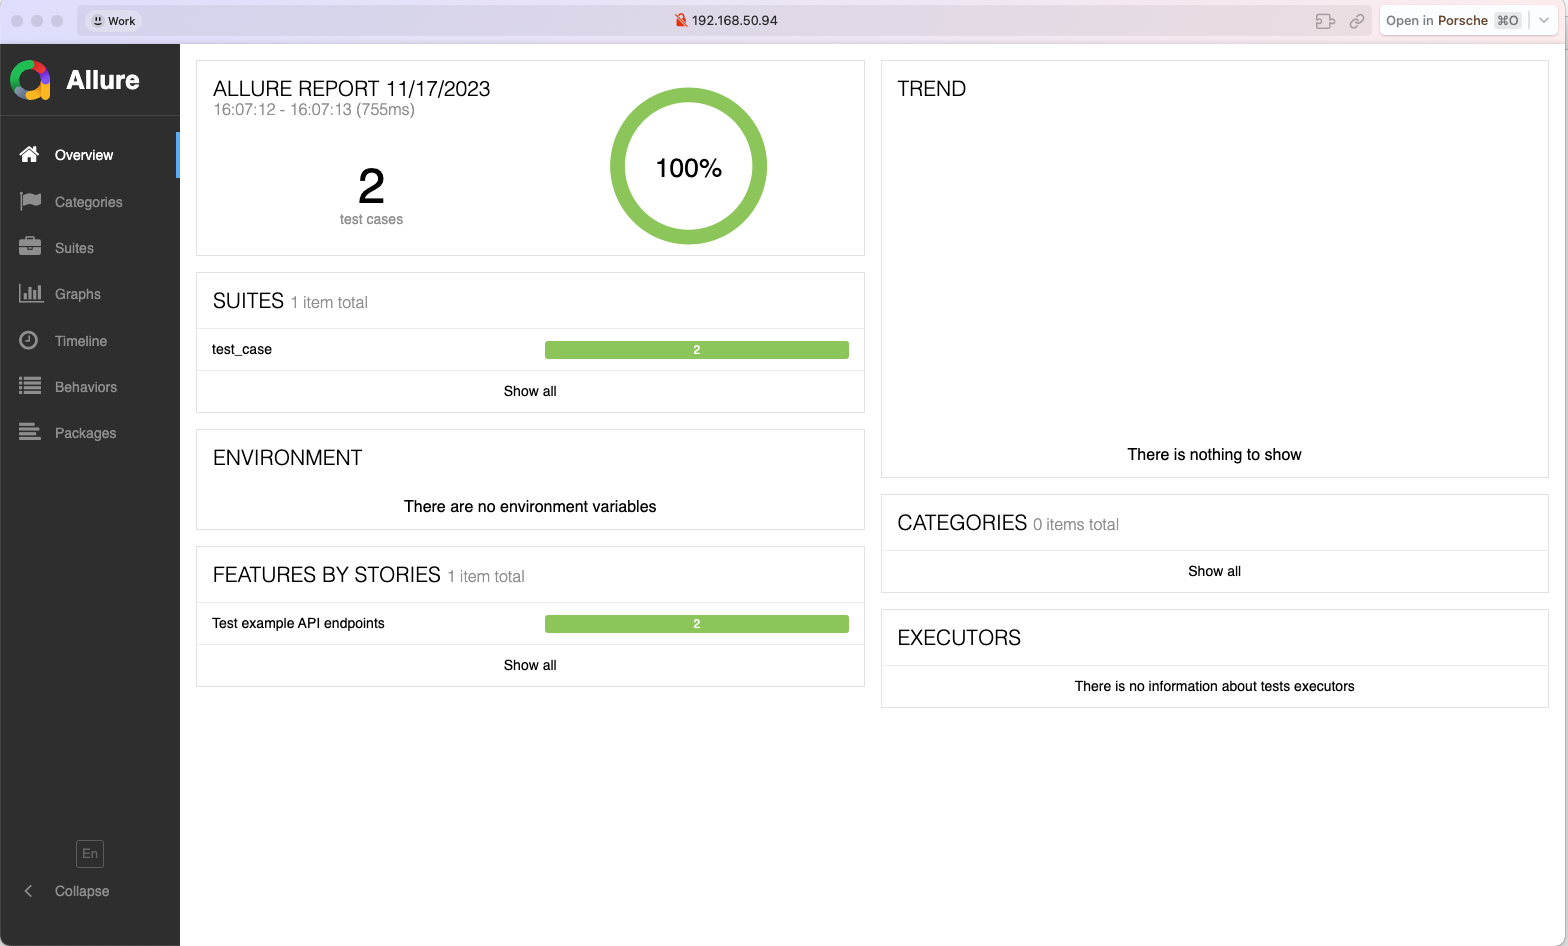
查看 allure 报告
输入以下命令来启动 allure 服务并浏览器中查看 allure 报告
allure serve allure-results
调整 CI/CD 流程来支持 allure 报告
以 github action 为例,其他 CI 工具类似
更新.github/workflows/pytest.yml 文件内容来上传 allure 报告到 GitHub
name: Pytest API Testing

on:
  push:
    branches: [ "main" ]
  pull_request:
    branches: [ "main" ]

permissions:
  contents: read

jobs:
  Pytes-API-Testing:

    runs-on: ubuntu-latest

    steps:
    - uses: actions/checkout@v3
    - name: Set up Python 3.10
      uses: actions/setup-python@v3
      with:
        python-version: "3.10"
    - name: Install dependencies
      run: |
        python -m pip install --upgrade pip
        pip install -r requirements.txt

    - name: Test with pytest
      run: |
        ENV=dev pytest

    - name: Archive Pytest allure test report
      uses: actions/upload-artifact@v3
      with:
        name: Pytest-allure-report
        path: allure-results

    - name: Upload Pytest allure report to GitHub
      uses: actions/upload-artifact@v3
      with:
        name: Pytest-allure-report
        path: allure-results
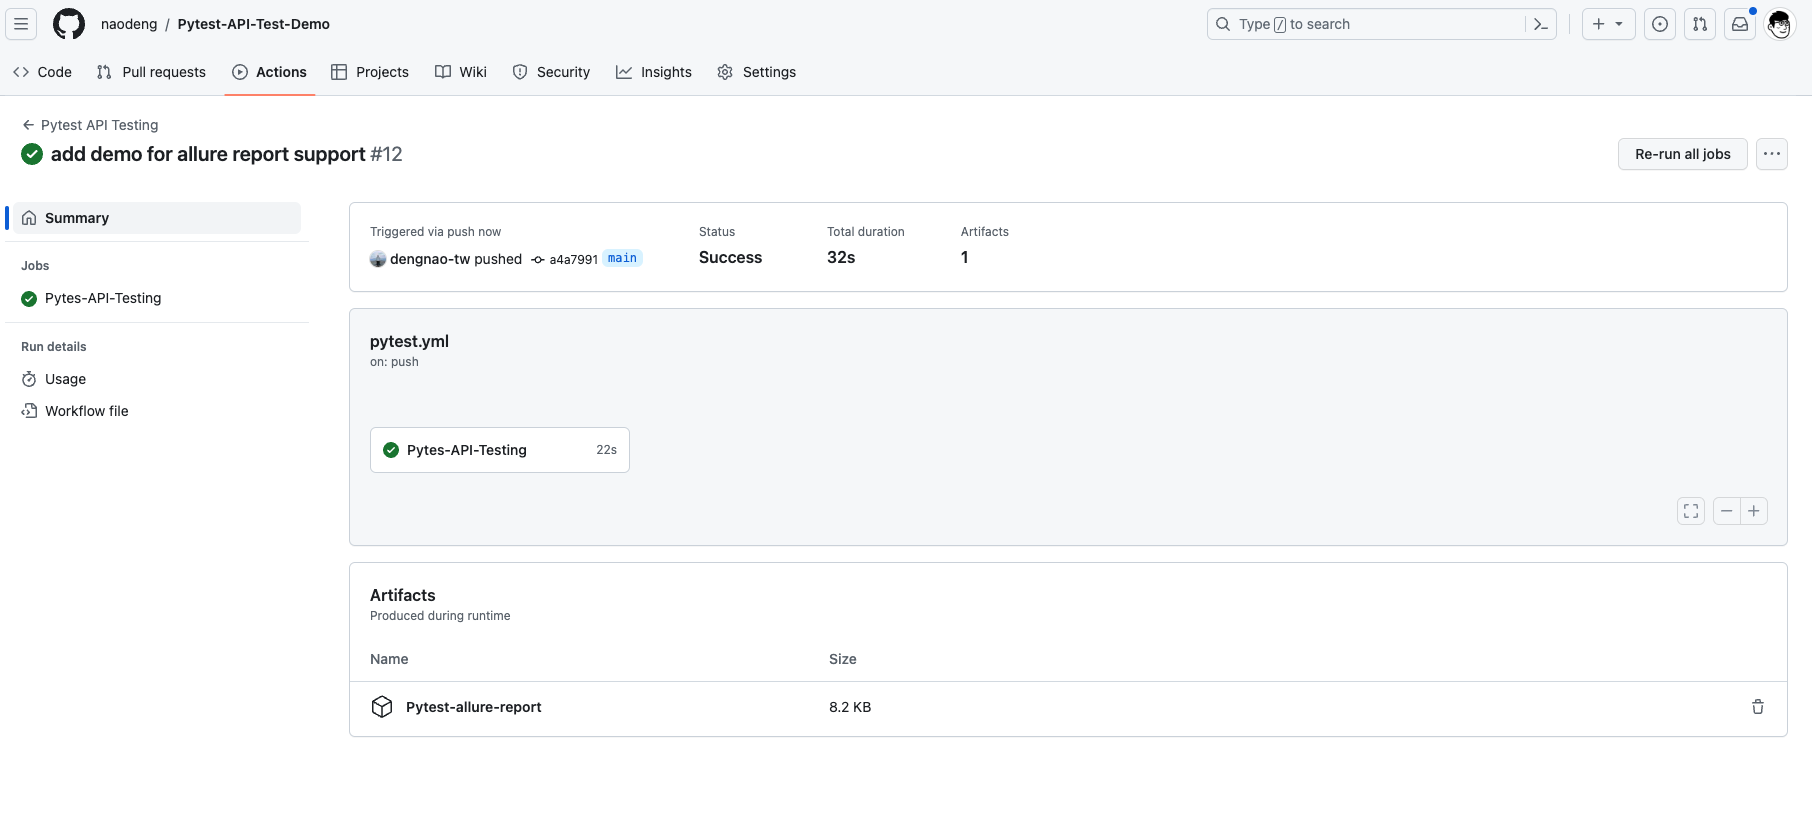
查看 github action allure 报告
在 GitHub 中,导航到你的仓库。单击上方的 Actions 选项卡,然后单击左侧的 Pytest API Testing 工作流。你应该会看到工作流正在运行,等待执行完成,就可以查看结果。
并发测试和分布式测试
在日常的接口自动化测试过程中,需要并发执行测试用例,以提高测试效率。
有时候也需要引入分布式测试,以便在多台机器上同时运行测试用例,也能更好的提升测试效率。
pytest-xdist 是 Pytest 的一个插件,能提供了一些对应的功能,主要用于支持并发测试和分布式测试。
pytest-xdist 功能介绍
- 并发执行测试:
- 使用
-n选项:pytest -n NUM允许并发运行测试,其中NUM是并发 worker 的数量。这可以加速测试执行,特别是在拥有多个 CPU 内核的计算机上。
bash
   pytest -n 3  # 启动 3 个并发 worker 执行测试
- 分布式测试:
- 使用
pytest --dist=loadscope:允许在多个节点上执行测试,通过分布式测试可以更快地完成测试运行。
bash
   pytest --dist=loadscope
- 使用
pytest --dist=each:每个节点运行一组测试,适用于分布式测试。
bash
   pytest --dist=each
- 参数化测试和并发:
- 使用
pytest.mark.run:结合pytest.mark.run标记,可以选择在不同的进程或节点上运行具有不同标记的测试。
python
   @pytest.mark.run(processes=2)
   def test_example():
       pass
- 分布式环境设置:
- 使用
pytest_configure_node:可以在节点上运行测试之前进行配置。
python
   def pytest_configure_node(node):
       node.slaveinput['my_option'] = 'some value'
- 使用
pytest_configure_node:可以在节点上运行测试之前进行配置。
python
   def pytest_configure_node(node):
       node.slaveinput['my_option'] = 'some value'
- 分布式测试环境销毁:
- 使用
pytest_configure_node:可以在节点上运行测试之后进行清理。
```python def pytest_configure_node(node): # 配置节点 yield
   # 在节点上运行测试后执行清理
   print("Cleaning up after test run on node %s" % node.gateway.id)
```
这些是 pytest-xdist 提供的一些功能,可以帮助您更有效地执行并发测试和分布式测试,以加速测试执行并提高效率。确保在使用前查阅 pytest-xdist 的文档以获取更详细的信息和用法示例。
安装 pytest-xdist 依赖
pip install pytest-xdist
并发运行测试用例示例
并发 3 个 worker 执行测试用例
分别运行以下命令,查看测试用例的执行时长
- 并发执行
pytest -n 3

- 默认串行执行
pytest
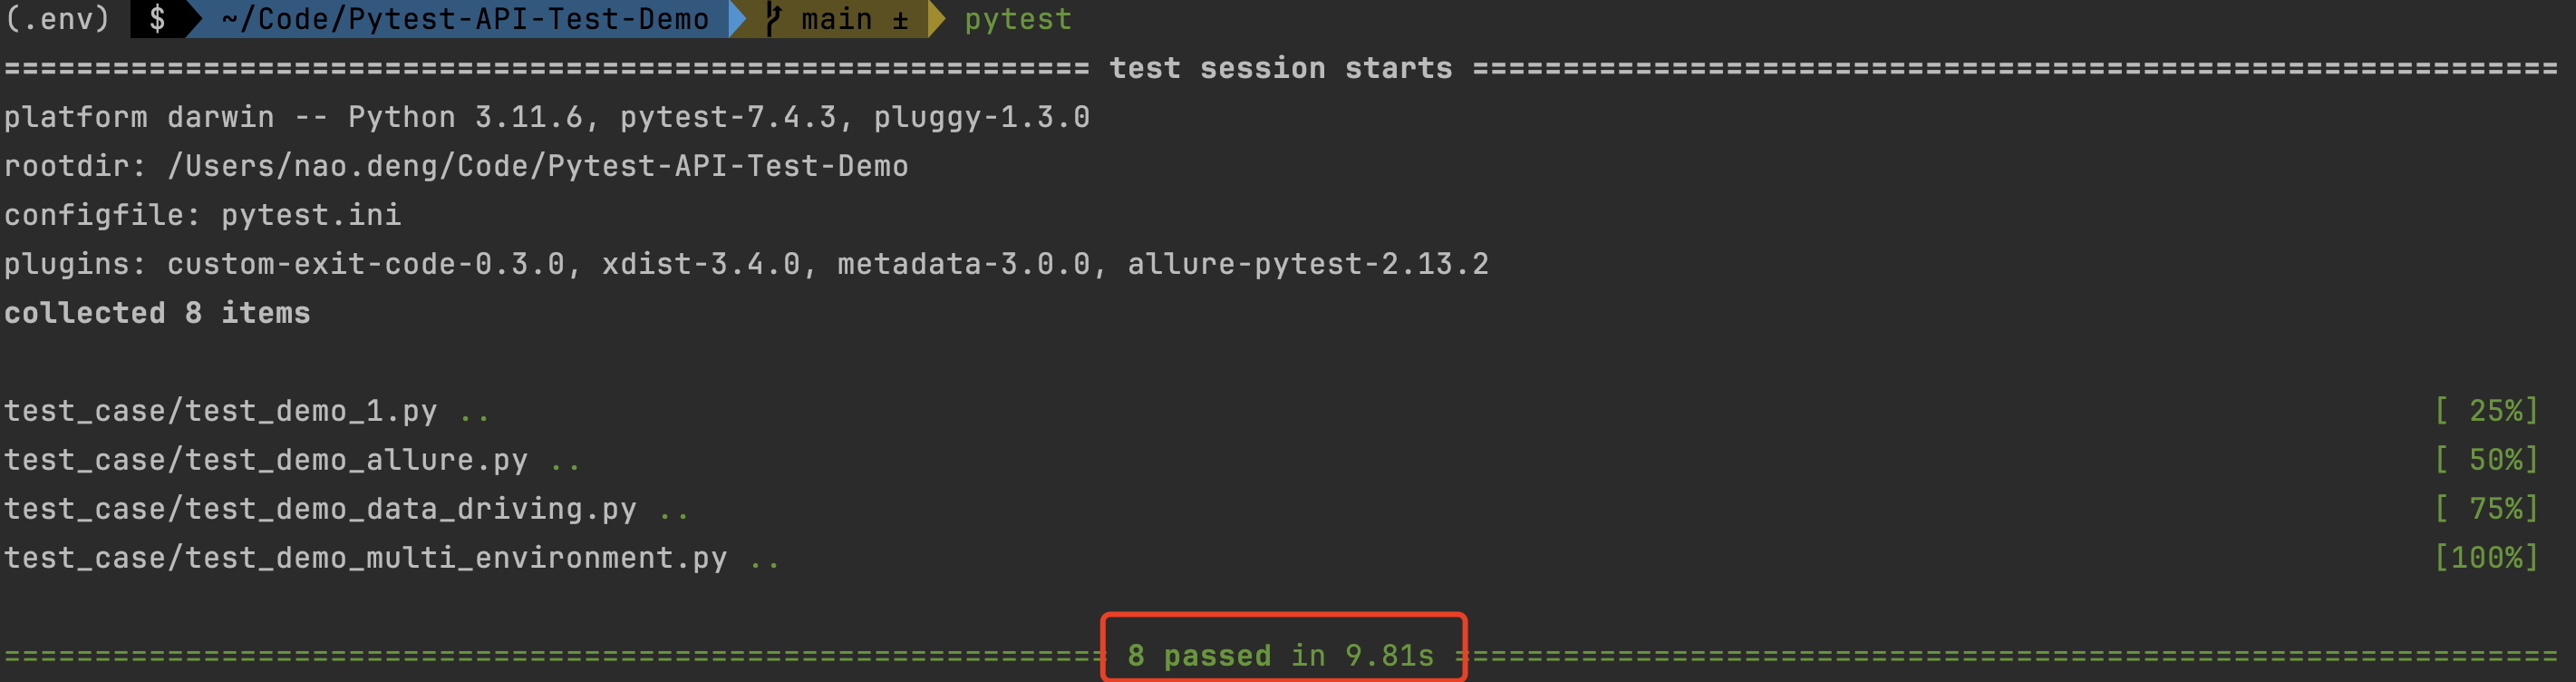
串行执行耗时 9.81s,而并发执行耗时 1.63s,可以看到并发执行测试用例可以大大提高测试效率。
并发 3 个 worker 执行测试用例,并且每个 worker 都会打印测试用例的进度
pytest -n 3 -v
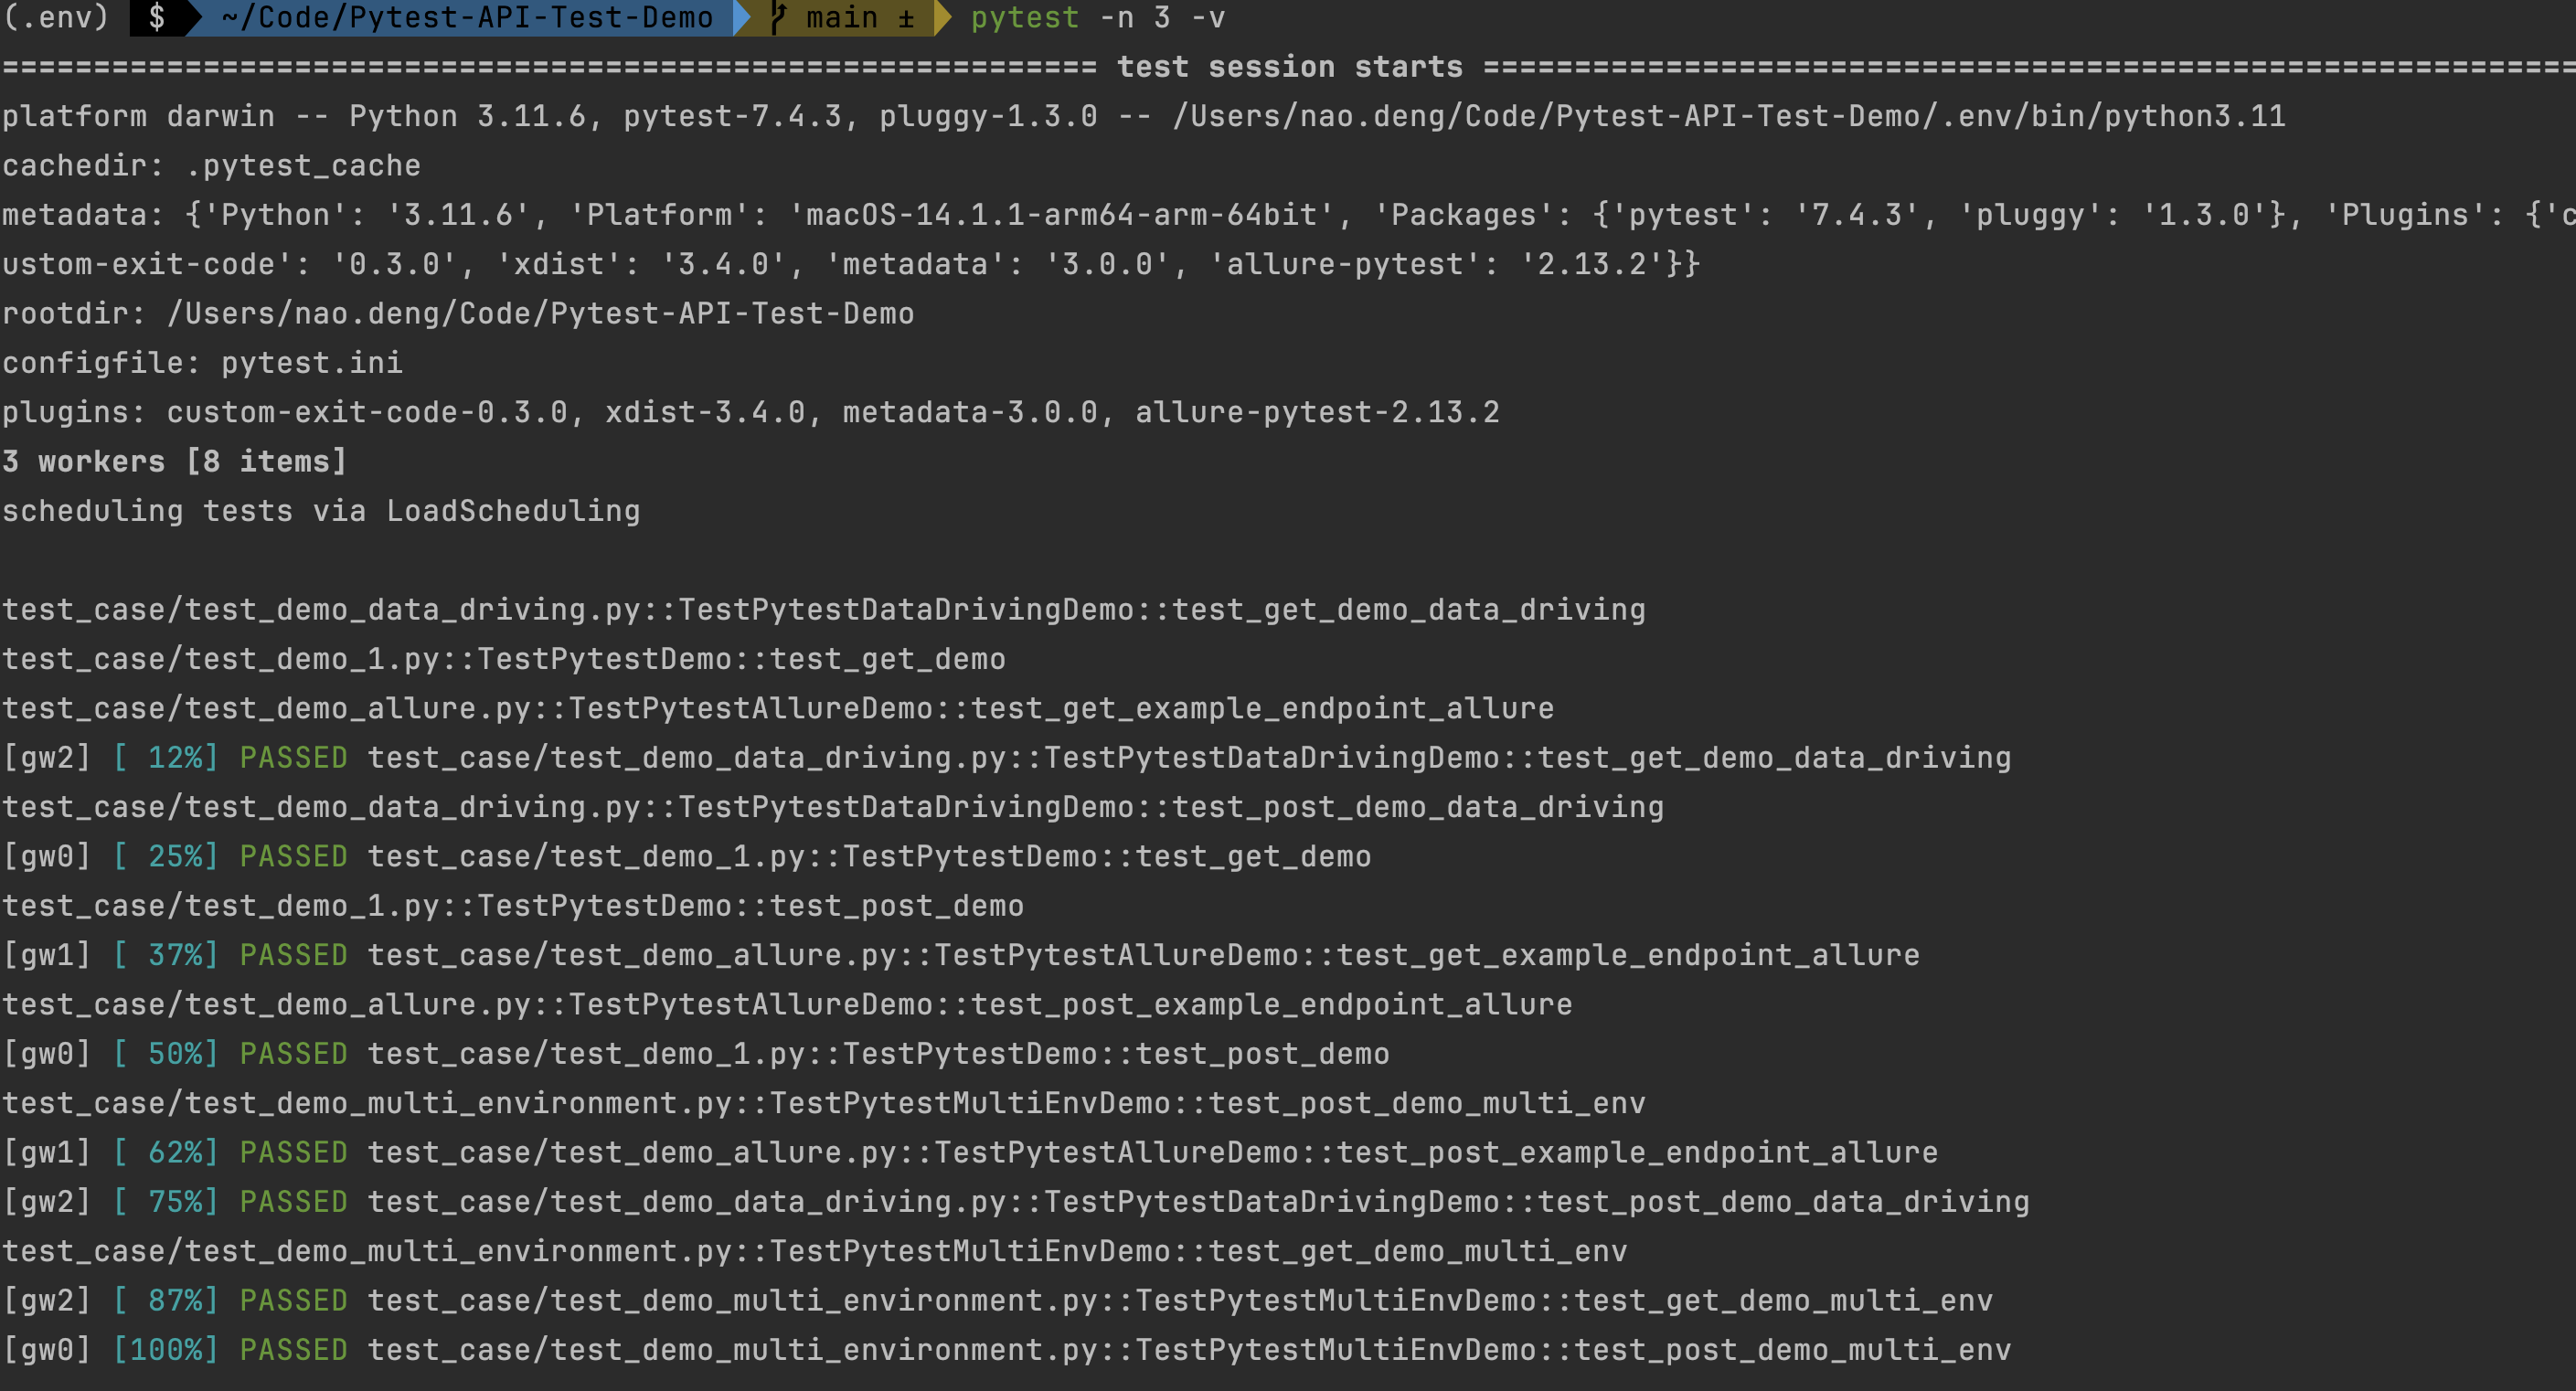
测试结果中会打印测试进度,可以更好的了解测试用例的执行情况。
分布式测试示例
分布式测试,每个节点运行一组测试
pytest --dist=each
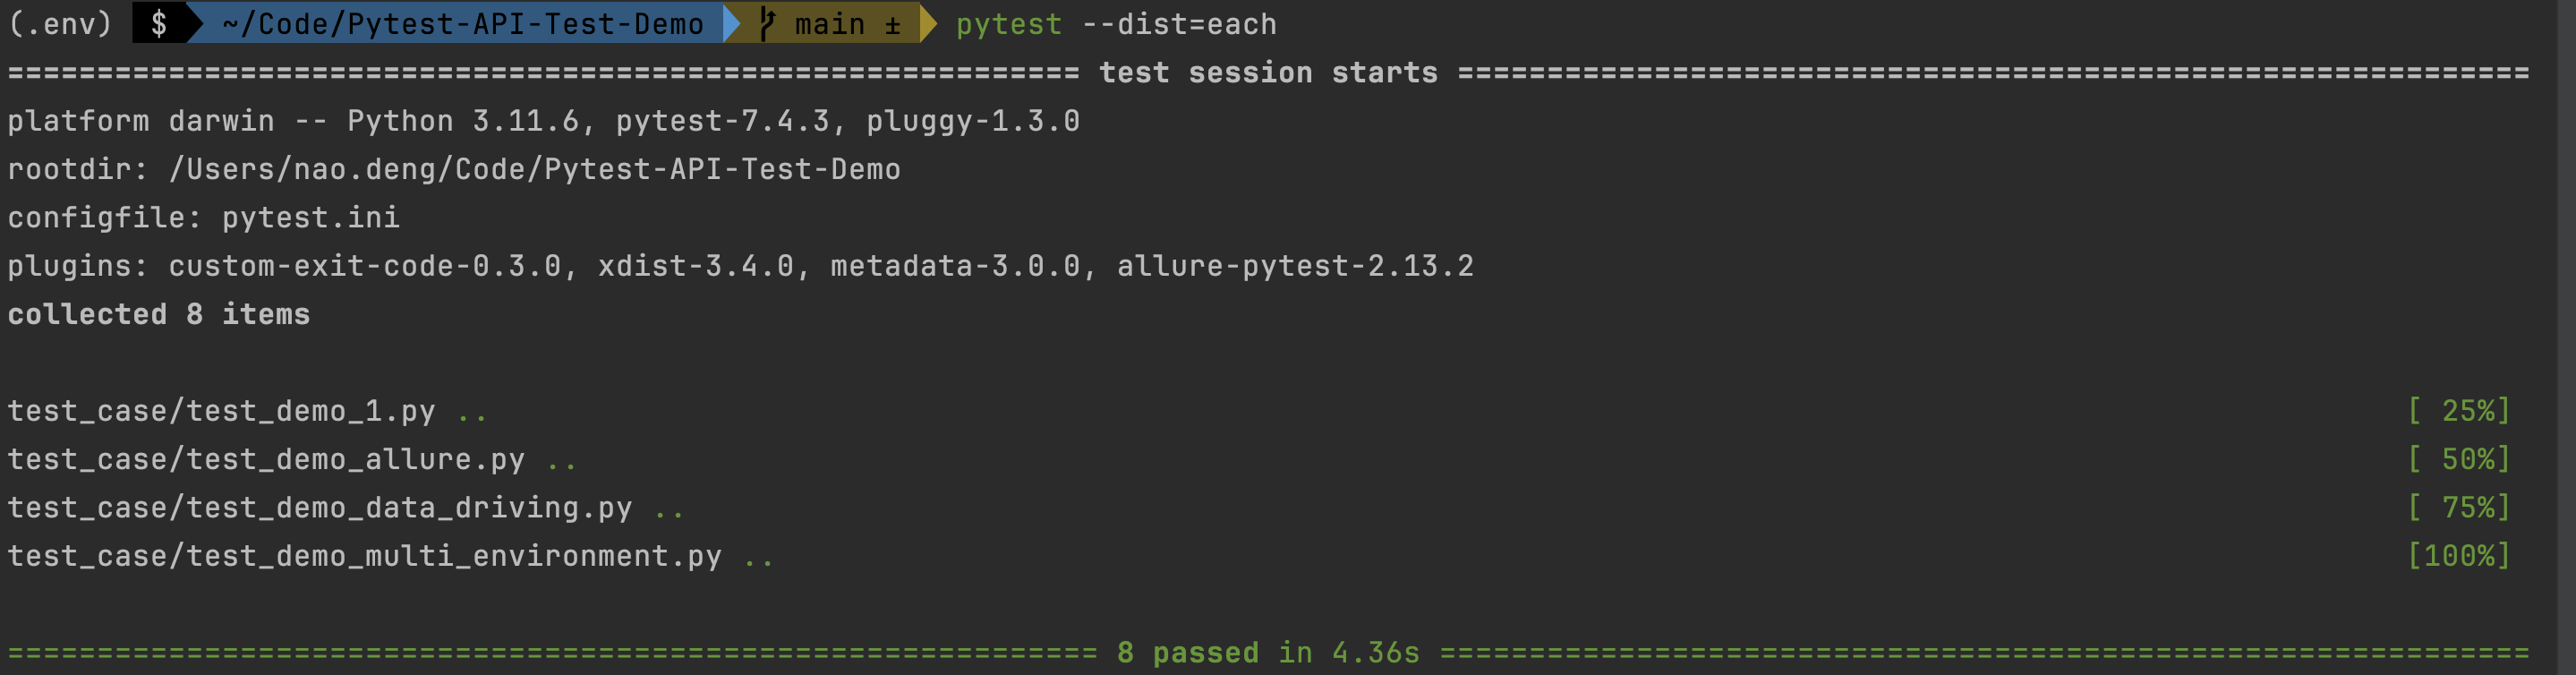
分布式测试可以更快地完成测试运行。
分布式测试,每个节点运行一组测试,并且每个 worker 都会打印测试用例的进度
pytest --dist=each -v
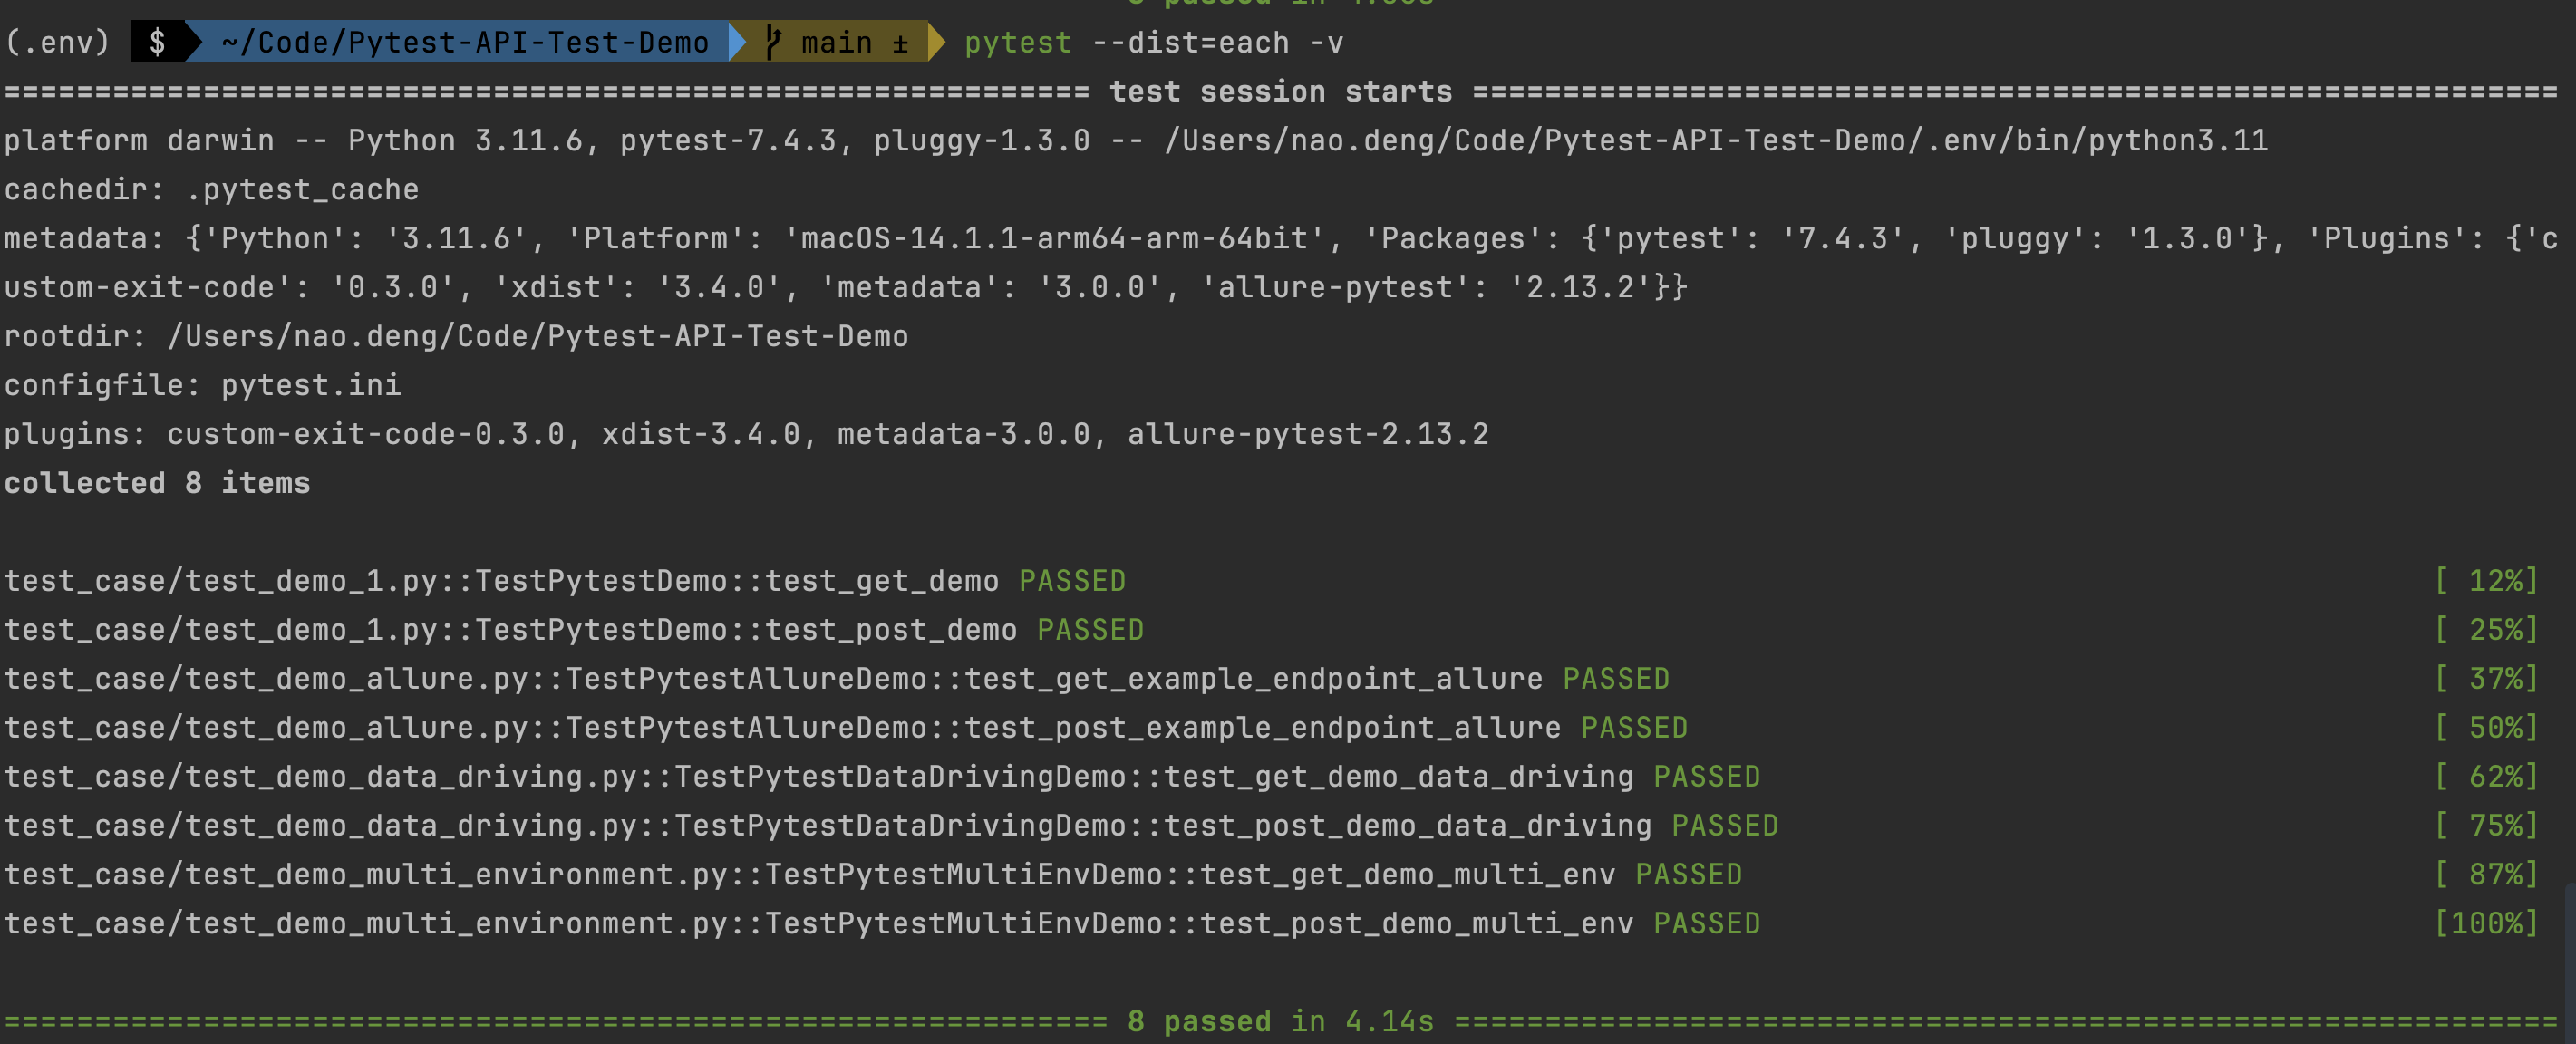
测试结果中会打印测试进度,可以更好的了解测试用例的执行情况。
分布式测试,每个节点运行一组测试,并且每个 worker 都会打印测试用例的进度,同时打印测试日志的输出
pytest --dist=each -v --capture=no
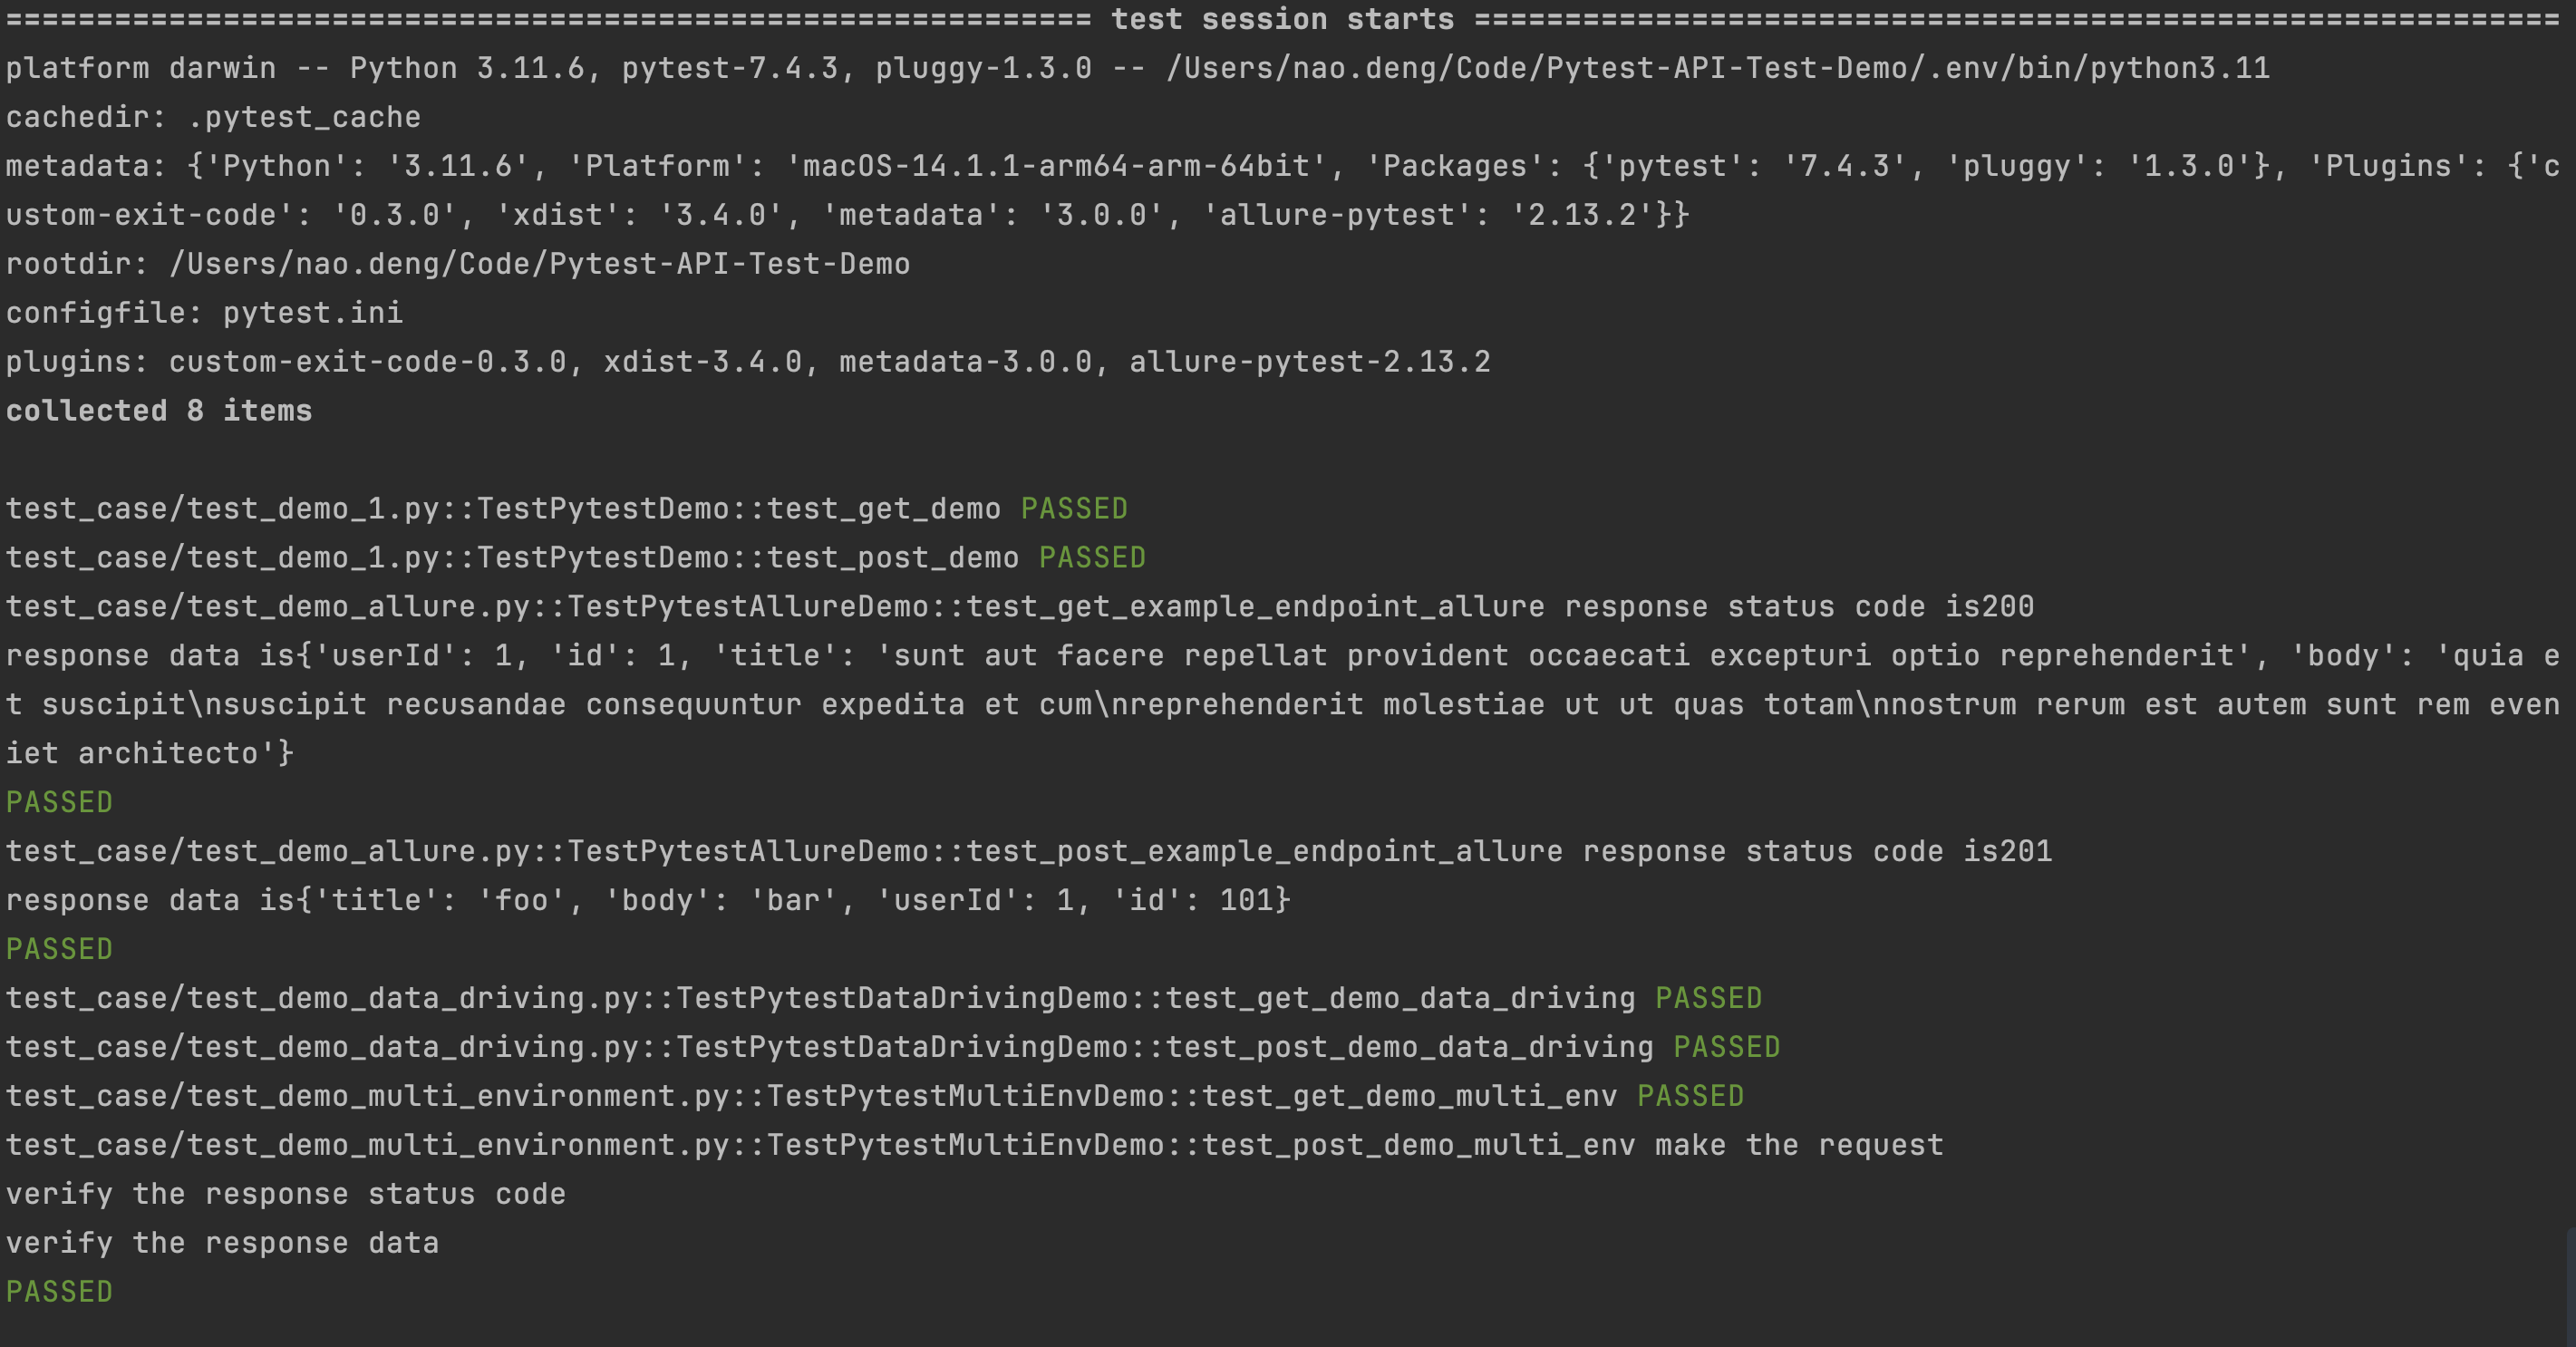
测试结果中会打印测试日志的输出,可以更好的了解测试用例的执行情况。
筛选用例执行
在日常的接口测试过程中,我们需要根据实际情况来选择性地执行测试用例,以提高测试效率。
一般我们使用 allure 测试报告的时候,可以使用 Allure 标签特性来进行筛选对应标签的的用例来执行测试,但 Pytest 框架不直接支持运行基于 Allure 标签的测试。所以可以使用 Pytest 标记来实现这一点。
Pytest 提供 marks标记功能可以用来标记不同类型的测试用例,然后进行筛选对应类型的测试用例进行执行。
大致流程为你可以用自定义标记(如 Regression/Smoke)来标记测试,然后使用 pytest 的 -m 选项只运行这些测试。
定义 Pytest 标记
编辑 pytest.ini 文件,添加以下内容:自定义标记的类型
- Regression:标记为回归测试的用例
- Smoke:标记为冒烟测试的用例
markers =
    Regression: marks tests as Regression
    Smoke: marks tests as Smoke
标记用例
操作步骤为:
- 引入 pytest
- 使用
@pytest.mark标记测试用例
为做区分,这里新建测试用例文件,文件名为 test_demo_filter.py
import pytest
import requests
import json


class TestPytestMultiEnvDemo:

    @pytest.mark.Regression  # mark the test case as regression
    def test_get_demo_filter(self, env_config, env_request_data, env_response_data):
        host = env_config["host"]
        get_api = env_config["getAPI"]
        get_api_response_data = env_response_data["getAPI"]
        # send request
        response = requests.get(host+get_api)
        # assert
        assert response.status_code == 200
        assert response.json() == get_api_response_data

    @pytest.mark.Smoke  # mark the test case as smoke
    def test_post_demo_filter(self, env_config, env_request_data, env_response_data):
        host = env_config["host"]
        post_api = env_config["postAPI"]
        post_api_request_data = env_request_data["postAPI"]
        print("make the request")
        post_api_response_data = env_response_data["postAPI"]
        # Your test code here
        response = requests.post(host + post_api, json=post_api_request_data)
        print("verify the response status code")
        assert response.status_code == 201
        print("verify the response data")
        assert response.json() == post_api_response_data
筛选测试用例执行
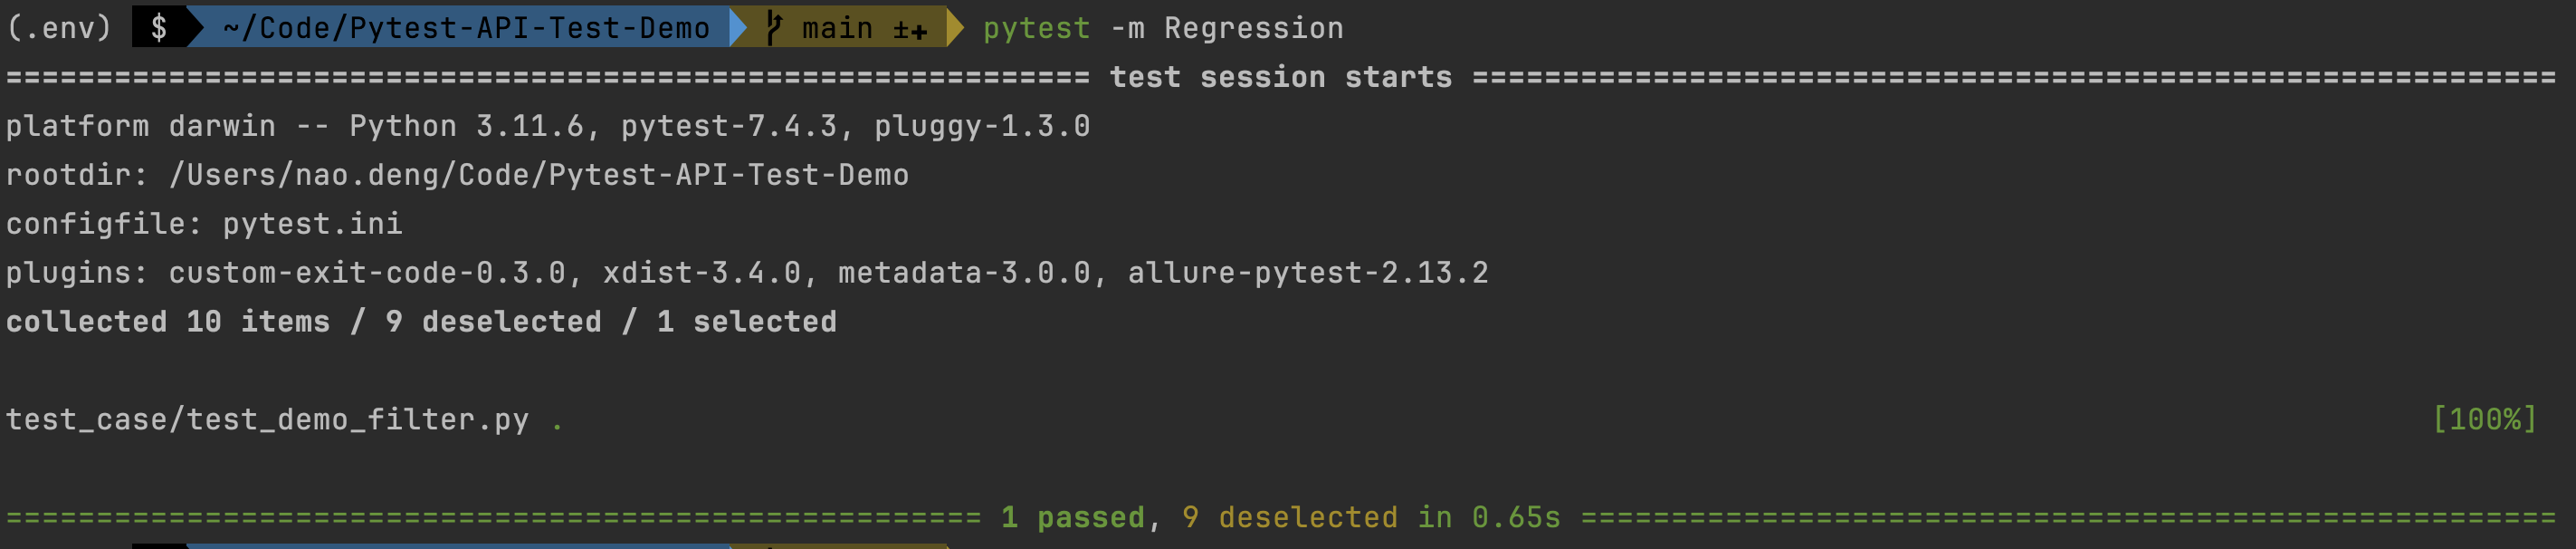
- 运行 Regression 标记的测试用例
pytest -m Regression
这条命令告诉 pytest 只运行标有 Regression 的测试。
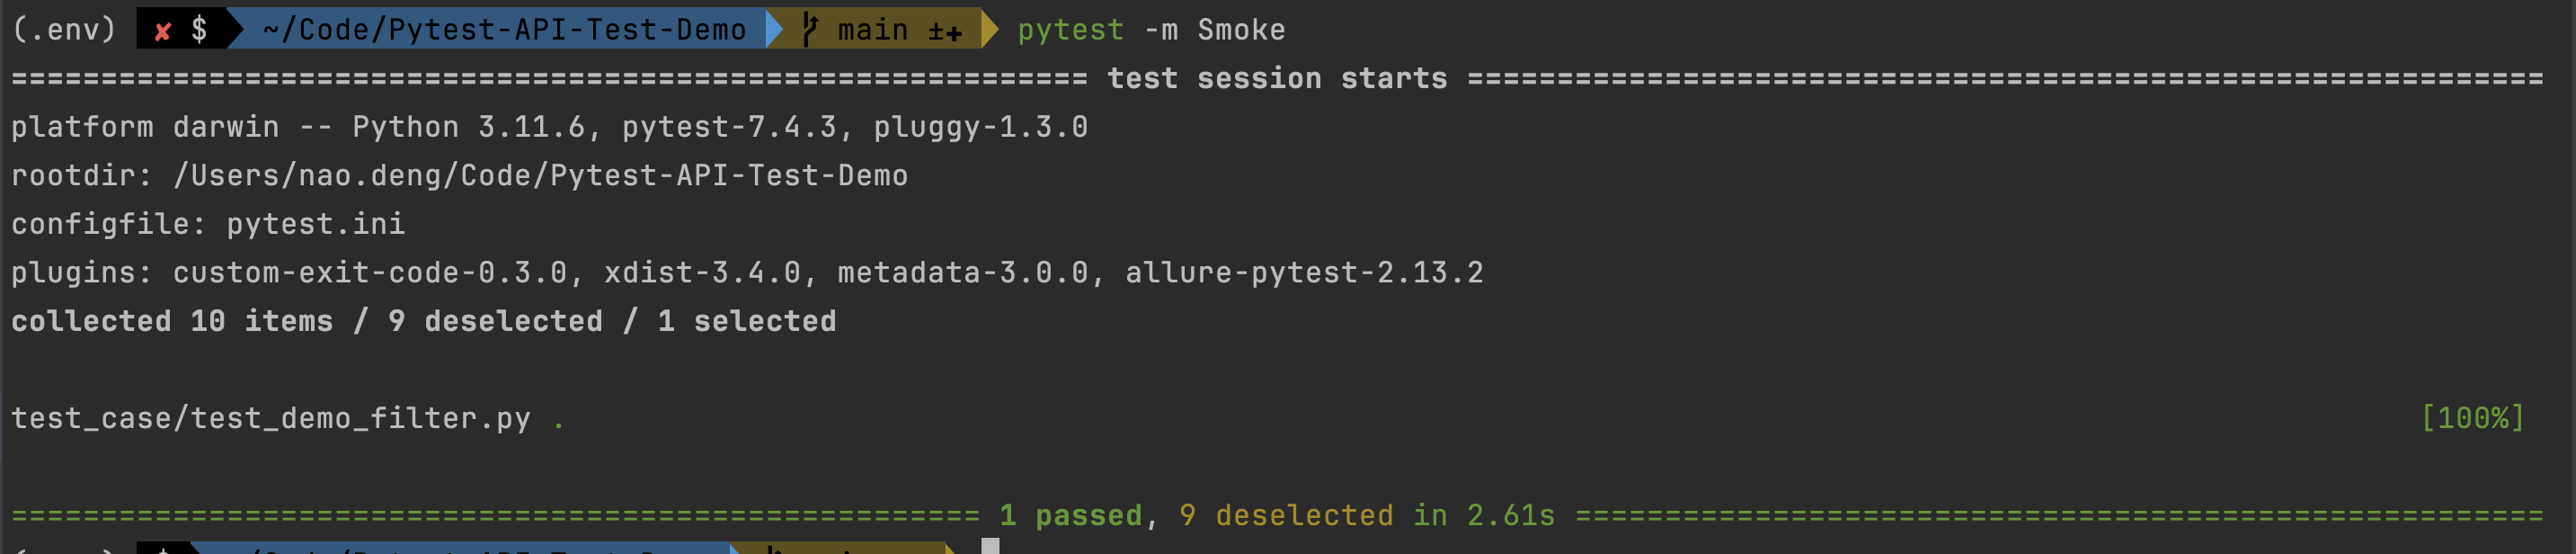
- 运行 Smoke 标记的测试用例
pytest -m Smoke
这条命令告诉 pytest 只运行标有 Smoke 的测试。