SuperTest
关于使用 SuperTest 进行 API 自动化测试的快速启动项目介绍文档。
介绍
本项目是一个使用 SuperTest 进行 API 自动化测试的快速启动项目教程,会使用 Jest 或 Mocha 作为测试框架进行 demo 演示。
下面会依次介绍 SuperTest、Jest 和 Mocha,让大家提前了解这些工具的基本使用。
SuperTest 介绍
"Supertest" 是一个用于测试 Node.js 应用程序的流行 JavaScript 库。它主要用于进行端到端(End-to-End)测试,也称为集成测试,以确保你的应用程序在不同组件之间正常运行。Supertest 通常与 Mocha、Jasmine 或 Jest 等测试框架一起使用,以编写和运行测试用例。
以下是 Supertest 的一些关键特点和用途:
- 发起 HTTP 请求:Supertest 允许你轻松地模拟 HTTP 请求,例如 GET、POST、PUT、DELETE 等,以测试你的应用程序的路由和端点。
- 链式语法:Supertest 提供了一种链式语法,使你能够在单个测试用例中构建和执行多个请求,这有助于模拟用户在应用程序中的不同操作。
- 断言和期望:你可以使用 Supertest 结合断言库(如 Chai)来检查响应的内容、状态码、头信息等,以确保应用程序的期望行为。
- 身份验证测试:Supertest 可以用于测试需要身份验证的端点,以确保用户登录和授权功能正常。
- 异步支持:Supertest 可以处理异步操作,例如等待响应返回后执行进一步的测试代码。
- 方便的集成:Supertest 可以轻松与不同的 Node.js 框架(如 Express、Koa、Hapi 等)一起使用,因此你可以测试各种类型的应用程序。
使用 Supertest 可以帮助你验证你的应用程序是否按预期工作,以及在应用程序发生更改时快速捕获潜在的问题。通常,你需要在项目中安装 Supertest 和测试框架,然后编写测试用例来模拟不同的请求和检查响应。这有助于提高代码质量和可维护性,确保你的应用程序在不断演化的过程中保持稳定性。
官方文档:https://github.com/ladjs/supertest
备注:Supertest 不止可以用来做 API 测试,也可以用来做单元测试和集成测试
代码示例:
// 导入 supertest
const request = require('supertest');

request({URL}) // 请求 (url) 或 请求 (app)
.get() or .put() or.post() // http method
.set() // http 选项
.send() //  请求的 body
.expect() //  断言
.end() // 结束请求
Jest 介绍
Jest 是一个流行的 JavaScript 测试框架,用于编写和运行 JavaScript 应用程序的单元测试、集成测试和端到端测试。它的目标是提供简单、快速和易于使用的测试工具,适用于各种 JavaScript 应用程序,包括前端和后端应用程序。
以下是 Jest 的一些关键特点和用途:
- 内置断言库:Jest 包括一个强大的断言库,使你能够轻松地编写断言,以验证代码的行为是否符合预期。
- 自动模拟:Jest 自动创建模拟(mocks),帮助你模拟函数、模块和外部依赖,从而让测试更加简单和可控。
- 快速和并行:Jest 通过智能地选择要运行的测试以及并行执行测试,可以快速地运行大量测试用例,从而节省时间。
- 全面的测试套件:Jest 支持单元测试、集成测试和端到端测试,并可以测试 JavaScript、TypeScript、React、Vue、Node.js 等各种应用程序类型。
- 快照测试:Jest 具有快照测试功能,可用于检查 UI 组件的渲染是否与之前的快照匹配,从而捕获 UI 变化。
- 自动监视模式:Jest 具有一个监视模式,可在代码更改时自动重新运行相关测试,从而支持开发人员进行持续测试。
- 丰富的生态系统:Jest 有丰富的插件和扩展,可用于扩展其功能,如覆盖率报告、测试报告和其他工具的集成。
- 社区支持:Jest 是一个流行的测试框架,拥有庞大的社区,提供了大量的文档、教程和支持资源。
Jest 通常与其他工具如 Babel(用于转译 JavaScript)、Enzyme(用于 React 组件测试)、Supertest(用于 API 测试)等一起使用,以实现全面的测试覆盖和确保代码质量。无论你是在编写前端代码还是后端代码,Jest 都是一个强大的测试工具,可以帮助你捕获潜在的问题,提高代码质量和可维护性。
官方文档:https://jestjs.io/docs/zh-Hans/getting-started
代码示例:
// 导入 jest
const jest = require('jest');

describe(): // 测试场景

it(): // 测试用例,it() 在 describe() 里面

before(): // 这个动作在所有测试用例之前执行

after(): // 这个动作在所有测试用例之后执行
Mocha 介绍
Mocha 是一个流行的 JavaScript 测试框架,用于编写和运行 JavaScript 应用程序的各种测试,包括单元测试、集成测试和端到端测试。Mocha 提供了灵活性和可扩展性,使开发人员能够轻松地定制测试套件以满足其项目的需求。
以下是 Mocha 的一些关键特点和用途:
- 多种测试风格:Mocha 支持多种测试风格,包括 BDD(行为驱动开发)和 TDD(测试驱动开发)。这使开发人员可以根据自己的偏好编写测试用例。
- 丰富的断言库:Mocha 本身并不包括断言库,但它可以与多种断言库(如 Chai、Should.js、Expect.js 等)结合使用,使你能够使用喜欢的断言风格来编写测试。
- 异步测试:Mocha 内置支持异步测试,允许你测试异步代码、Promise、回调函数等,确保代码在异步场景下的正确性。
- 并行测试:Mocha 可以并行运行测试套件中的测试用例,提高测试执行效率。
- 丰富的插件和扩展:Mocha 有丰富的插件生态系统,可以用于扩展其功能,如测试覆盖率报告、测试报告生成等。
- 易于集成:Mocha 可以与各种断言库、测试运行器(如 Karma 和 Jest)、浏览器(使用浏览器测试运行器)等一起使用,以适应不同的项目和测试需求。
- 命令行界面:Mocha 提供了一个易于使用的命令行界面,用于运行测试套件,生成报告以及其他测试相关操作。
- 持续集成支持:Mocha 可以轻松集成到持续集成(CI)工具中,如 Jenkins、Travis CI、CircleCI 等,以确保代码在每次提交后都能得到测试。
Mocha 的灵活性和可扩展性使其成为一个受欢迎的测试框架,适用于各种 JavaScript 项目,包括前端和后端应用程序。开发人员可以根据自己的需求和喜好选择测试工具、断言库和其他扩展,以满足项目的要求。无论你是在编写浏览器端代码还是服务器端代码,Mocha 都是一个强大的测试工具,可帮助你确保代码质量和可靠性。
官方文档:https://mochajs.org/
代码示例:
// 导入 mocha
const mocha = require('mocha');

describe(): // 测试场景

it(): // 测试用例,it() 在 describe() 里面

before(): // 这个动作在所有测试用例之前执行

after(): // 这个动作在所有测试用例之后执行
CHAI 简介
Chai 是一个 JavaScript 断言库,用于编写和运行测试用例时进行断言和期望值的验证。它是一个流行的测试工具,通常与测试框架(如 Mocha、Jest 等)一起使用,以帮助开发者编写和执行各种类型的测试,包括单元测试和集成测试。
以下是一些 Chai 的主要特点和用途:
- 可读性强的断言语法:Chai 提供了一个易于阅读和编写的断言语法,使测试用例更易于理解。它支持自然语言的断言风格,例如 expect(foo).to.be.a('string') 或 expect(bar).to.equal(42)。
- 多种断言风格:Chai 提供了多种不同的断言风格,以适应不同开发者的偏好。主要的风格包括 BDD(Behavior-Driven Development)风格、TDD(Test-Driven Development)风格和 assert 风格。
- 插件扩展:Chai 可以通过插件进行扩展,以支持更多的断言类型和功能。这使得 Chai 可以满足各种测试需求,包括异步测试、HTTP 请求测试等。
- 易于集成:Chai 可以轻松集成到各种测试框架中,例如 Mocha、Jest、Jasmine 等。这使得它成为编写测试用例的强大工具。
- 支持链式断言:Chai 允许你对多个断言进行链式调用,以便更容易进行复杂的测试和验证。
代码示例:
// 导入 chai
const chai = require('chai');
const expect = chai.expect;

// demo 断言
.expect(<actual result>).to.{assert}(<expected result>) // 断言目标严格等于值

.expect(‘hello').to.equal('hello'); // 断言目标严格等于值

.expect({ foo: 'bar' }).to.not.equal({ foo: 'bar' }); // 断言目标值不严格等于值。

.expect('foobar').to.contain('foo'); // 断言目标字符串包含给定的子字符串。

.expect(foo).to.exist; // 断言目标既不是 null 也不是未定义。

.expect(5).to.be.at.most(5); // 断言目标值小于或等于值。
项目依赖
需提前安装好以下环境
- [x] nodejs, demo 版本为 v21.1.0
项目文件结构
以下是一个 SuperTest 接口自动化测试项目的文件结构,其中包含了测试配置文件、测试用例文件、测试工具文件和测试报告文件。可进行参考。
SuperTest-Jest-demo
├── README.md
├── package.json
├── package-lock.json
├── Config // 测试配置文件
│   └── config.js
├── Specs // 测试用例文件
│   └── test.spec.js
├── Utils // 测试工具文件
│   └── utils.js
├── Report // 测试报告文件
│   └── report.html
├── .gitignore
└── node_modules // 项目依赖
从 0 到 1 搭建 SuperTest 接口自动化测试项目
下面会从 0 到 1 搭建一个 SuperTest 接口自动化测试项目,会使用 Jest 或 Mocha 作为测试框架进行 demo 演示。
Mocha 版本
可参考 demo 项目:https://github.com/Automation-Test-Starter/SuperTest-Mocha-demo
新建项目文件夹
mkdir SuperTest-Mocha-demo
项目初始化
// 进入项目文件夹下
cd SuperTest-Mocha-demo
// nodejs 项目初始化
npm init -y
安装依赖
// 安装 supertest
npm install supertest --save-dev
// 安装 mocha测试框架
npm install mocha --save-dev
// 安装 chai断言库
npm install chai --save-dev
新建测试文件及测试用例
// 新建测试文件夹
mkdir Specs
// 新建测试用例文件
cd Specs
touch test.spec.js
编写测试用例
测试接口可参考项目中 demoAPI.md 文件
// Test: test.spec.js
const request = require('supertest'); // import supertest
const chai = require('chai'); // import chai
const expect = require('chai').expect; // import expect

// Test Suite
describe('Verify that the Get and POST API returns correctly', function(){
        // Test case 1
        it('Verify that the GET API returns correctly', function(done){
            request('https://jsonplaceholder.typicode.com') // Test endpoint
                .get('/posts/1') // API endpoint
                .expect(200) // expected response status code
                .expect(function (res) {
                    expect(res.body.id).to.equal(1  )
                    expect(res.body.userId).to.equal(1)
                    expect(res.body.title).to.equal("sunt aut facere repellat provident occaecati excepturi optio reprehenderit")
                    expect(res.body.body).to.equal("quia et suscipit\nsuscipit recusandae consequuntur expedita et cum\nreprehenderit molestiae ut ut quas totam\nnostrum rerum est autem sunt rem eveniet architecto")
                }) // expected response body
                .end(done) // end the test case

        });
        // Test case 2
        it('Verify that the POST API returns correctly', function(done){
            request('https://jsonplaceholder.typicode.com') // Test endpoint
                .post('/posts') // API endpoint
                .send({
                    "title": "foo",
                    "body": "bar",
                    "userId": 1
                }) // request body
                .expect(201) // expected response status code
                .expect(function (res) {
                    expect(res.body.id).to.equal(101  )
                    expect(res.body.userId).to.equal(1)
                    expect(res.body.title).to.equal("foo")
                    expect(res.body.body).to.equal("bar")
                }) // expected response body
                .end(done) // end the test case
        });
});
配置 mocha 配置文件
- 新建配置文件
// 项目根目录下新建配置文件
touch .mocharc.js
- 更新配置文件
// mocha config
module.exports = {
    timeout: 5000, // 设置测试用例的默认超时时间(毫秒)
    spec: ['Specs/**/*.js'], // 指定测试文件的位置
};
调整测试脚本
在 package.json 文件中添加测试脚本
"scripts": {
    "test": "mocha"
  },
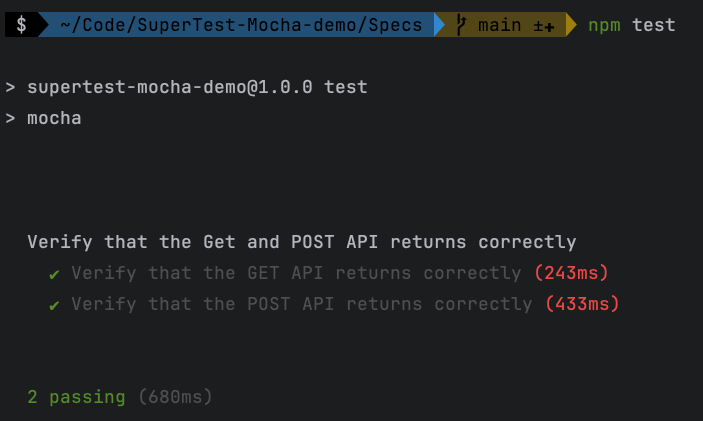
运行测试用例
// 运行测试用例
npm run test
测试报告
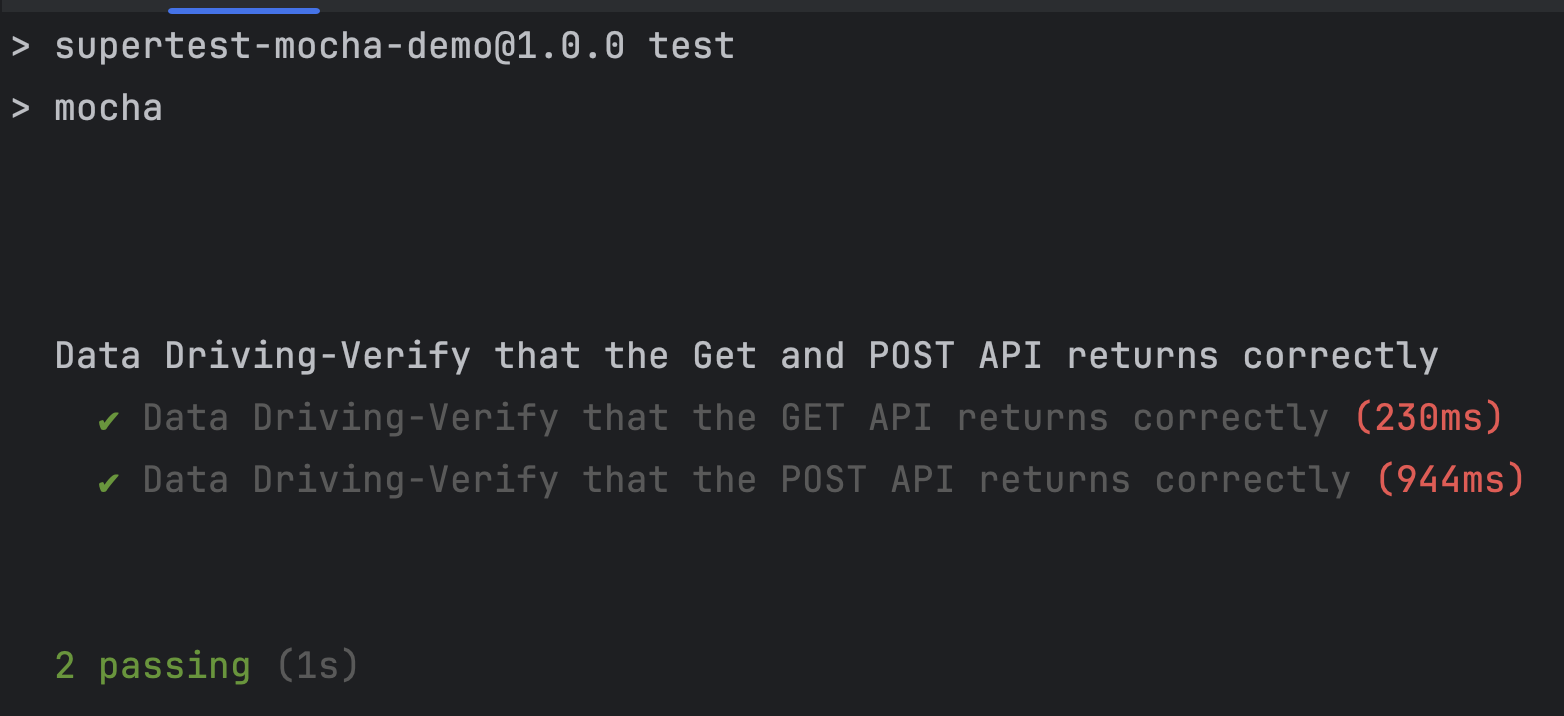
命令行测试报告
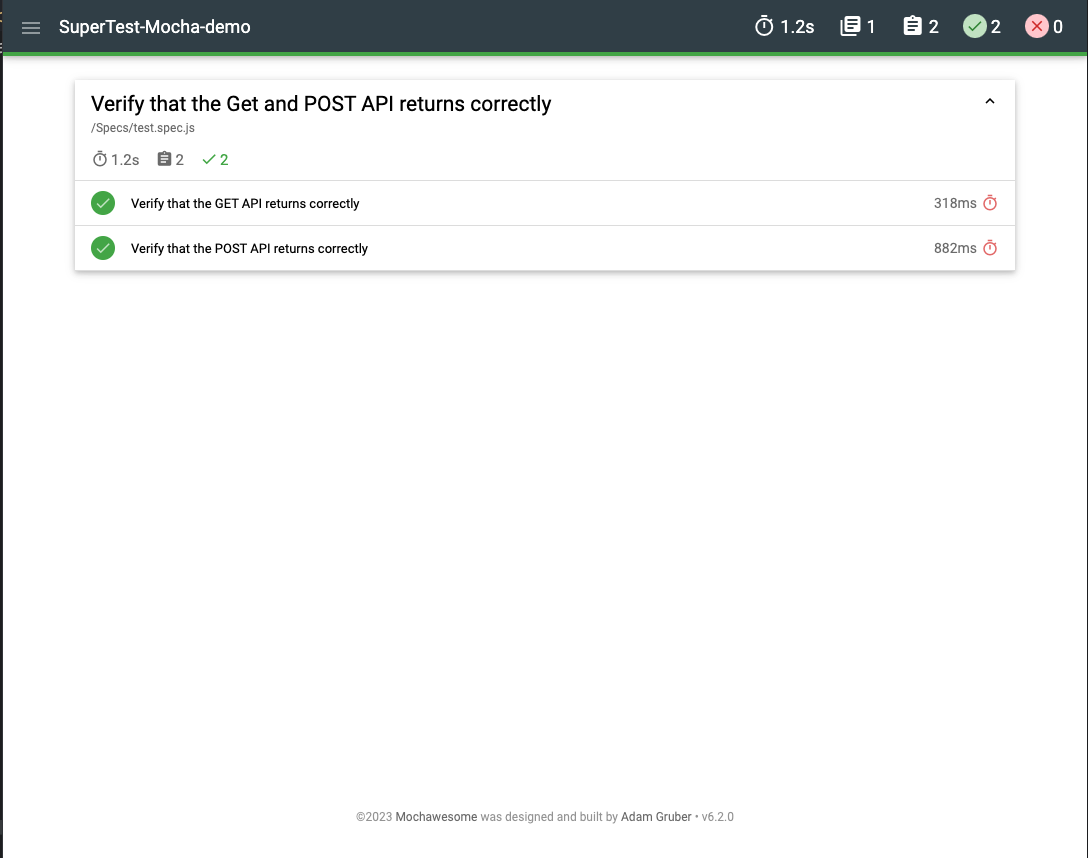
集成 mochawesome 测试报告
- 安装 mochawesome
npm install --save-dev mochawesome
- 更新 mocha 配置文件
可参考 demo 项目:https://github.com/Automation-Test-Starter/SuperTest-Mocha-demo
// mocha config
module.exports = {
    timeout: 5000, // 设置测试用例的默认超时时间(毫秒)
    reporter: 'mochawesome', // 使用 mochawesome 报告生成器
    'reporter-option': [
        'reportDir=Report', // 报告生成路径
        'reportFilename=[status]_[datetime]-[name]-report', //报告名称
        'html=true', // 生成 html 格式报告
        'json=false', // 不生成 json 格式报告
        'overwrite=false', // 不覆盖已经存在的报告
        'timestamp=longDate', // 给报告添加时间戳

    ], // 传递给报告生成器的参数
    spec: ['Specs/**/*.js'], // 指定测试文件的位置
};
- 运行测试用例
// 运行测试用例
npm run test
- 查看测试报告
测试报告文件夹:Report,点击使用浏览器打开最新 html 报告文件
Jest 版本
可参考 demo 项目:https://github.com/Automation-Test-Starter/SuperTest-Jest-demo
新建 Jest demo 项目文件夹
mkdir SuperTest-Jest-demo
Jest demo 项目初始化
// 进入项目文件夹下
cd SuperTest-Mocha-demo
// nodejs 项目初始化
npm init -y
Jest demo 安装依赖
// 安装 supertest
npm install supertest --save-dev
// 安装 Jest测试框架
npm install jest --save-dev
新建 Jest demo 项目的测试文件及测试用例
// 新建测试文件夹
mkdir Specs
// 新建测试用例文件
cd Specs
touch test.spec.js
编写 Jest demo 测试用例
测试接口可参考项目中 demoAPI.md 文件
const request = require('supertest');

// Test Suite
describe('Verify that the Get and POST API returns correctly', () => {
    // Test case 1
    it('Verify that the GET API returns correctly', async () => {
        const res = await request('https://jsonplaceholder.typicode.com') // Test endpoint
            .get('/posts/1') // API endpoint
            .send() // request body
            .expect(200); // use supertest's expect to verify that the status code is 200
        // user jest's expect to verify the response body
        expect(res.status).toBe(200); // Verify that the status code is 200
        expect(res.body.id).toEqual(1); // Verify that the id is 1
        expect(res.body.userId).toEqual(1); // Verify that the userId is 1
        expect(res.body.title).toEqual("sunt aut facere repellat provident occaecati excepturi optio reprehenderit");
        expect(res.body.body).toEqual("quia et suscipit\nsuscipit recusandae consequuntur expedita et cum\nreprehenderit molestiae ut ut quas totam\nnostrum rerum est autem sunt rem eveniet architecto");
    });

    // Test case 2
    it('Verify that the POST API returns correctly', async() =>{
        const res = await request('https://jsonplaceholder.typicode.com') // Test endpoint
            .post('/posts') // API endpoint
            .send({
                "title": "foo",
                "body": "bar",
                "userId": 1
            }) // request body
            .expect(201); // use supertest's expect to verify that the status code is 201
        // user jest's expect to verify the response body
        expect(res.statusCode).toBe(201);
        expect(res.body.id).toEqual(101);
        expect(res.body.userId).toEqual(1);
        expect(res.body.title).toEqual("foo");
        expect(res.body.body).toEqual("bar");
    });
});
配置 Jest 配置文件
- 新建配置文件
// 项目根目录下新建配置文件
touch jest.config.js
- 更新配置文件
// Desc: Jest configuration file
module.exports = {
    // 测试文件的匹配规则
    testMatch: ['**/Specs/*.spec.js'],
};
调整 Jest 测试脚本
在 package.json 文件中添加测试脚本
"scripts": {
    "test": "jest"
  },
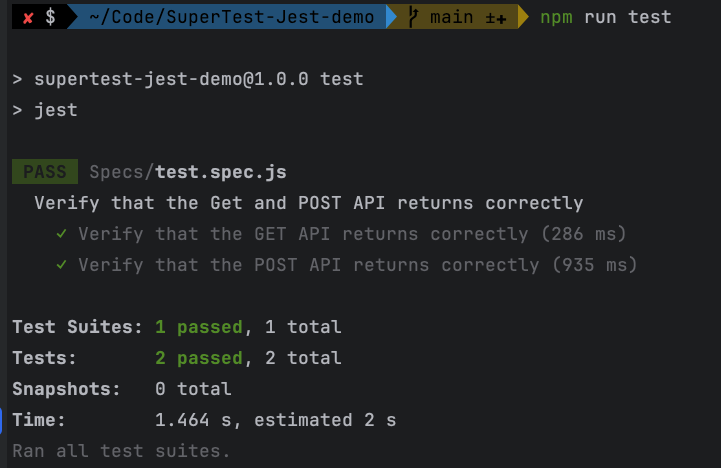
运行 Jest 测试用例
// 运行测试用例
npm run test
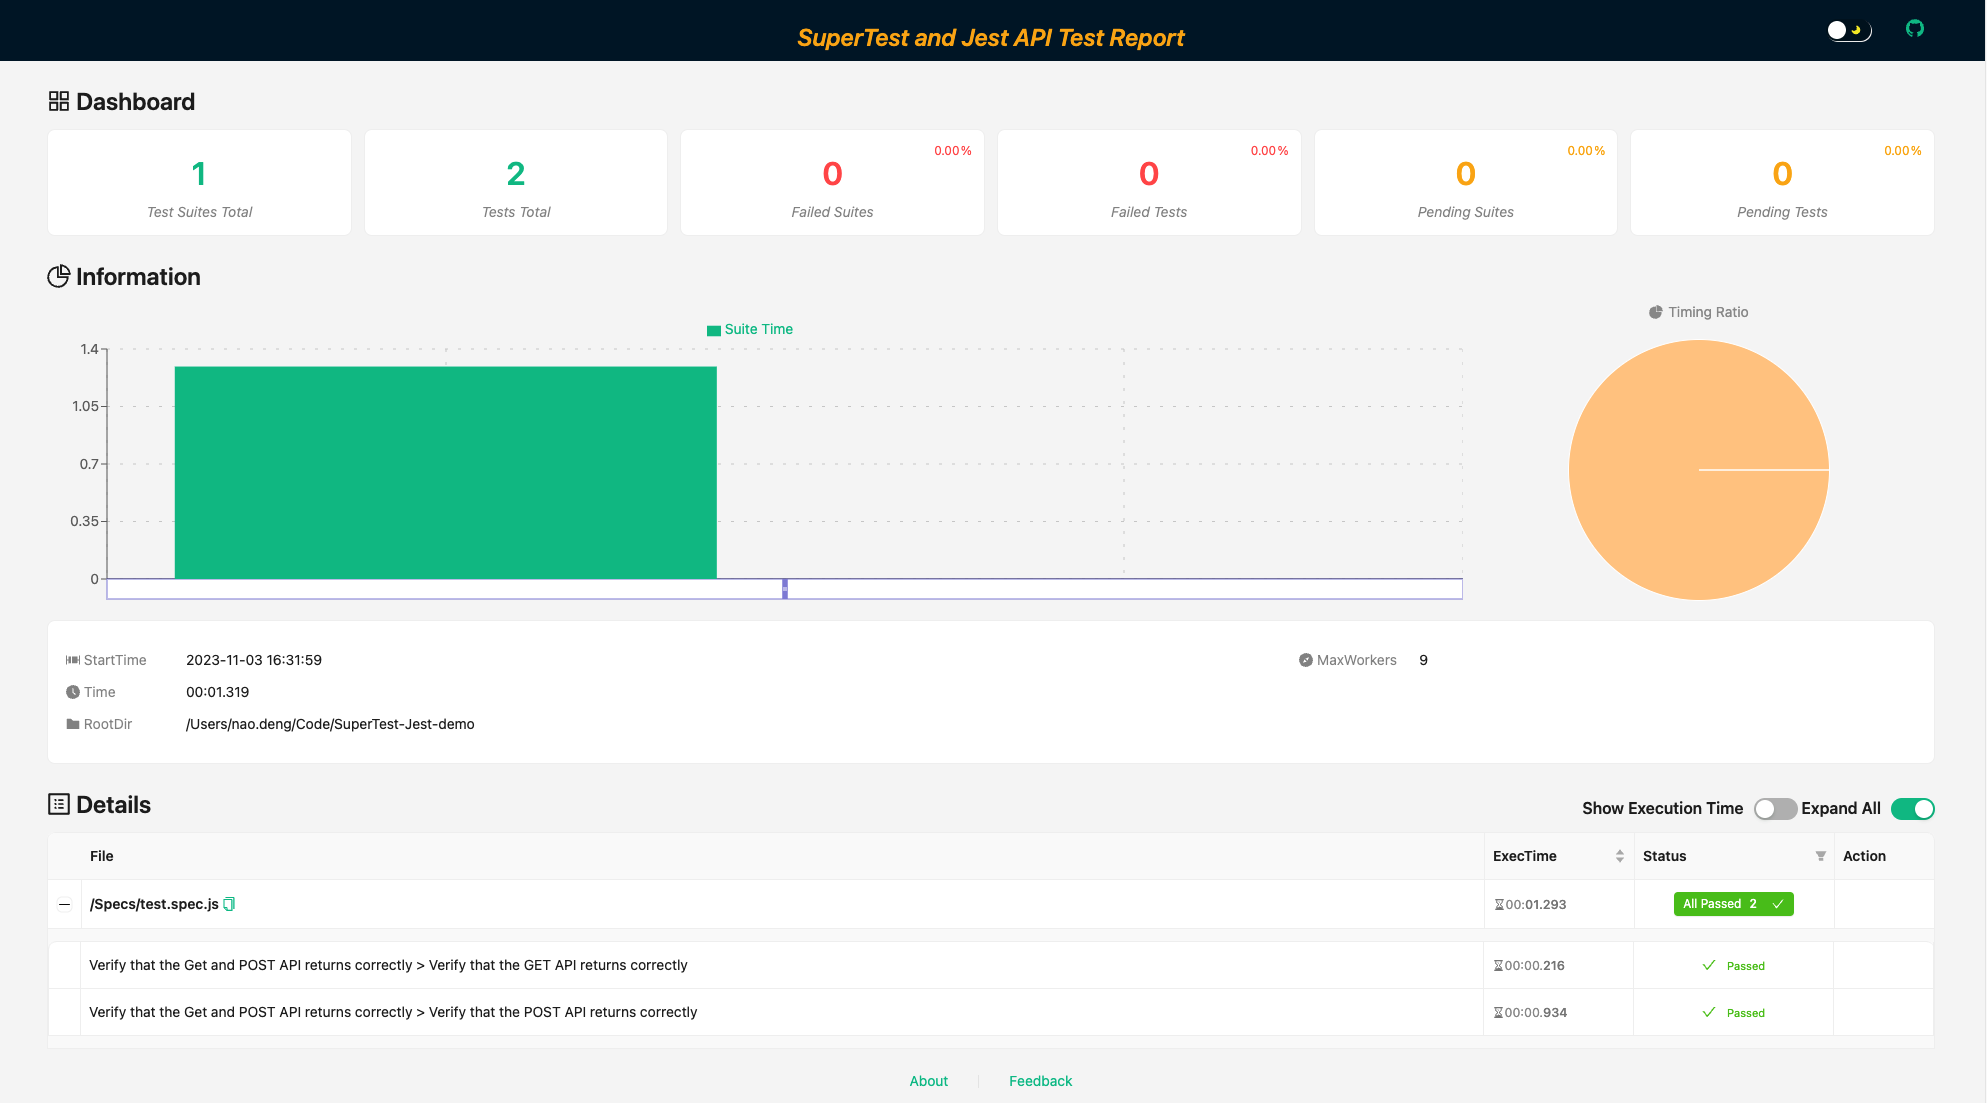
Jest 测试报告
Jest 命令行测试报告
集成 jest-html-reporters 测试报告
- 安装 jest-html-reporters
npm install --save-dev jest-html-reporters
- 更新 Jest 配置文件
可参考 demo 项目:https://github.com/Automation-Test-Starter/SuperTest-Jest-demo
// Desc: Jest configuration file
module.exports = {
    // 测试文件的匹配规则
    testMatch: ['**/Specs/*.spec.js'],
    // 测试报告生成器
    reporters: [
        'default',
        [
            'jest-html-reporters',
            {
                publicPath: './Report', // 报告生成路径
                filename: 'report.html', // 报告名称
                pageTitle: 'SuperTest and Jest API Test Report', // 报告标题
                overwrite: true, // 报告文件是否覆盖
                expand: true, // 展开所有测试套件
            },
        ],
    ],
};
- 运行 Jest 测试用例
// 运行测试用例
npm run test
- 查看测试报告
测试报告文件夹:Report,点击使用浏览器打开最新 html 报告文件
进阶用法
持续集成
接入 github action
以 github action 为例,其他 CI 工具类似
Mocha 版本接入 github action
可参考 demo:https://github.com/Automation-Test-Starter/SuperTest-Mocha-demo
创建.github/workflows 目录:在你的 GitHub 仓库中,创建一个名为 .github/workflows 的目录。这将是存放 GitHub Actions 工作流程文件的地方。
创建工作流程文件:在.github/workflows 目录中创建一个 YAML 格式的工作流程文件,例如 mocha.yml。
编辑 mocha.yml 文件:将以下内容复制到文件中
name: RUN SuperTest API Test CI

on:
  push:
    branches: [ "main" ]
  pull_request:
    branches: [ "main" ]

jobs:
  RUN-SuperTest-API-Test:

    runs-on: ubuntu-latest

    strategy:
      matrix:
        node-version: [ 18.x]
        # See supported Node.js release schedule at https://nodejs.org/en/about/releases/

    steps:
    - uses: actions/checkout@v3
    - name: Use Node.js ${{ matrix.node-version }}
      uses: actions/setup-node@v3
      with:
        node-version: ${{ matrix.node-version }}
        cache: 'npm'

    - name: Installation of related packages
      run: npm ci

    - name: RUN SuperTest API Testing
      run: npm test

    - name: Archive SuperTest mochawesome test report
      uses: actions/upload-artifact@v3
      with:
        name: SuperTest-mochawesome-test-report
        path: Report

    - name: Upload SuperTest mochawesome report to GitHub
      uses: actions/upload-artifact@v3
      with:
        name: SuperTest-mochawesome-test-report
        path: Report
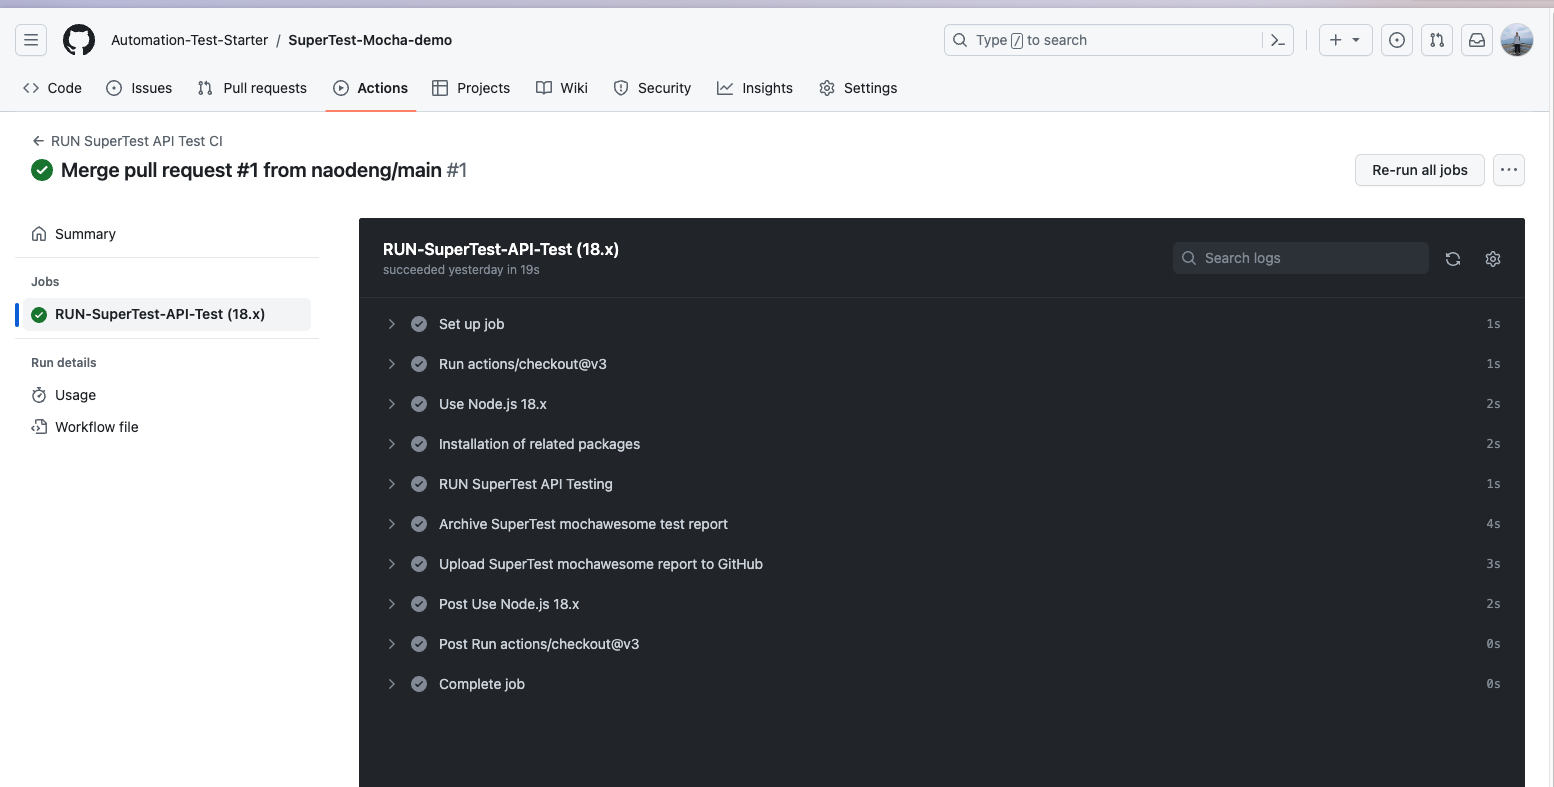
- 提交代码:将 mocha.yml 文件添加到仓库中并提交。
- 查看测试报告:在 GitHub 中,导航到你的仓库。单击上方的 Actions 选项卡,然后单击左侧的 RUN SuperTest API Test CI 工作流。你应该会看到工作流正在运行,等待执行完成,就可以查看结果。
Jest 版本接入 github action
可参考 demo:https://github.com/Automation-Test-Starter/SuperTest-Jest-demo
创建.github/workflows 目录:在你的 GitHub 仓库中,创建一个名为 .github/workflows 的目录。这将是存放 GitHub Actions 工作流程文件的地方。
创建工作流程文件:在.github/workflows 目录中创建一个 YAML 格式的工作流程文件,例如 jest.yml。
编辑 jest.yml 文件:将以下内容复制到文件中
name: RUN SuperTest API Test CI

on:
  push:
    branches: [ "main" ]
  pull_request:
    branches: [ "main" ]

jobs:
  RUN-SuperTest-API-Test:

    runs-on: ubuntu-latest

    strategy:
      matrix:
        node-version: [ 18.x]
        # See supported Node.js release schedule at https://nodejs.org/en/about/releases/

    steps:
      - uses: actions/checkout@v3
      - name: Use Node.js ${{ matrix.node-version }}
        uses: actions/setup-node@v3
        with:
          node-version: ${{ matrix.node-version }}
          cache: 'npm'

      - name: Installation of related packages
        run: npm ci

      - name: RUN SuperTest API Testing
        run: npm test

      - name: Archive SuperTest test report
        uses: actions/upload-artifact@v3
        with:
          name: SuperTest-test-report
          path: Report

      - name: Upload SuperTest  report to GitHub
        uses: actions/upload-artifact@v3
        with:
          name: SuperTest-test-report
          path: Report
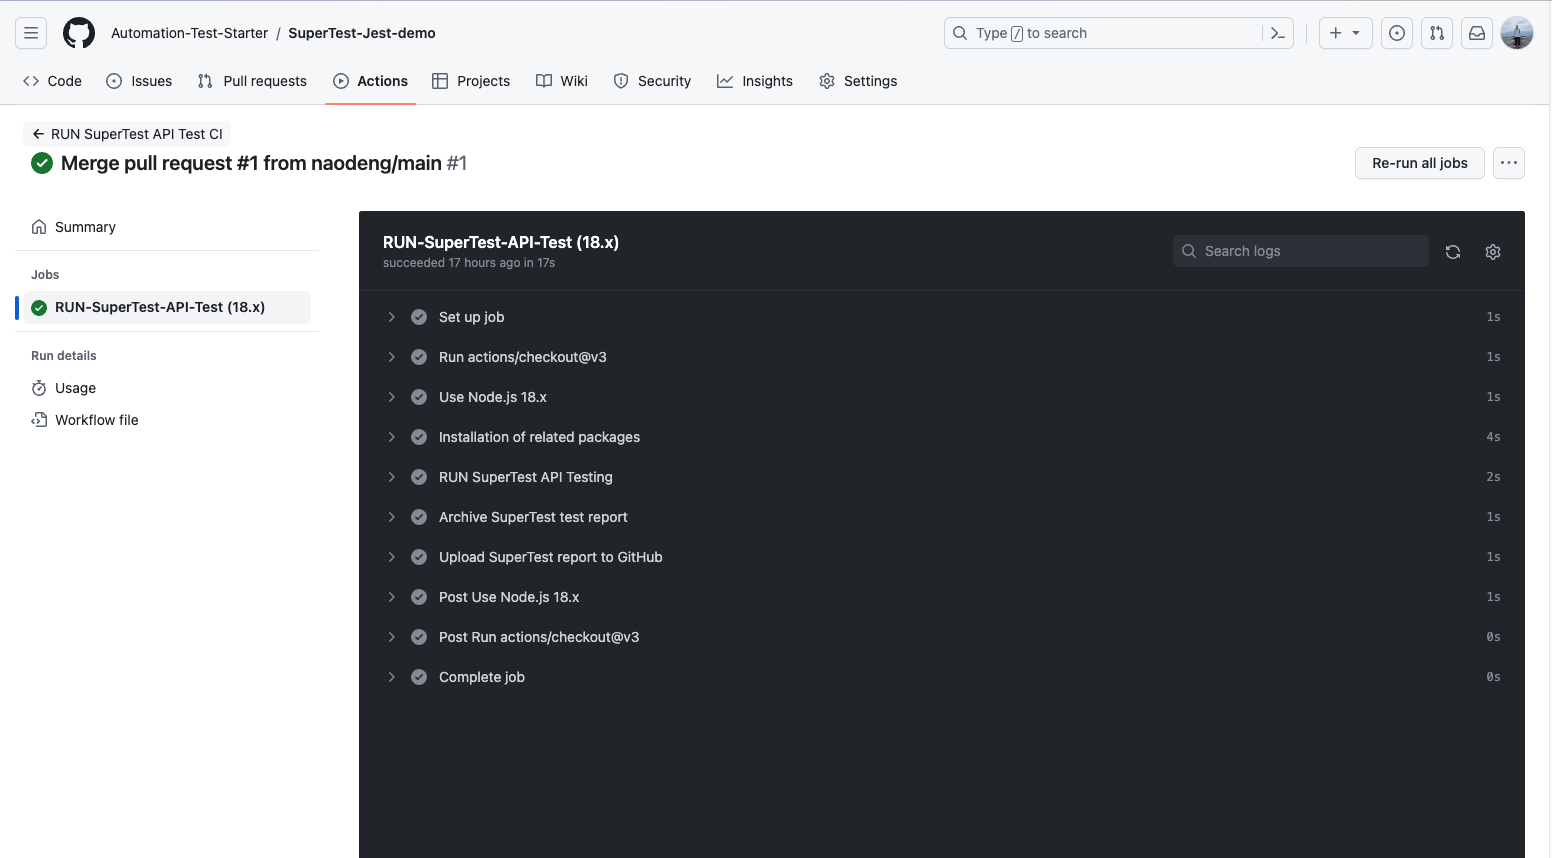
- 提交代码:将 jest.yml 文件添加到仓库中并提交。
- 查看测试报告:在 GitHub 中,导航到你的仓库。单击上方的 Actions 选项卡,然后单击左侧的 RUN-SuperTest-API-Test 工作流。你应该会看到工作流正在运行,等待执行完成,就可以查看结果。
常用断言
下面会一次介绍一下 SuperTest,CHAI 和 Jest 常用的断言。
SuperTest 的内置断言
Supertest 是基于SuperAgent 构建的一个更高级的库,所以 Supertest 可以很轻松的使用 SuperAgent 的 HTTP 断言。
示例如下:
.expect(status[, fn]) //断言响应状态代码。

.expect(status, body[, fn]) // 断言响应状态代码和正文。

.expect(body[, fn]) // 用字符串、正则表达式或解析后的正文对象断言响应正文文本。

.expect(field, value[, fn]) // 用字符串或正则表达式断言标题字段值。

.expect(function(res) {}) // 传递一个自定义断言函数。它将得到要检查的响应对象。如果检查失败,则抛出错误。
CHAI 的常用断言
- 相等性断言(Equality Assertions)
expect(actual).to.equal(expected) // 验证实际值是否等于期望值。
expect(actual).to.deep.equal(expected) // 验证实际值和期望值是否深度相等,适用于对象和数组比较。
expect(actual).to.eql(expected) // 与 deep.equal 一样,用于深度相等的比较。
- 包含性断言(Inclusion Assertions)
expect(array).to.include(value) // 验证数组是否包含指定的值。
expect(string).to.include(substring) // 验证字符串是否包含指定的子字符串。
expect(object).to.include(key) // 验证对象是否包含指定的键。
- 类型断言(Type Assertions)
expect(actual).to.be.a(type) // 验证实际值的类型是否等于指定类型。
expect(actual).to.be.an(type) // 与 to.be.a 一样,用于类型断言。
expect(actual).to.be.an.instanceof(constructor) // 验证实际值是否是指定构造函数的实例。
- 真假性断言(Truthiness Assertions)
expect(value).to.be.true // 验证值是否为真。
expect(value).to.be.false // 验证值是否为假。
expect(value).to.exist // 验证值是否存在,非 null 和非 undefined。
- 长度断言(Length Assertions)
expect(array).to.have.length(length) // 验证数组的长度是否等于指定长度。
expect(string).to.have.lengthOf(length) // 验证字符串的长度是否等于指定长度。
- 空值断言(Empty Assertions)
expect(array).to.be.empty // 验证数组是否为空。
expect(string).to.be.empty // 验证字符串是否为空。
- 范围断言(Range Assertions)
expect(value).to.be.within(min, max) // 验证值是否在指定的范围内。
expect(value).to.be.above(min) // 验证值是否大于指定值。
expect(value).to.be.below(max) // 验证值是否小于指定值。
- 异常断言(Exception Assertions)
expect(fn).to.throw(error) // 验证函数是否抛出指定类型的异常。
expect(fn).to.throw(message) // 验证函数是否抛出包含指定消息的异常。
- 存在性断言(Existence Assertions)
expect(object).to.have.property(key) // 验证对象是否包含指定属性。
expect(array).to.have.members(subset) // 验证数组是否包含指定的成员。
更多 chai 的断言,请查看https://www.chaijs.com/api/assert/
Jest 的常用断言
- 相等性断言(Equality Assertions)
expect(actual).toBe(expected) // 验证实际值是否严格等于期望值。
expect(actual).toEqual(expected) // 验证实际值和期望值是否深度相等,适用于对象和数组比较。
- 不相等性断言
expect(actual).not.toBe(expected) // 验证实际值与期望值不相等。
- 包含性断言(Inclusion Assertions)
expect(array).toContain(value) // 验证数组是否包含指定的值。
- 类型断言(Type Assertions)
expect(actual).toBeTypeOf(expected) // 验证实际值的类型是否等于指定类型。
- 真假性断言(Truthiness Assertions)
expect(value).toBeTruthy() // 验证值是否为真。
expect(value).toBeFalsy() // 验证值是否为假。
- 异步断言
await expect(promise).resolves.toBe(expected) // 验证异步操作是否成功完成并返回与期望值匹配的结果。
- 异常断言
expect(fn).toThrow(error) // 验证函数是否抛出指定类型的异常。
expect(fn).toThrow(message) // 验证函数是否抛出包含指定消息的异常。
- 范围断言
expect(value).toBeGreaterThanOrEqual(min) // 验证值是否大于或等于指定的最小值。
expect(value).toBeLessThanOrEqual(max) // 验证值是否小于或等于指定的最大值。
- 对象属性断言
expect(object).toHaveProperty(key, value) // 验证对象是否包含指定属性,并且该属性的值等于指定值。
更多 Jest 的断言,请查看https://jestjs.io/docs/expect
数据驱动
API 测试的数据驱动是一种测试方法,其中测试用例的输入数据和预期输出数据都被存储在数据文件中,测试框架根据这些数据文件执行多次测试,以验证 API 的各个方面。数据驱动测试可以帮助你有效地覆盖多种情况,确保 API 在各种输入数据下都能正常运行。
Mocha 版本可参考 demo 项目:https://github.com/Automation-Test-Starter/SuperTest-Mocha-demo
Jest 版本可参考 demo 项目:https://github.com/Automation-Test-Starter/SuperTest-Jest-demo
mocha 版本和 Jest 版本类似,这里以 Mocha 版本为例
新建测试配置文件
// 新建测试配置文件夹
mkdir Config
// 新建测试配置文件
cd Config
touch config.js
编写测试配置文件
// Test config file
module.exports = {
    host: 'https://jsonplaceholder.typicode.com',  // Test endpoint
    getAPI: '/posts/1',  // Test GET API URL
    postAPI: '/posts', // Test POST API URL
};
新建测试数据文件
// 新建测试数据文件夹
mkdir testData
// 进入测试数据文件夹
cd testData
// 新建请求数据文件
touch requestData.js
// 新建响应数据文件
touch responseData.js
编写测试数据文件
- 编写请求数据文件
// Test request data file
module.exports = {
    getAPI: '',  // request data for GET API
    postAPI:{
        "title": "foo",
        "body": "bar",
        "userId": 1
    },  // request data for POST API
};
- 编写响应数据文件
// Test response data file
module.exports = {
    getAPI: {
        "userId": 1,
        "id": 1,
        "title": "sunt aut facere repellat provident occaecati excepturi optio reprehenderit",
        "body": "quia et suscipit\nsuscipit recusandae consequuntur expedita et cum\nreprehenderit molestiae ut ut quas totam\nnostrum rerum est autem sunt rem eveniet architecto"
    },  // response data for GET API
    postAPI:{
        "title": "foo",
        "body": "bar",
        "userId": 1,
        "id": 101
    },  // response data for POST API
};
更新测试用例来支持数据驱动
为做区分,这里新建测试用例文件,文件名为 dataDrivingTest.spec.js
// Test: dataDrivingTest.spec.js
const request = require('supertest'); // import supertest
require('chai');
// import chai
const expect = require('chai').expect; // import expect

const config = require('../Config/testConfig'); // import test config
const requestData = require('../TestData/requestData'); // import request data
const responseData = require('../TestData/responseData'); // import response data

// Test Suite
describe('Data Driving-Verify that the Get and POST API returns correctly', function(){
        // Test case 1
        it('Data Driving-Verify that the GET API returns correctly', function(done){
            request(config.host) // Test endpoint
                .get(config.getAPI) // API endpoint
                .expect(200) // expected response status code
                .expect(function (res) {
                    expect(res.body.id).to.equal(responseData.getAPI.id)
                    expect(res.body.userId).to.equal(responseData.getAPI.userId)
                    expect(res.body.title).to.equal(responseData.getAPI.title)
                    expect(res.body.body).to.equal(responseData.getAPI.body)
                }) // expected response body
                .end(done) // end the test case

        });
        // Test case 2
        it('Data Driving-Verify that the POST API returns correctly', function(done){
            request(config.host) // Test endpoint
                .post(config.postAPI) // API endpoint
                .send(requestData.postAPI) // request body
                .expect(201) // expected response status code
                .expect(function (res) {
                    expect(res.body.id).to.equal(responseData.postAPI.id )
                    expect(res.body.userId).to.equal(responseData.postAPI.userId )
                    expect(res.body.title).to.equal(responseData.postAPI.title )
                    expect(res.body.body).to.equal(responseData.postAPI.body )
                }) // expected response body
                .end(done) // end the test case
        });
});
运行该测试用例确认数据驱动是否生效
若用 demo 项目运行数据驱动支持测试用例:dataDrivingTest.spec.js,建议先屏蔽掉 test.spec.js 测试用例,否则会报错
多环境支持
在使用 Jest 或 Mocha 进行 API 测试时,你可能需要支持测试不同的环境,例如开发环境、测试环境和生产环境。这可以通过配置不同的测试脚本和环境变量来实现。
下面会简单描述一下如何在 Jest 和 Mocha 中配置多环境支持,会以支持两个环境来进行 demo 演示。
Mocha 版本可参考 demo 项目:https://github.com/Automation-Test-Starter/SuperTest-Mocha-demo
Jest 版本可参考 demo 项目:https://github.com/Automation-Test-Starter/SuperTest-Jest-demo
mocha 版本和 Jest 版本类似,这里以 Mocha 版本为例
新建多环境测试配置文件
// 新建测试配置文件夹 若已有则不用新建
mkdir Config
// 新建测试环境测试配置文件
cd Config
touch testConfig-test.js
// 新建开发环境测试配置文件
touch testConfig-dev.js
编写多环境测试配置文件
- 编写测试环境测试配置文件
根据实际情况编写测试环境测试配置文件
// Test config file for test environment
module.exports = {
    host: 'https://jsonplaceholder.typicode.com',  // Test endpoint
    getAPI: '/posts/1',  // Test GET API URL
    postAPI: '/posts', // Test POST API URL
};
- 编写开发环境测试配置文件
根据实际情况编写开发环境测试配置文件
// Test config file for dev environment
module.exports = {
    host: 'https://jsonplaceholder.typicode.com',  // Test endpoint
    getAPI: '/posts/1',  // Test GET API URL
    postAPI: '/posts', // Test POST API URL
};
新建多环境测试数据文件
// 新建测试数据文件夹 若已有则不用新建
mkdir testData
// 进入测试数据文件夹
cd testData
// 新建测试环境请求数据文件
touch requestData-test.js
// 新建测试环境响应数据文件
touch responseData-test.js
// 新建开发环境请求数据文件
touch requestData-dev.js
// 新建开发环境响应数据文件
touch responseData-dev.js
编写多环境测试数据文件
- 编写测试环境请求数据文件
根据实际情况编写测试环境请求数据文件
// Test request data file for test environment
module.exports = {
    getAPI: '',  // request data for GET API
    postAPI:{
        "title": "foo",
        "body": "bar",
        "userId": 1
    },  // request data for POST API
};
- 编写测试环境响应数据文件
根据实际情况编写测试环境响应数据文件
// Test response data file for test environment
module.exports = {
    getAPI: {
        "userId": 1,
        "id": 1,
        "title": "sunt aut facere repellat provident occaecati excepturi optio reprehenderit",
        "body": "quia et suscipit\nsuscipit recusandae consequuntur expedita et cum\nreprehenderit molestiae ut ut quas totam\nnostrum rerum est autem sunt rem eveniet architecto"
    },  // response data for GET API
    postAPI:{
        "title": "foo",
        "body": "bar",
        "userId": 1,
        "id": 101
    },  // response data for POST API
};
- 编写开发环境请求数据文件
根据实际情况编写开发环境请求数据文件
// Test request data file for dev environment
module.exports = {
    getAPI: '',  // request data for GET API
    postAPI:{
        "title": "foo",
        "body": "bar",
        "userId": 1
    },  // request data for POST API
};
- 编写开发环境响应数据文件
根据实际情况编写开发环境响应数据文件
// Test response data file for dev environment
module.exports = {
    getAPI: {
        "userId": 1,
        "id": 1,
        "title": "sunt aut facere repellat provident occaecati excepturi optio reprehenderit",
        "body": "quia et suscipit\nsuscipit recusandae consequuntur expedita et cum\nreprehenderit molestiae ut ut quas totam\nnostrum rerum est autem sunt rem eveniet architecto"
    },  // response data for GET API
    postAPI:{
        "title": "foo",
        "body": "bar",
        "userId": 1,
        "id": 101
    },  // response data for POST API
};
更新测试用例来支持多环境
为做区分,这里新建测试用例文件,文件名为 multiEnvTest.spec.js
// Test: multiEnvTest.spec.js
const request = require('supertest'); // import supertest
require('chai');
// import chai
const expect = require('chai').expect; // import expect

const config = process.env.NODE_ENV === 'test' ? require('../Config/testConfig-test') : require('../Config/testConfig-dev'); // import test config
const requestData = process.env.NODE_ENV === 'test' ? require('../TestData/requestData-test') : require('../TestData/requestData-dev'); // import request data
const responseData= process.env.NODE_ENV === 'test' ? require('../TestData/responseData-test') : require('../TestData/responseData-dev'); // import response data

// Test Suite
describe('multiEnv-Verify that the Get and POST API returns correctly', function(){
    // Test case 1
    it('multiEnv-Verify that the GET API returns correctly', function(done){
        request(config.host) // Test endpoint
            .get(config.getAPI) // API endpoint
            .expect(200) // expected response status code
            .expect(function (res) {
                expect(res.body.id).to.equal(responseData.getAPI.id)
                expect(res.body.userId).to.equal(responseData.getAPI.userId)
                expect(res.body.title).to.equal(responseData.getAPI.title)
                expect(res.body.body).to.equal(responseData.getAPI.body)
            }) // expected response body
            .end(done) // end the test case

    });
    // Test case 2
    it('multiEnv-Verify that the POST API returns correctly', function(done){
        request(config.host) // Test endpoint
            .post(config.postAPI) // API endpoint
            .send(requestData.postAPI) // request body
            .expect(201) // expected response status code
            .expect(function (res) {
                expect(res.body.id).to.equal(responseData.postAPI.id )
                expect(res.body.userId).to.equal(responseData.postAPI.userId )
                expect(res.body.title).to.equal(responseData.postAPI.title )
                expect(res.body.body).to.equal(responseData.postAPI.body )
            }) // expected response body
            .end(done) // end the test case
    });
});
更新测试脚本来支持多环境
'''json // package.json "scripts": { "test": "NODE_ENV=test mocha" // 运行测试环境测试脚本 "dev": "NODE_ENV=dev mocha" // 运行 dev 环境测试脚本 }, '''
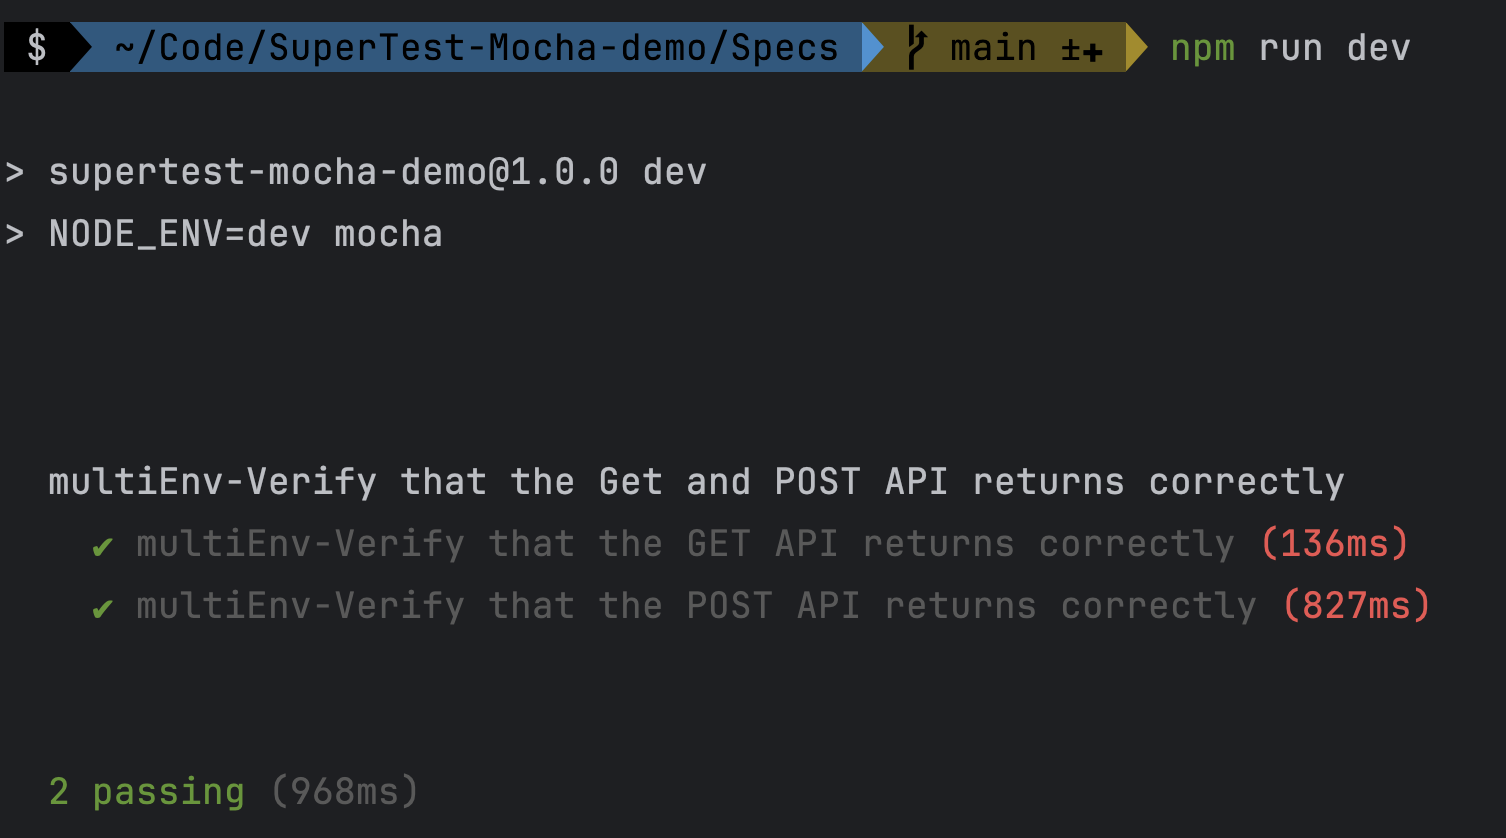
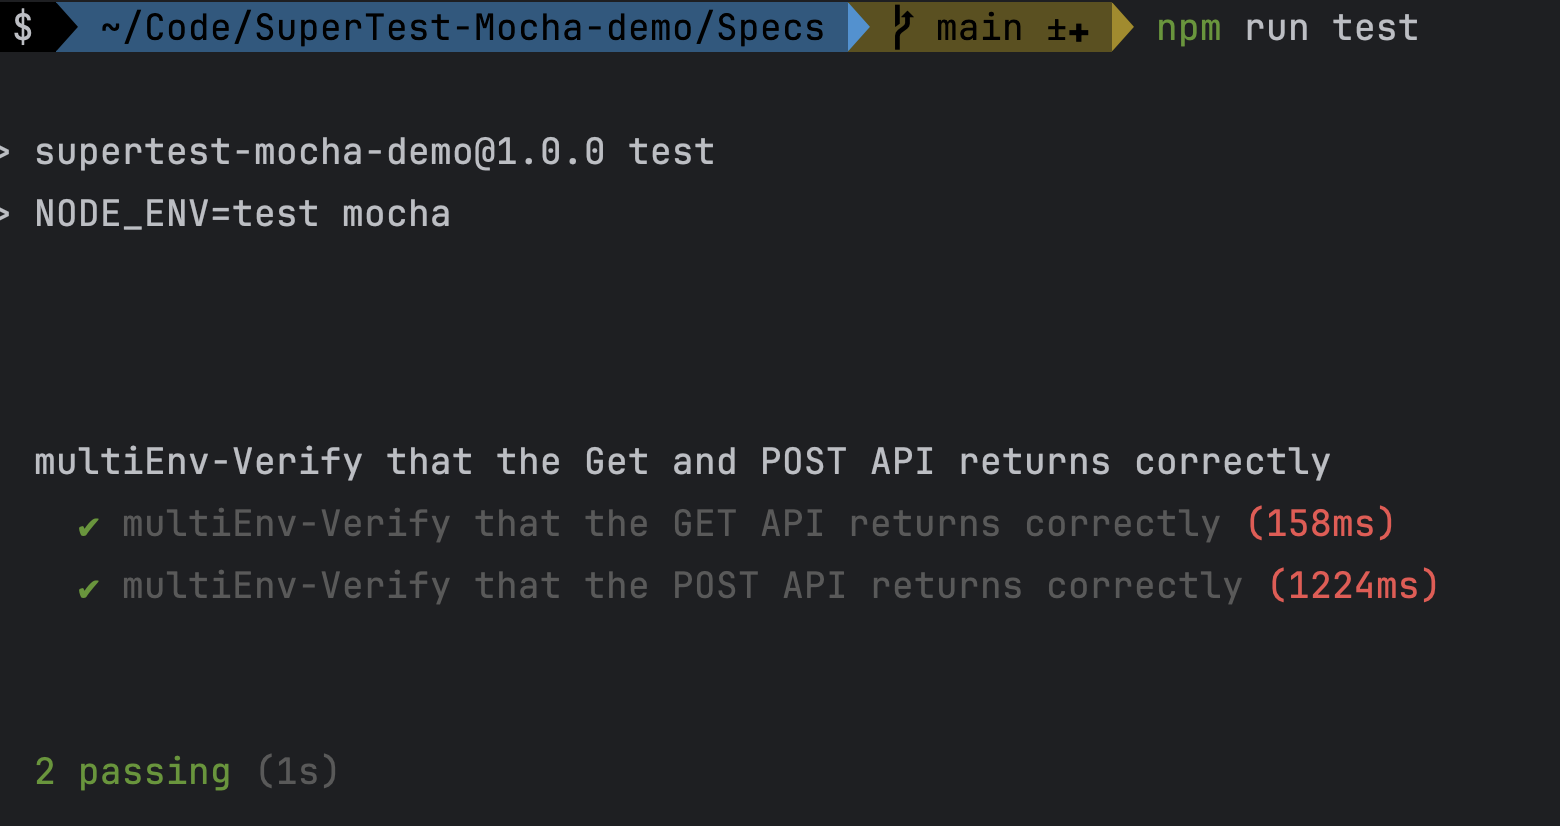
运行该测试用例确认多环境支持是否生效
若用 demo 项目运行多环境支持测试用例:multiEnvTest.spec.js,建议先屏蔽掉 dataDrivingTest.spec.js 和 test.spec.js 测试用例,否则会报错
- 运行测试环境测试脚本
npm run test
- 运行开发环境测试脚本
npm run dev